Need a crash course on campervan electrical components?
This post is the perfect place to start for a quick overview of the parts of a campervan electrical system.
With a summary of what each component is, what is does and why it’s needed, alongside simple diagrams showing how they fit together, this post helps build up your knowledge base fast.
This post is written with beginners in mind. So if you already know a thing or 2 about campervan electrics, stick with it.
It works up from the basic components needed for a simple electrical installation, right upto a complex, multi-charging source setup.
So are you ready? Let’s get started.
Camper Van Electrical Diagrams
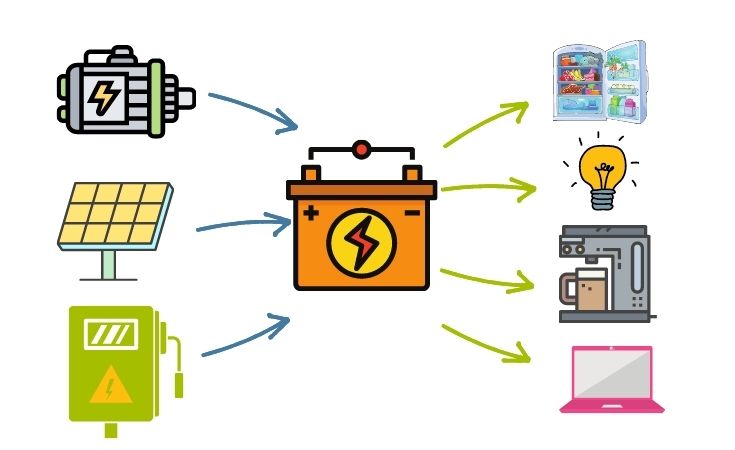
All camper electrical systems are built around a battery.
As appliances and devices (commonly referred to as load), use the energy stored in the battery, it needs to be recharged.
The more charging sources, the more complex the set up but the basic principles remain the same.
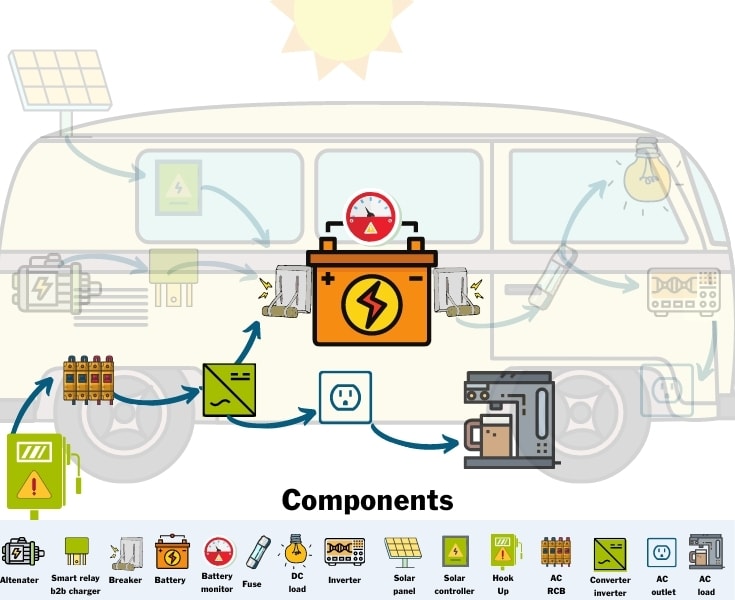
The Simplest Electrical Installation
The simplest self contained electrical installation for a camper involves charging the battery as you drive.
Every vehicle has an alternator fitted in the engine bay so it’s an ideal opportunity to recharge batteries with as few components as possible.
Before we had a campervan, we spent many weeks every year on road trips in our Land Cruiser and Land Rover.
We had no need for a complex electrical setup. Instead, we wanted enough power to run a small fridge, charge camera batteries and a single LED light.
Now we live in a campervan full-time and this set up remains part of our electrical design. It was was the first thing we installed during the van build.
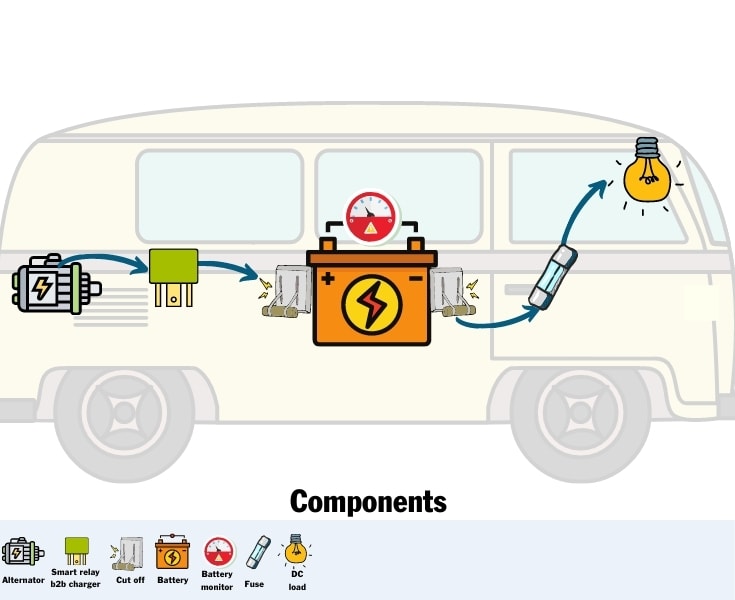
The diagram above shows the major components.
A battery to battery charger or smart relay is fitted to the engine’s alternator to efficiently harvest energy as we drive.
For safety, 2 cut off switches are added to the battery, allowing the power input and output to be switched off.
A simple battery monitor allows us to keep an eye on the battery health.
The fuses provide more safety so power surges or appliance faults don’t damage the battery.
With only the engine as a charging source, the system is pretty limited and dependant on driving at least every other day.
On a small system like this, using only 12v / DC appliances helps keep the demand on the battery to a minimum.
Everything you need to know about campervan electrics. Now available in ebook and paperback!
Learn how to design, size, install and troubleshoot your camper’s electrical system.
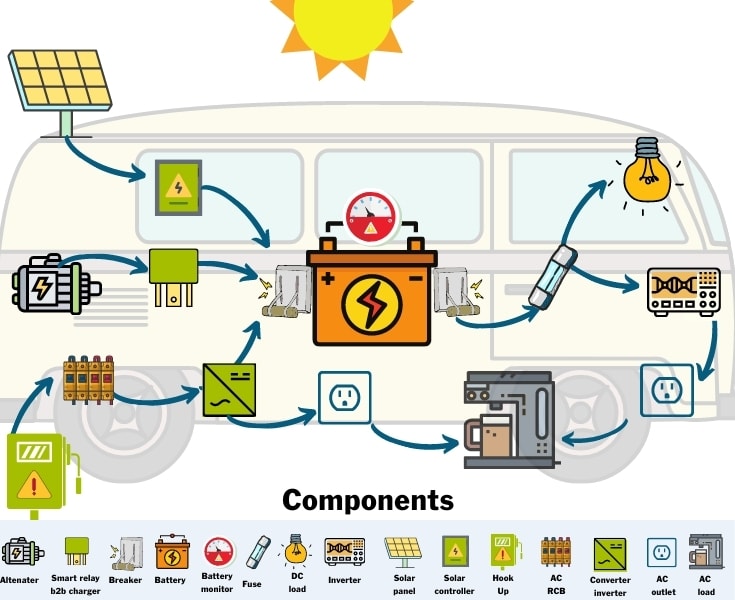
Adding Solar Panels for Extra Charging
A campervan solar system can elevate a basic electrical set up to enable full-time van living.
It needs to be sized to suit your usage and may need multiple solar panels and extra batteries.
We have enough solar capacity on our Sprinter van conversion to keep us off grid permanently.
But simply adding 1 small panel can really boost your capacity too. And best of all, it’s scaleable so you can start with 1 panel and add more later.
Adding solar to the basic system is really quite simple.
You already have the main components so this is about adding another charging source.
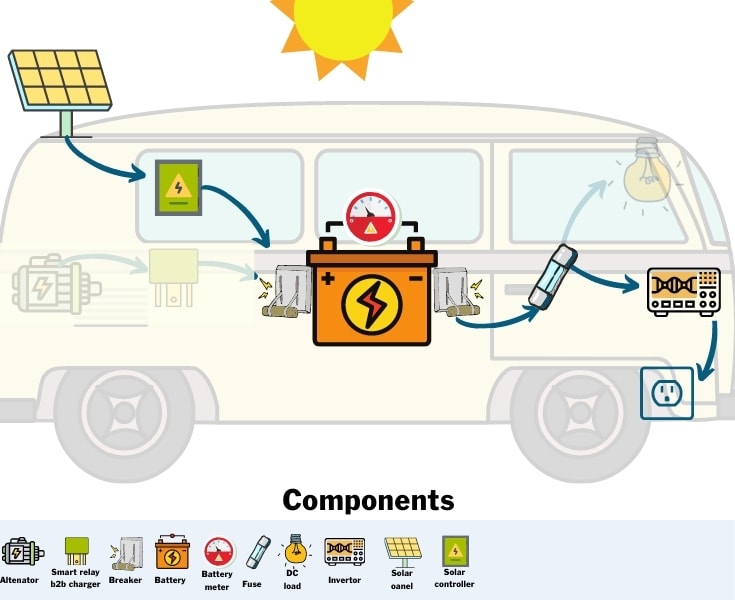
The diagram above builds onto the basic setup.
Solar panels of course are essential to harvest the sun’s energy.
But we can’t pass solar energy directly to the battery because it’ll do it harm.
Instead we need to control the voltage by passing the energy through a solar charge controller.
And that’s it! With these 2 main components you can add solar to your camper.
With an increase in charging capacity, you may want or need to increase the size of the battery bank. You can do this by installing additional batteries.
A larger battery bank provides the opportunity to power more appliances.
While we prefer to keep most of our appliances to 12v/ DC in some cases it’s not possible. Our laptops need an AC supply for example.
To use these, we need to convert the 12v power from the battery to AC. For this, we need an inverter.
You can read more about installing a DIY campervan solar system here.
Need help & advice with your electrical setup?
Join Our Facebook Support Group
Components for Shore Power
Most campgrounds offer a mains electricity supply, sometimes called shore power and with the right setup, you can recharge the camper’s batteries.
It’s a bit like plugging your laptop into the wall socket to charge. A laptop’s battery needs DC power to charge. But the wall sockets provide AC.
The laptop’s power cable has a chunky box on it between the plug and the end that gets plugged into the laptop.
That’s a converter and as the name suggests, it converts AC power to DC.
Imagine this on a slightly bigger scale.
The AC shore power at the campsite needs to be converted to DC to charge the battery.
There’s a few more components needed too by way of a shore power hookup kit.
It includes an AC breaker, hook up box and cables. It’s all just like RCB breakers in a house but on a smaller scale.
Our van has a shore power charging capability too but to be honest, we only ever use it if there’s no extra campground fees for the supply.
It comes in useful if the weather is atrocious and we have lots of work to do with the laptops.
For RV owners who run many AC appliances like air conditioning, microwaves and coffee makers, shore power is a necessity.
Automatically Create Your Bespoke RV Wiring Diagram
Includes 110v & 240v, solar, B2B, batteries, inverters, 12v, 24v & 48v systems, wire gauges in AWG & mm² & much more!
Campervan Electrical Components
We’ve summarised every component listed here – just click on the underlined links for more detail on each.
1. Campervan Batteries
The heart of the electrical system, “house” batteries (sometimes called a leisure battery or deep cycle battery) come in 3 different types – AGM, Gel & Lithium.
Unlike the starter battery in the engine, these deep cycle batteries are designed for a gradual release of energy.
To understand more about the different types of battery and how to choose the right one for you, read our article on campervan batteries.
2. Battery to Battery Charger or Smart Relay
All vehicles have an inbuilt generator called an alternator to charge the starter battery.
In modern vehicles, the alternator is “smart” so when the starter battery is fully charged, it switches off.
To charge the camper’s leisure batteries, we need the alternator to keep running. We do this with a battery to battery charger (also known as a DC to DC charger or B2B charger).
The B2B charger basically fools the alternator into thinking the starter battery is never full so stays switched on.
In older vehicles, the alternators aren’t so “smart” and run constantly. A split charging system is needed instead of a B2B charger.
This passes the energy to the leisure batteries only when the starter battery is full.
Find out if your camper has a smart alternator or not before choosing between a B2B charger and smart relay.
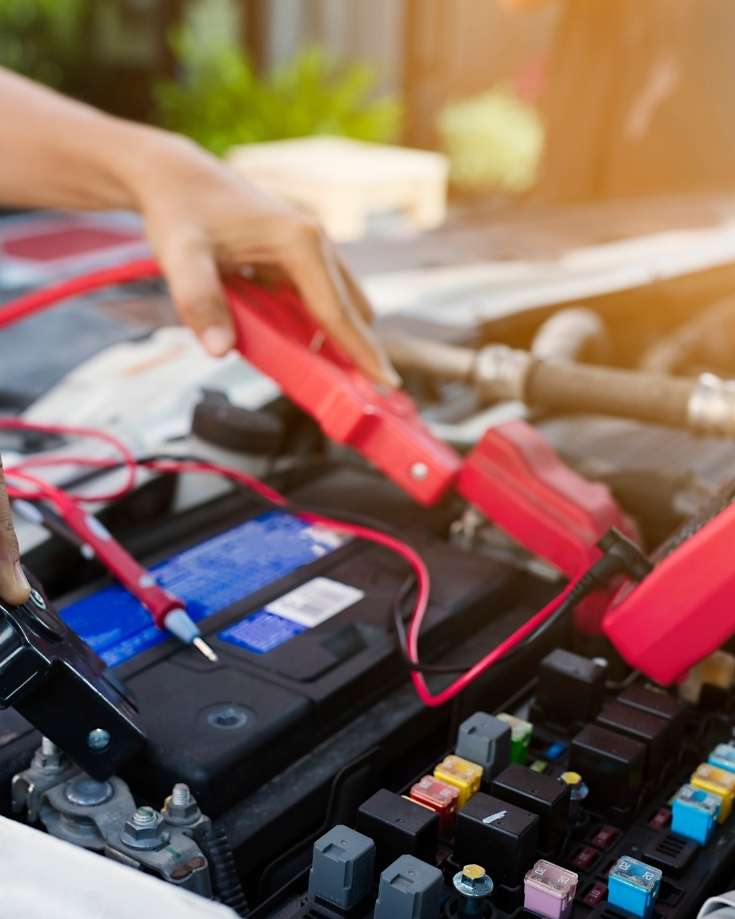
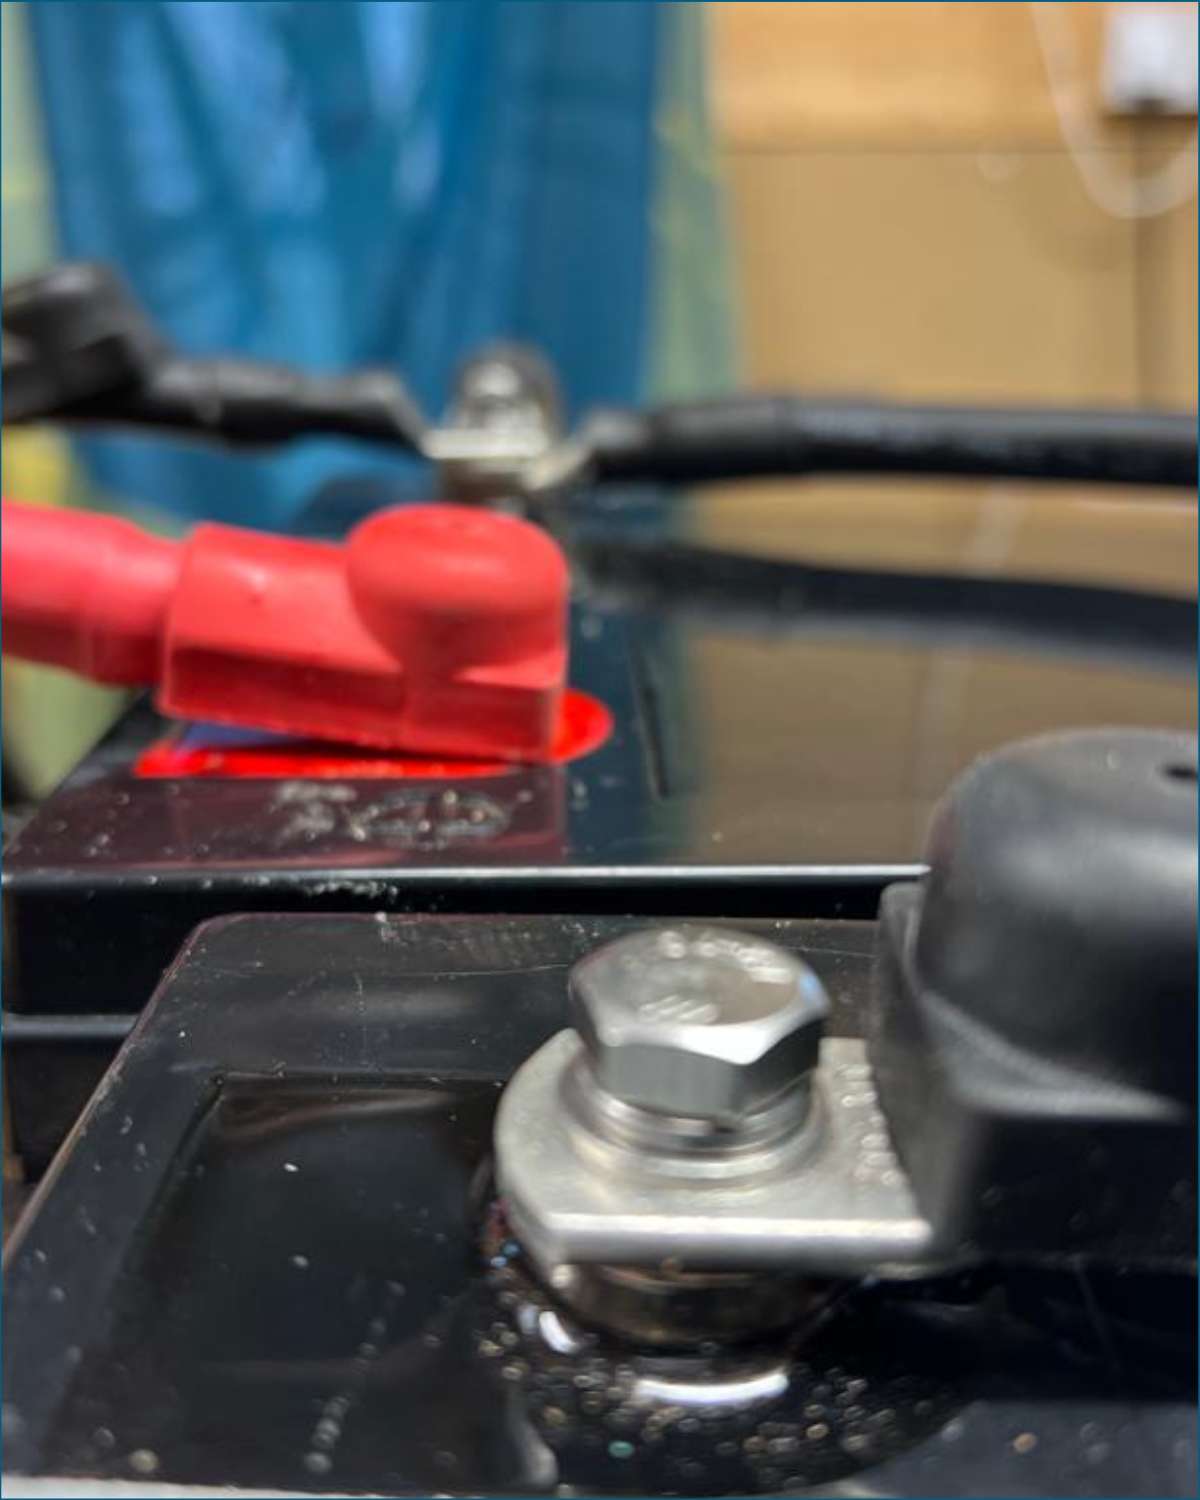
3. Cut Off Switches
Sometimes referred to as a battery isolator or kill switch, a cut off switch is a safety device.
Installing one on either side of the battery allows the battery to be completely isolated, preventing charging and discharging.
It’s especially useful for anytime you ned to work on the electrical system or when putting the van in storage.
4. Battery Monitor
A battery monitor isn’t completely essential but they are totally useful.
In a campervan, where battery capacity is limited, a monitor will help you keep en eye on how full the battery is, what your net usage is and the battery’s voltage too.
Living in the van, even for short periods, you’ll quickly get used to what normal, healthy readings look like for your set up.
It acts as an early warning sign if things aren’t working correctly as well as allowing you to adapt usage if running low on power.
5. Fuse Blocks
A fuse block is basically a housing for a set of fuses.
Fuses act as safety devices to protect the battery. If an appliance develops a fault or draws too much current or voltage, the fuse will blow, protecting the battery.
Every appliance and outlet should be on a fuse.
6. Solar Panels

A solar panel collects the sun’s energy in the form of light, converting it to electricity.
Camper solar panels come in a various sizes. The most useful long term solution for off grid living involves fixing the solar panels to the camper’s roof.
But you can get portable solar panels too if you want to go for a small but easy installation or to bolster an existing solar system.
7. Solar Charge Controller
As we mentioned above, a solar charge controller protects the battery from harm and is an essential component in s solar setup.
But not all solar charge controllers are the same. There’s different types, sizes and features.
It’s easy to get lost in the technical detail and end up buying an inferior or inappropriate product for your setup.
Check out our post on how to choose the best solar charge controller for your RV or camper.
8. Inverter
Campervan batteries provide DC power so AC appliances can’t run directly from them.
Instead, the DC power needs to be converted to AC and the power inverter does this job.
Inverters are inherently inefficient and AC appliances power hungry, so we always recommend using DC alternatives wherever possible.
Failing that, keeping the size of the inverter to a minimum will improve efficiency.
Use our inverter calculator to work out the best size for your needs.
9. Converter
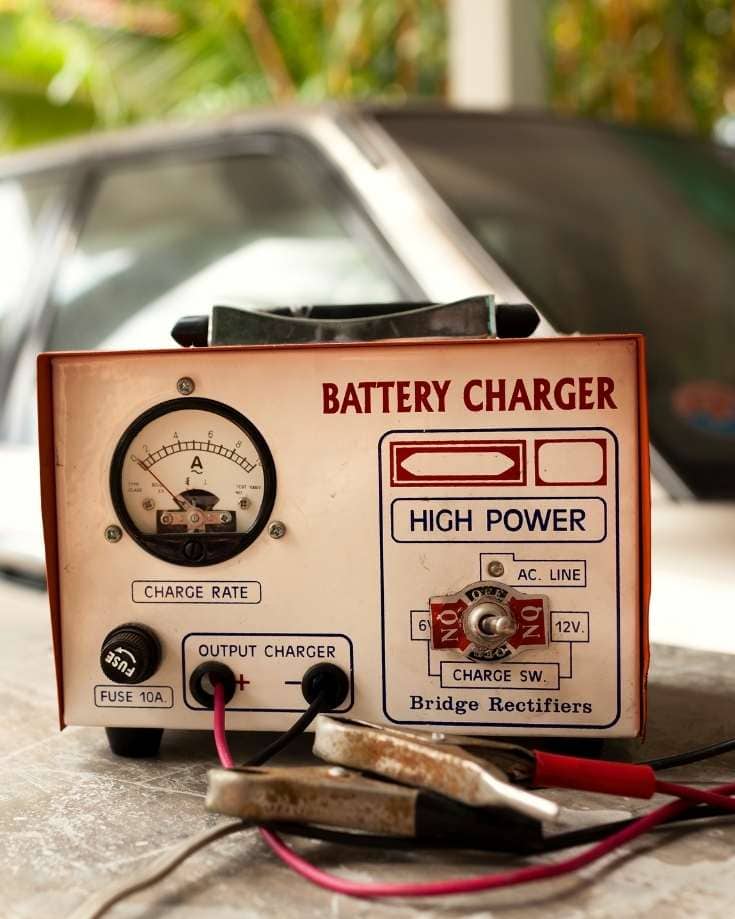
Quite the opposite to an inverter, a power converter changes AC power to DC.
It’s an essential part in charging batteries from mains electricity supply at home or on campgrounds.
You can also buy inverter chargers which combine the functions of the inverter and converter into one. They’re pretty expensive though and often too big for what you need!
Read our article explaining the difference between RV converter vs inverters for more information.
10. Shore Power Hookup Kit
A shore power hookup kit includes all the parts needed to install mains electricity as a charging source in your van.
There’s not much to it really other than an AC breaker, hook up box and cables. It’s very similar to the RCB breakers in a house but on a smaller scale.
You’ll need to have a hole cut into the side of the van for the hook up box to fit.
Note too: AC power is a LOT more powerful and so dangerous than DC power. Be careful and get an electrical expert to help if necessary.
11. 12v / DC Appliances
Keeping demand to a minimum will help save on the amount of battery capacity needed in your camper.
In turn, this will save money on component parts and campground fees too.
Wherever possible, use 12v /DC appliances instead of household AC ones. Lights, fridges, ventilation fans and even microwaves come in DC alternatives.
If you already have your design, create your complete camper van electrics kit & parts list here.
Graham Bogie

Graham is a seasoned marine electrical engineer with two decades of experience designing customized electrical systems for plant machinery and converting campers and overland vehicles. His expertise has led him to author the reputable Campervan Electrics Handbook and become the chief designer of the RV Wiring Design Tool. As a knowledgeable figure in the field, his YouTube channel, blog, Facebook group, and newsletter, offering electrical advice and product reviews, reach more than a million users each year.

Why is it that your system design engine, after I have inserted a 460Ah battery states I need 1 X 100Ah battery only – I am aware that to fully charge such a large battery in 8 hours I will require a massive solar set-up but I am also aware that if I only have a 100Ah battery it may only last me 8 – 20 hours and I have planned a system to be able to last 4 or 5 days without any charging and know I will be charging by driving or occasional hooking up, the area where I currently live does not usually get 6 hours of clear blue sunny skies during winter and driving or hook up might be the only option but your system totally disregarded my input
I like this but my BIGGEST fear is using the wrong size wiring on each component, i understand 00 from the Alt to the battery to the Isolator and on to the Battery but using the type of wire to the solar and on to the other components is the headach
Hi Gary
Yeah cable size is important to get right for safety and efficiency.
We recommend drawing out your circuits, noting how much current each component draws on each circuit. Make sure that you add together the currents for anything wired on parallel circuits. Make sure any series circuits only have components with identical current draws.
Solar panels probably need a 10 AWG. But check our wiring gauge table because cable length makes a difference too….https://mowgli-adventures.com/campervan-wiring/#wires
The sizes on the chart are over-spec’d to give approx 3% voltage drop rather than 10% with a smaller cable.
Let us know if you have any other questions though.