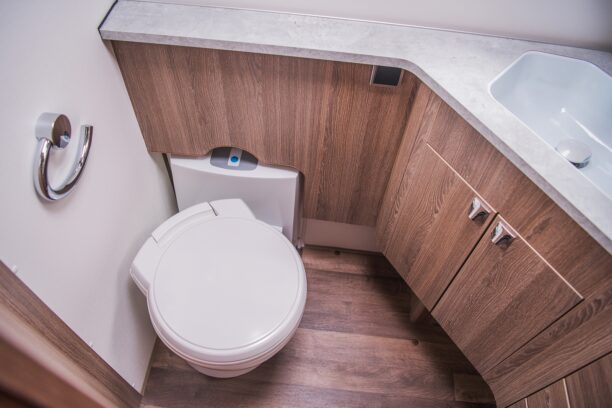
Watching your RV toilet leaking on the floor is never a welcome sight, but when you’re on the road, it can go from a minor annoyance to a major disaster really quickly.
After all, a bunch of dirty water on the floor of a house is bad enough, but in a moving vehicle…well, let’s just ask: have you ever seen what happens to a fish tank when you slam on the brakes? Yeah, pretty gross.
The tricky thing about an RV toilet leaking on the floor is that repairing it usually falls into one of two categories: either it’s a cheap, simple fix you can do yourself, or it’s a pricey problem that will either require a pro to solve or necessitate replacing the entire toilet.
Don’t worry, though — at the very least, you should be able to diagnose the problem yourself, and in this step-by-step guide, we’ll show you how to do exactly that.
While this may end up being a simple issue to fix, if at any time you don’t feel comfortable with handling it yourself, then stop and call a plumber to handle it for you instead.
There’s no shame in passing off the job to someone who’s been trained to do it (but there is shame in having your bathroom look like the elevator from The Shining every time you open the door).
Tools and Supplies You’ll Need
- Hand mirror
- Flashlight
- Basin wrench
- Water valve kit
- Rags or towels
- New flange seal
- Putty knife
- Sealant
- A new toilet (possibly)
- Rubber gloves
- Safety glasses
Time to complete project: 30 – 60 minutes
Project difficulty: 3/5
How to Fix an RV Toilet That’s Leaking On the Floor
It’s impossible to give a blanket answer to this question, as the problem could be one of several different things.
Instead of giving a one-size-fits-all answer, then, we’ll walk you through how to assess the situation, and then tell you what to do depending on what you’ve found in your assessment.
Also, while we know that every home improvement guide tells you to wear the proper safety equipment (and we also know that you ignore this advice), it’s especially important when working on a toilet.
Trust us — you do not want to have any water shoot into your eyes or mouth when you’re working on a toilet. Also, please don’t ask us how we know this.
Determine the Source of the Leak
Before you can stop the water from escaping, you’ll have to determine where it’s escaping from. Unfortunately, there’s not a lot of room behind RV toilets, so you’ll probably need a hand mirror to help with this step.
Some RV toilets leak constantly, while some only leak when the unit is flushed. If you don’t spot any drips from your first assessment, try flushing the toilet a time or two to see if that helps.
First, examine the water valve that connects to the toilet to see if any moisture is dripping off of it. If so, that’s a relatively easy fix.
If the water is coming from the base of the toilet at the floor, you’ll have a more serious issue on your hands (but one that you can likely solve yourself).
Water may also be dripping from a crack in the bowl itself, so you’ll want to take a flashlight and look all around to see if there’s any obvious damage.
All of the above issues should only be a problem when the toilet is flushed; if the RV toilet leaks constantly, though, you should check the internal seals to see if they’re warped or damaged.
Once you’ve identified the source of the leak, you can then take steps to fix it. Let’s look at each of the scenarios above in more detail. Oh, and before we go any further — don’t forget to shut off the water and drain the bowl once you’ve identified the source of the RV toilet leak (forgetting to do this is a mistake you’ll likely only ever make once).
The Water is Coming from the Valve
This is a common issue, as RV toilet valves often crack and leak if the unit has been subjected to freezing conditions.
It’s also easy to diagnose, as a bad valve will often send jets of water spraying in every direction when the toilet is flushed. However, sometimes the leaks are just a few drips, so it’s worth checking on the valve even if you haven’t been subjected to a surprise bidet treatment.
The first thing to do is simply check the connection. If it’s loose, all you have to do is tighten it and the leaky RV toilet problem should be solved. This is the absolute best-case scenario, since it’s free and takes seconds to do.
However, if that doesn’t help, you’ll likely need to purchase a water valve kit. These aren’t terribly expensive, and they should have detailed instructions for replacing the valve.
The Water is Coming from the Base of the Toilet
This is a serious issue that shouldn’t be ignored, as the RV toilet is leaking, the fluid is most likely black water. This can be a biohazard, so don’t wait to take action.
The most likely issue is a bad flange seal, which is located underneath the toilet. To check the seal, you’ll need to disconnect and remove the toilet (don’t worry — it’s easier than it sounds).
Look around the toilet to see if you can find the bolts connecting it to the camper (they may be hidden, so look for plastic caps as well). Remove the bolts, and then loosen the water supply from the inlet valve.
You should then be able to remove the toilet. You’ll probably want to set some towels down first, as there might be some water that leaks out at this point.
The old flange seal should be around the drain hole on the floor. You may be able to simply remove it, but if it’s an older wax model, you might need to take a putty knife and scrape it off.
Once the old seal is removed, clean the area and attach the new one following the manufacturer’s instructions. Then, replace the toilet, being sure to position the toilet drain into the flange seal.
The Water is Coming from a Crack in the Bowl
If you’ve found a crack in the toilet bowl through which the water is escaping, you really have only two options: fill in the crack with sealant or replace the entire toilet.
If the crack is minor enough, the sealant might be able to do the trick — but even if it does, it will likely only be a temporary fix. You’re much better off just replacing the whole toilet.
Besides, there’s no guarantee that there’s just a single crack, as there might be more fissures forming due to the weakness caused by the initial damage.
The Problem is Due to Bad Internal Seals
The flange seal is just one of the seals on your toilet, and while it’s the most likely culprit when there’s water leaking on the floor, it’s not the only suspect.
There are several other seals inside your toilet, any of which could cause water to RV toilet leak if they go bad. A worn or faulty blade seal is the most common issue, but it’s far from the only potential problem.
One of the telltale signs of bad internal RV toilet seals is a constant water leak. If the water only leaks when the toilet is flushed, it’s extremely unlikely that this is the problem.
Unfortunately, replacing all of the seals is a difficult and time-consuming (not to mention messy) job. It involves quite a bit of trial and error, as you have to pinpoint which exact seal is causing the problem — and that’s assuming that there’s only one seal that’s gone bad.
You’re better off hiring a pro to do it, or just replacing the entire toilet, and starting from scratch.
Should My RV Toilet Hold Water?
Yes, your RV toilet should be able to hold water and only drain the contents when it’s flushed. However, if you don’t see any fluid coming out of either end, then that might mean there is an issue with one of these plumbing components: flush valve or level control for example.
How Much Will All This Cost?
The cost of repairing an RV toilet that’s leaking on the floor will depend on what the problem is and whether you pay someone to do it.
If you’re just paying for parts and providing all the labor yourself, you can easily do this for less than $100 — unless you’re replacing the entire toilet, as RV toilets usually cost somewhere between $100 and $150.
If you just want to pawn the job off on a pro, though, expect to pay $50+ per hour of their time, plus the cost of supplies. That could easily run the total cost upwards of $200.
Angela Devaney

Angela Devaney, a former IT project management professional, embarked on an adventurous journey of full-time travel, which included touring West Africa in a converted overland truck and converting an ex-military 4×4 Sprinter van into a camper for a five-year South American expedition. She now utilizes her hands-on experience to create practical RV living and van life advice as a full-time digital media producer, reaching over a million users annually through her YouTube channel, blog, and newsletter. Angela also lends her expertise as the editor-in-chief of the Campervan Electrics Handbook.