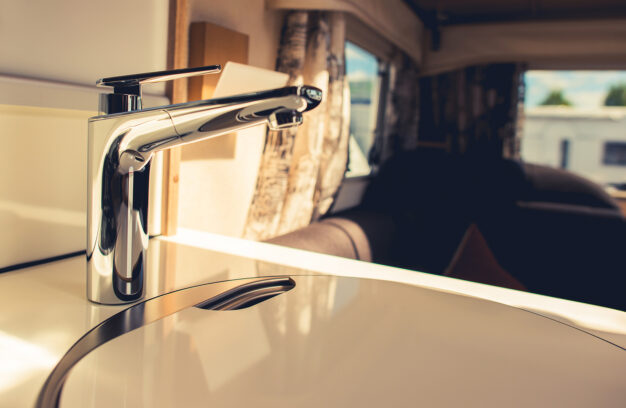
When you’re trying to relax after a long day on the road, it can be annoying to hear your RV’s water pump constantly turning on and off, even when you’re not using the water. Besides the frustration of the noise, you’ll soon realize that the constant cycling will also lead to premature wear, which means you may be buying a new pump long before it’s necessary.
- 15 to 60 minutes, depending on the issue
- Difficulty: 2 out of 5, depending on the issue
How To Fix a Water Pump
Tools and Materials Needed
Depending on what’s causing your RV water pump to keep running, you may need the following tools and supplies:
- Screwdriver
- Wrench
- Replacement water line or pipe (if necessary)
- Saw (if necessary)
- Pipe primer and adhesive (if necessary)
- Allen key (if necessary)
- Replacement pressure switch (if necessary)
- Replacement water pump (if necessary)
- Pliers (if necessary)
- Bucket or towels (if necessary)
Thankfully, diagnosing and fixing an RV water pump that keeps running can be an easy job. In most cases, you can make most repairs in about an hour with just a few tools. Walk through our repair steps below to discover what might be causing the problem so you can fix it and go back to easy-living in your camper.
Steps To Follow: How to Fix an RV Water Pump That’s Constantly Running
When your RV water pump keeps running, it usually means that there’s a problem with the water pressure somewhere within the system. If the water pump senses that your water pressure has fallen — like when you turn on a water faucet — it kicks in to maintain a steady flow.
When you hear the pump cycling even when no one’s using the water, you need to carefully inspect every line, valve carefully, and connection in the system to figure out what’s causing the drop in pressure.
Warning! Before attempting any repairs to your RV water pump or water lines, be sure to shut off the electricity and water supply going to the pump.
Step 1: Look for Water Leaks
In the best-case situation, a leak somewhere within the waterline will be obvious — you’ll see dripping or puddled water. If you don’t see these signs after tracing the water line from the pump to each fixture in your RV, you’ll need to spend some extra time ensuring there isn’t a leak somewhere you can’t quite see. For example, leaks in your freezer’s ice maker or the toilet may not be obvious.
Should you locate a leak, you’ll make necessary repairs by fixing or replacing the fixture or water line that’s causing problems. Fixing a leaky faucet may be as easy as replacing a washer that’s corroded, while a cracked pipe or broken water line will require removing the damaged section and installing a new piece.
Step 2: Clean Screens and Filters
Another issue that can cause a drop in pressure and keep your water pump constantly running is a build-up of dirt and sediment. This is more likely to happen if you use sandy or unfiltered water tank hookups from campsites and other locations. To remedy this problem, just clean the screens and filters within your pump and anywhere else in your system.
Step 3: Adjust the Pressure Switch
The pressure switch is a component that shuts off your water pump once it reads that a certain pressure reading has been met. Many water pumps include an adjustment screw to let you determine the pressure requirements before the pump cycles.
Adjusting the screw one way will make the water pump more sensitive to drops in pressure -while going the other way decreases the sensitivity. Depending on your pump model, you might use your hands, a screwdriver, or an Allen key to adjust the sensitivity.
- Locate the adjustment screw and familiarize yourself with the settings.
- Have someone turn on the shower for 30 seconds and then turn it off.
- Adjust the screw until the pump turns off shortly after the shower has been turned off.
- Confirm the adjustment by having the shower turned on again for 30 seconds. The pump should run for a short while after the shower is turned off. If it runs too long, continue adjusting and repeating the test until you reach the right setting.
- If the pump will still not stop running, you may need to replace the pressure switch despite the adjustments. Before confirming that, check for leaking valves and the pump seals (in the next 2 sections).
Step 4: Check for Leaking Valves
Some plumbing systems include non-return valves in the pipework. They allow water to flow in one direction only. So when water is pumped to, say, a showerhead mixer, a non-return valve will be fitted to both the hot and cold inlet pipes.
If a non-return valve fails, water will flow back through the system resulting in a pressure drop. The pump senses the pressure drop and so continues to pump.
If you have no apparent water leaks, the next thing to check is for a failed non-return valve.
Check your water system diagrams for if and where there are any non-return valves. You will need to inspect the valves to rule out issues to confirm they work correctly.
This probably means depressurizing your water system by switching off the pump and draining the water tank from the pipe where the non-return valve is fitted. You can then safely remove the valve without flooding your RV.
Inspect the valve to check it’s clean and that nothing is obstructing its operation. The valve’s flap (or spring-loaded ballbearing) should move freely in one direction only. Try giving it a good clean in the first instance, and maybe a descale. If anything looks damaged, the part probably needs replacing.
Step 5: Check for Leaking Pump Seals
Water pumps consist of rotating blades, known as an impeller. The impeller must be sealed to ensure the proper water tank pressure is maintained during operation.
The tolerances of these seals are quite fine. Wear and tear can result in these deals failing, resulting in pressure loss through the pump’s suction lines.
Most RV water pumps are sealed units, and the internal parts cannot be easily replaced. Therefore, you will need to replace the pump.
Step 6: Replace the Pressure Switch
If the valves and seals seem ok, it indicates a likely problem with the pressure switch. When a pressure switch goes bad, your RV water pump will keep running continuously because it can’t get a gauge on the pressure. A new switch can cost as little as $15, and replacing it is generally easy and requires just a screwdriver.
- Locate the pressure switch on your RV water pump.
- Remove the screws holding the pressure switch in place.
- Remove the old switch and set it aside.
- If you’ve been provided with a new diaphragm, remove the old one and replace it with the new one.
- Position the new pressure switch in its place.
- Attach the new pressure switch by replacing the screws.
Step 7: Purchase a New Pump
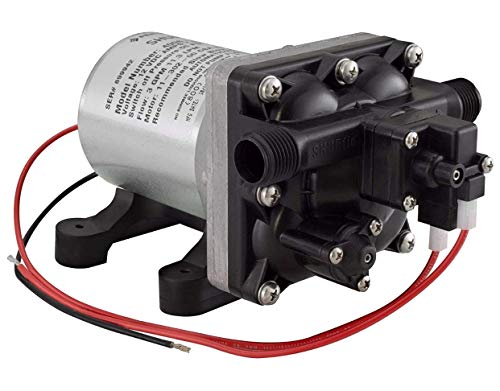
If your pump is particularly old or replacing the pressure switch doesn’t fix the problem with the RV water pump continuously running, it may be time for a new water pump. While you could take the pump to a professional for repair, a new pump typically costs $75 to $150, which may be cheaper than the cost of a repair.
Replacing an RV water pump on your own takes more effort than the repairs we’ve covered, but it’s still an easy job. Here’s what you’ll do:
- Turn off your water supply.
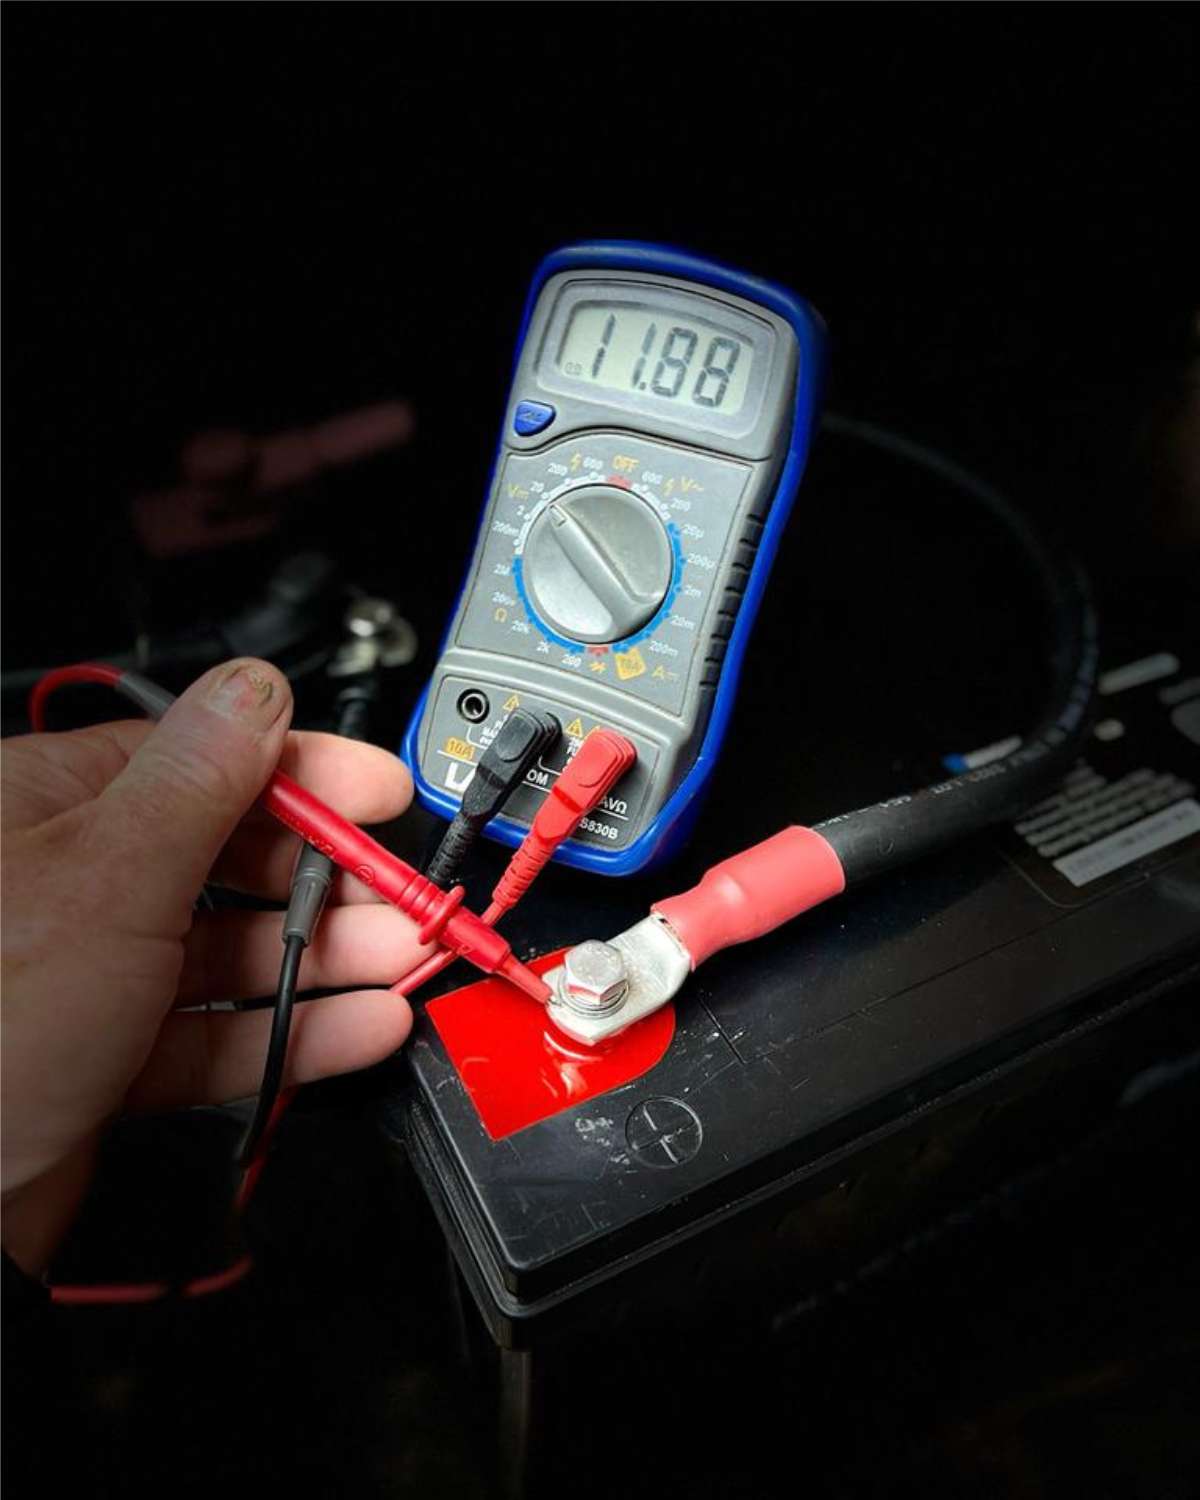
- Power off your water pump, and cut the electricity to the pump. You can accomplish this by removing the pump’s fuse from the breaker box or disconnecting all power to your RV.
- Drain the water from your water tank system by turning on a faucet. When the flow of water stops, turn off the faucet.
- Using pliers or a screwdriver, disconnect the water pump from the latching controller and power source.
- Place a bucket or towels under the pump to catch leaking water, and then remove the inlet and outlet water lines from the pump.
- Remove the water pump from its mount by removing the screws holding it in place.
- Remove the inlet filter from the old pump and clean it thoroughly to remove dirt and debris.
- Connect the inlet filter to the new pump.
- Mount your new pump and tighten it in place using the existing screws.
- Reconnect the inlet and outlet water lines to the new pump.
- Reconnect the new pump to the latching controller and power supply using the instructions provided with your unit.
- Reestablish power to the new pump, and turn it on.
- Test the new pump’s operation by turning on a faucet. The water pump should turn on and water should begin to flow. Allow some time for air in the system to clear and water pressure to return, and then shut off the faucet. The water pump should shut off shortly thereafter.
- Double-check the inlet and outlet hoses to be sure there are no leaks.
Conclusion
A lot of times, an RV water pump that keeps running is an easy fix. It may take a little time to locate a leak or replace a pressure switch, but they’re jobs that you can easily tackle with tools you’re sure to have in your collection.
Even purchasing and installing a new RV water pump is a more affordable option than taking the RV in for professional repair. Of course, if you’re not comfortable making repairs or can’t trace the source of your water pump’s issues, a qualified repair shop can help.
Angela Devaney

Angela Devaney, a former IT project management professional, embarked on an adventurous journey of full-time travel, which included touring West Africa in a converted overland truck and converting an ex-military 4×4 Sprinter van into a camper for a five-year South American expedition. She now utilizes her hands-on experience to create practical RV living and van life advice as a full-time digital media producer, reaching over a million users annually through her YouTube channel, blog, and newsletter. Angela also lends her expertise as the editor-in-chief of the Campervan Electrics Handbook.

Question: The power to my water pump stays on with it being switched off at the control panel. I have already changed the on/off switch at the control panel with no success. Any suggestions. All advice would be appreciated.
“If you can’t locate any water leaks, it’s possible that a loose connection is allowing air to seep into your water supply and dropping the overall pressure.” This is impossible. How could air enter into a system which is at a higher pressure?
Pump cycling is pretty straight forward. It only occurs from a loss of pressure on the high side from a pipe leak (visible water leaking), or a pump check valve leaking pressure back through the pump. If pressure is not lost, it may be a bad switch.
Adjusting the pressure set point on the pump will not fis the problem (but it may hide it).
The correct way to solve the problem is find and verify it, not just start replacing parts.
Hi Steve – You’re quite right, that was badly worded. We’ve updated that section to more accurately describe the fault-finding/fix process.
We appreciate you taking the time to point that out.