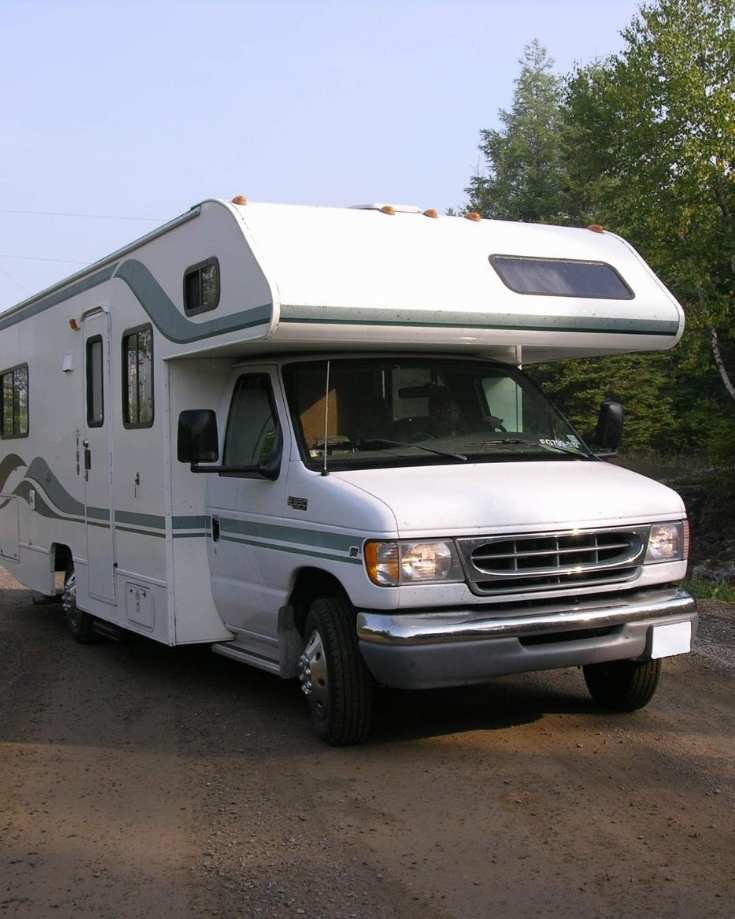
We enjoy boondocking and living off-grid in our campervan as much as we can.
Living in our van full-time, it allows us to get away from it all and enjoy the peace and tranquility of nature.
But we still want to run our fridge, charge our cameras and laptops, turn on our LED lights and in the winter, run our heating.
Our camper solar panel setup allows us to have the best of both worlds without relying too much on shore power hook up facilities, generators or even driving too much.
Installing solar panels on a camper van conversion is one of the best things you can do for an independent lifestyle and it helps keep van life costs down too.
This post is one part in our DIY campervan solar system series.
Here, we provide a step by step guide on how to install solar panels on RVs, campervans and motorhomes.
Whether this is your camper’s first electrical installation or you’re retro fitting solar panels into an existing campervan electrical design, this guide has you covered.
Tasks To Do Before A Solar Panel Installation
Planning a DIY campervan conversion is a big job in itself and doing some tasks in the right order will help avoid re-work and unnecessary cost.
Before starting your solar panel installation, try to make sure you’ve completed the following tasks and decisions first:
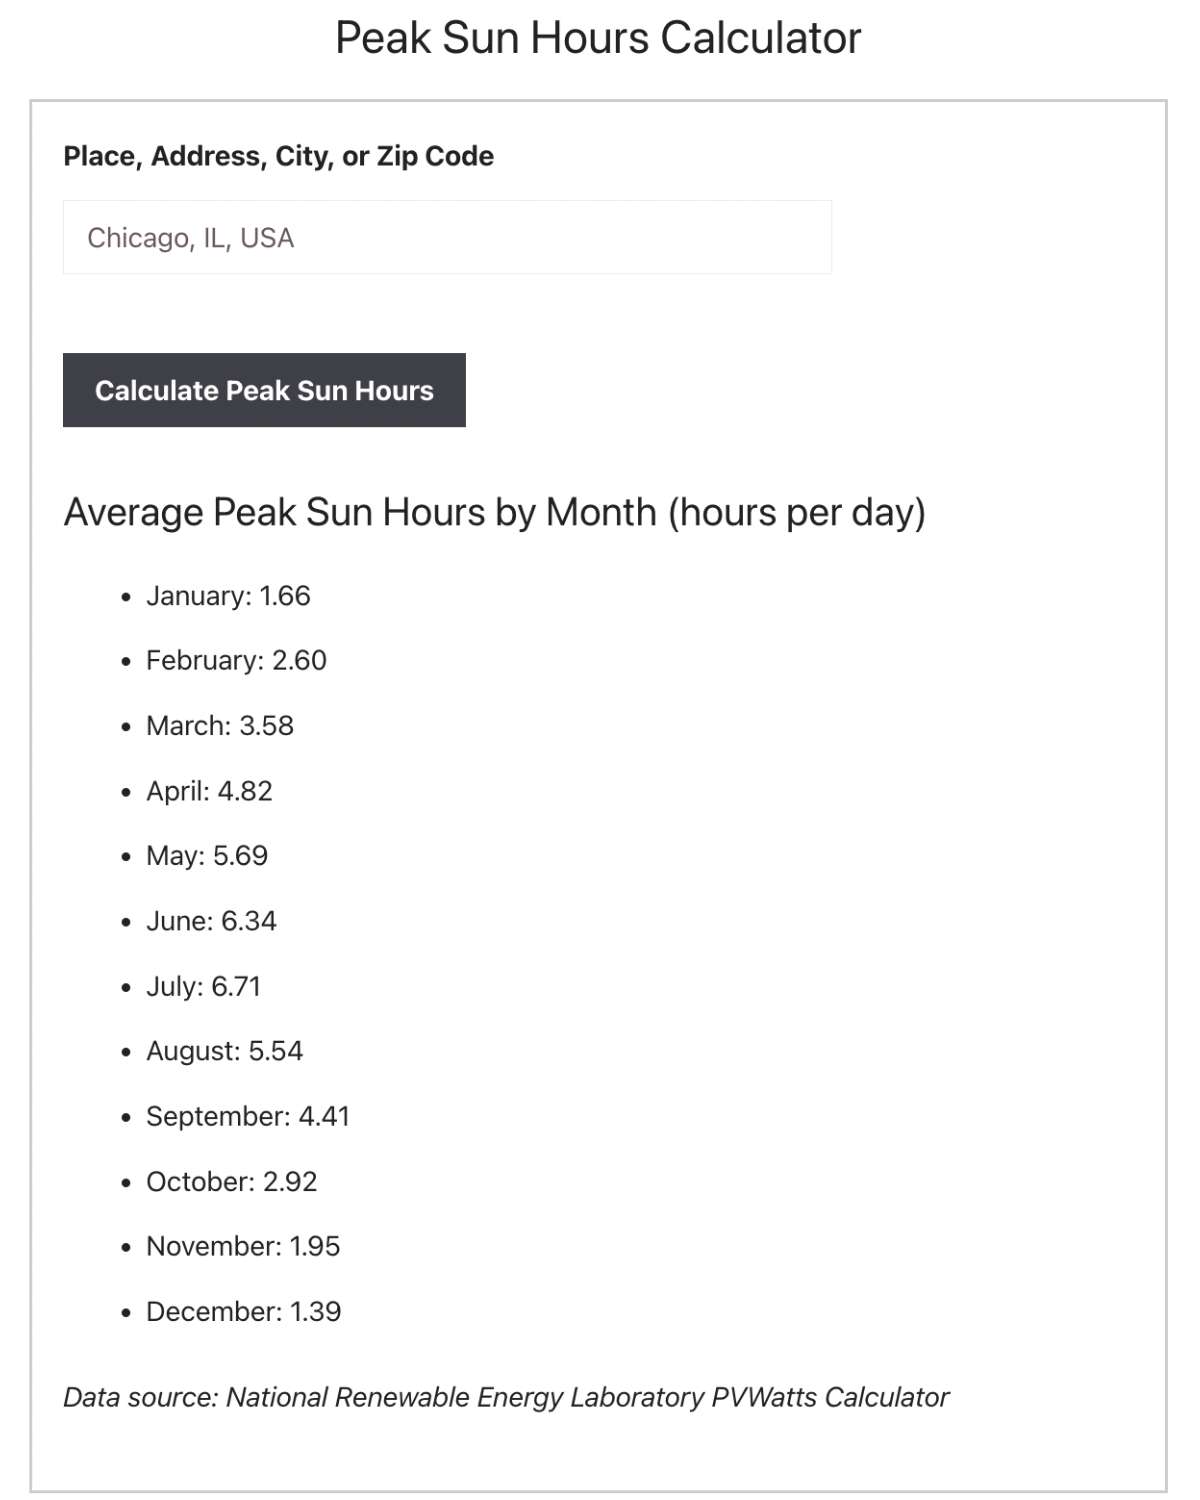
Size Your Camper Solar Panel System Needs
Consider your ideal set up when calculating the size you need.
If the calculation results in a system too big for your vehicle, it will help you reassess what is important or look for alternative solutions to reduce your electric demands.
You can check out our complete set of electrical calculators for RVs and campervan conversions to help size your entire solar setup.
Need help & advice with your electrical setup?
Join Our Facebook Support Group
Decide How Much Solar Power To Install
If your budget doesn’t stretch to the whole system upfront, don’t worry.
Starting small is better than not starting at all.
Aim to buy the correct size solar charge controller for your full system but fewer panels and batteries.
You can scale up your battery bank and panels when you have the money without replacing the expensive controller.
Measure Your Roof…
…. and the available space up there for solar panels.
Solar panels come in a variety of sizes and it’s preferable to use the same manufacturer, watt and amp size for all of them.
If you have to work around roof vents and aerials, you may have a bit of a puzzle to work out.
How Will You Mount The Panels To The Roof?
Will you fix the panels permanently to the roof? Or do you want a tilting mount?
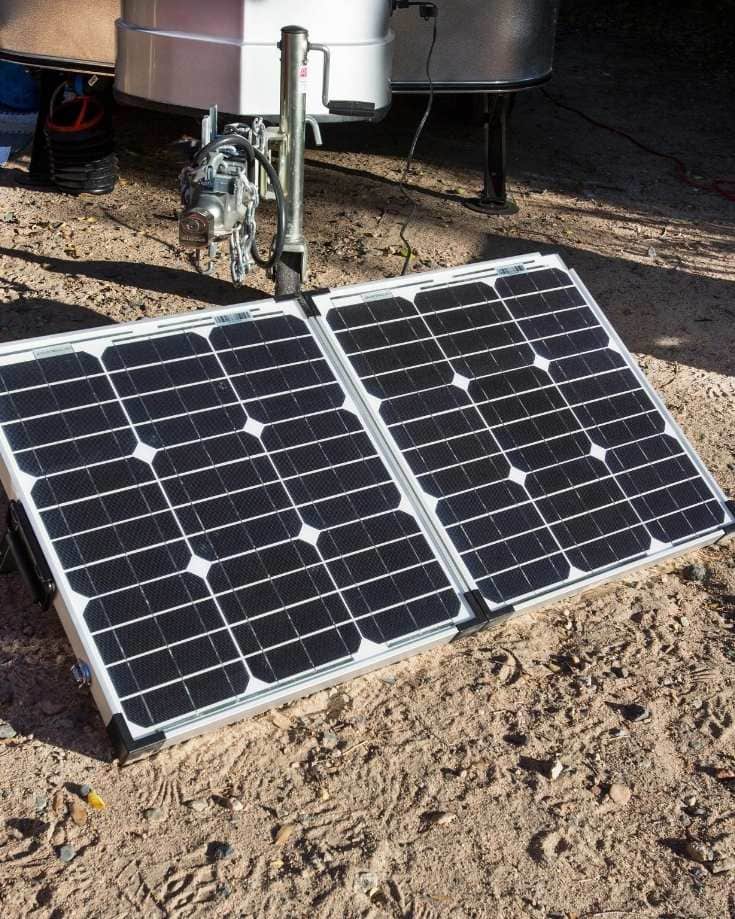
Or perhaps you want a portable solar panel instead (or as well).
What you decide affects your shopping list so figure it out first.
Will You Wire Your Camper Solar Panels In series or Parallel?
Choosing the best solar setup for you not only affects the components needed but how efficiently you can squeeze every last drop of juice from the panels.
There’s no one size fits all answer to this question though.
Check out our complete guide to wiring your solar panels in series or parallel.
It covers mixed panels too and includes an interactive calculator to find the most efficient setup for your array.
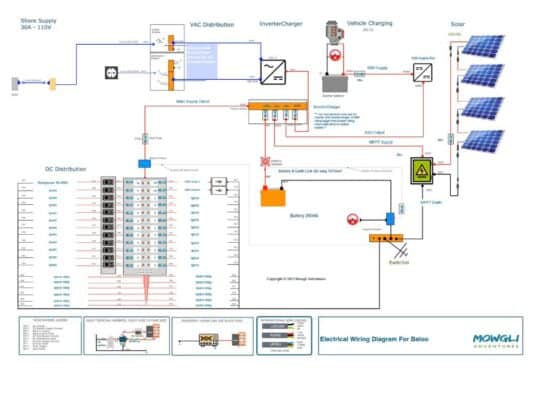
Draw Up A Wiring Diagram Before You Start
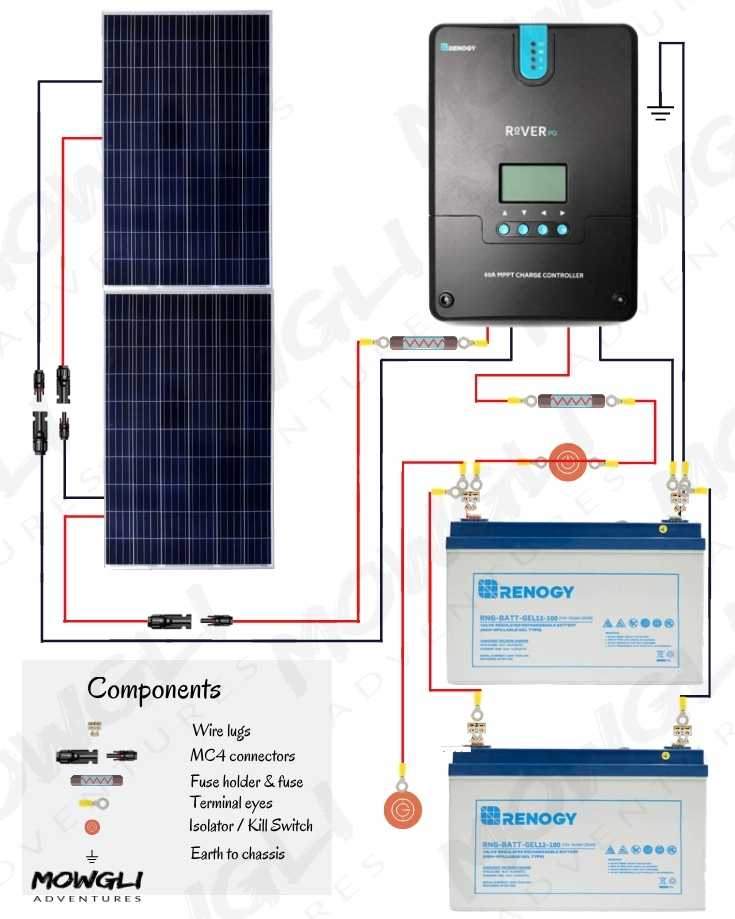
Or use one of our 12v solar panel wiring diagrams.
This will help you make a complete kit list for your installation.
Buy All The Components You Need
Buy everything you need before you start the solar panel installation.
If buying a pre-configured solar panel kit, make sure it has everything you need, nothing you don’t need and it makes economical sense.
You’ll still need to buy batteries and maybe extra cables so take this into account.
We’ve posted wiring diagrams for camper solar setups for 100w, 200w, 300w, 400w, 600w and 800w with complete kit lists for their installation to help you with this.
Have Access To All The Solar Installation Tools Needed
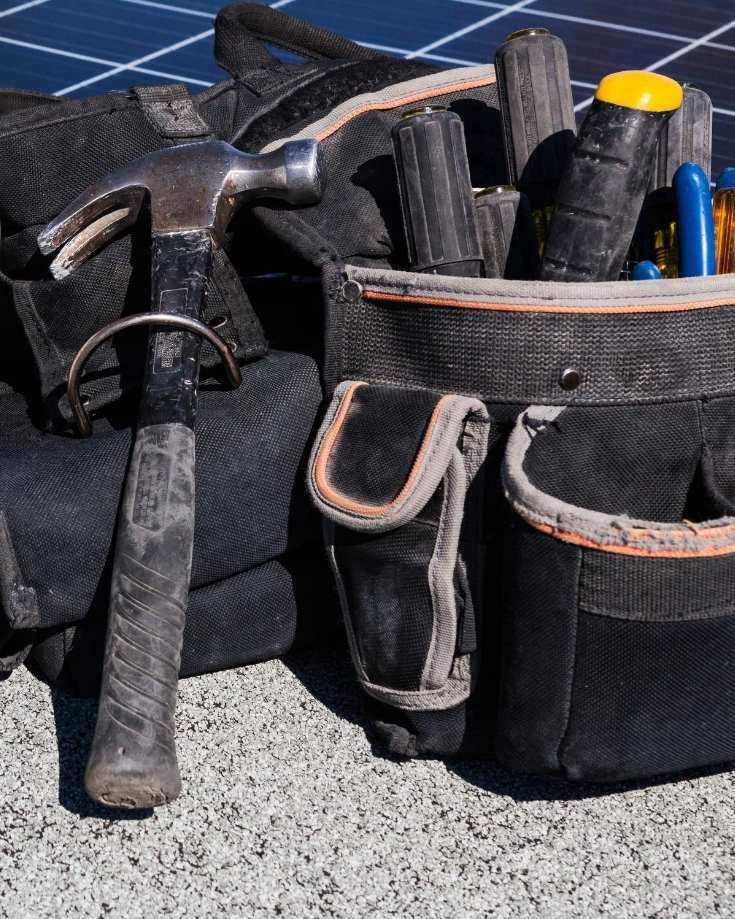
You can probably find most solar installation tools you need in the bottom of your toolbox but there’s a few things a little more specialist, like a multimeter.
Check out our complete guide for how to use a digital multimeter in your camper.
Make sure you have them before you start.
The step by step instructions on how to install solar panels on a camper van conversion below lists all the tools needed.
Avoid Installing The Campervan Insulation
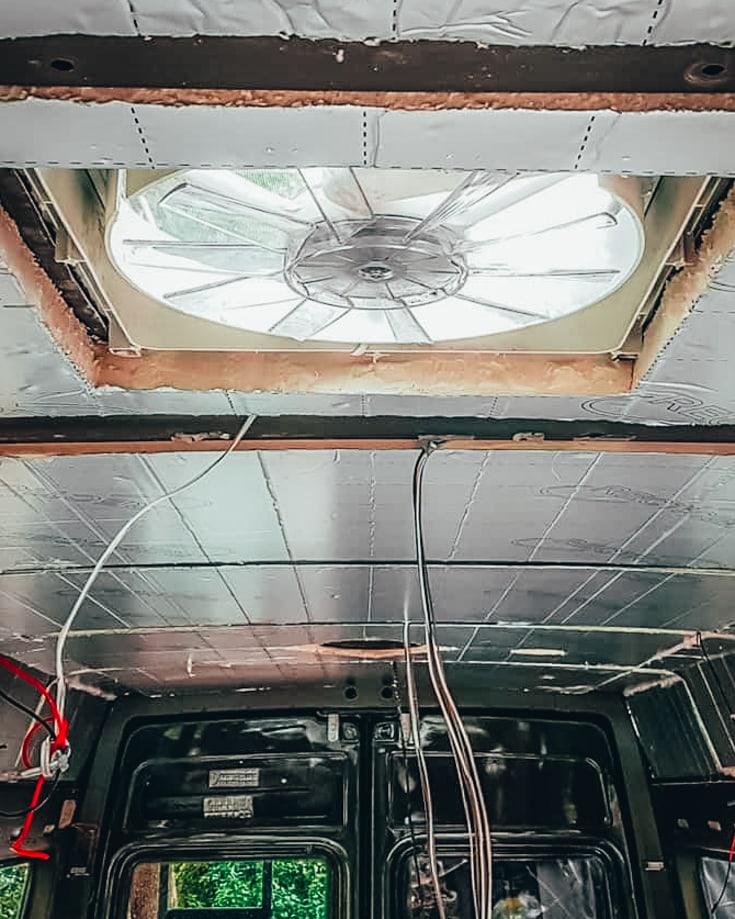
You’ll need access to the skin of your RV, campervan or motorhome to run cables through the roof and down the walls, maybe even along the floor.
It’s much easier in an empty van.
Avoid installing the campervan insulation, lining and possibly the floor covering until the solar installation is complete.
If retro fitting your solar capability, consider how you’ll get the access needed and make good any unavoidable damage afterwards.
Components of a Camper Solar System | A Brief Glossary
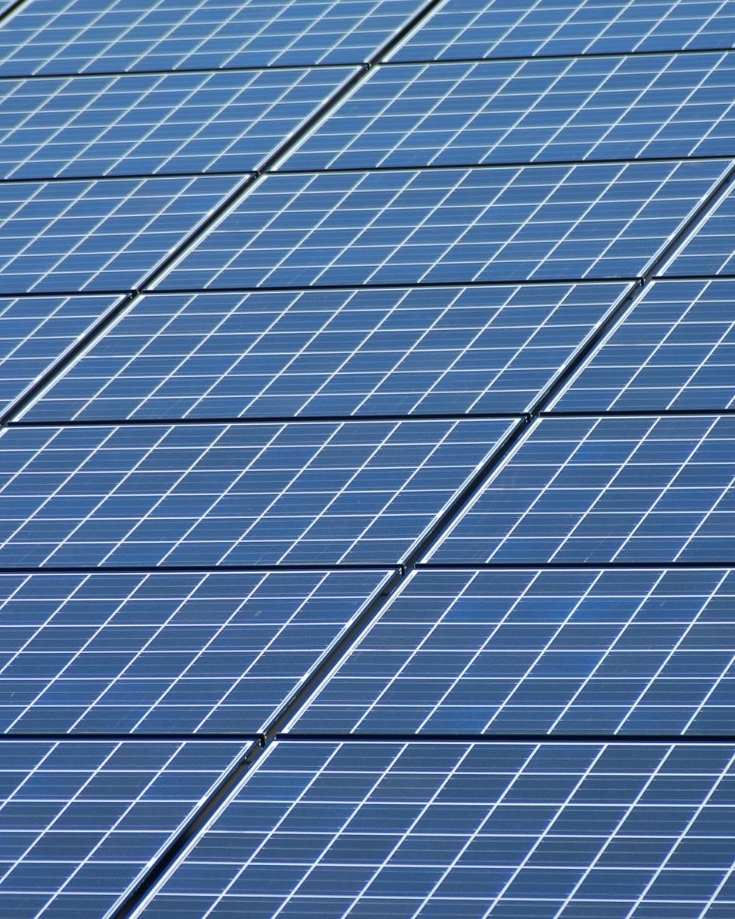
Solar Panels
Solar panels harvest sunlight, converting it to electricity. There are different types of solar panels but we recommend using monocrystalline as they’re the most efficient.
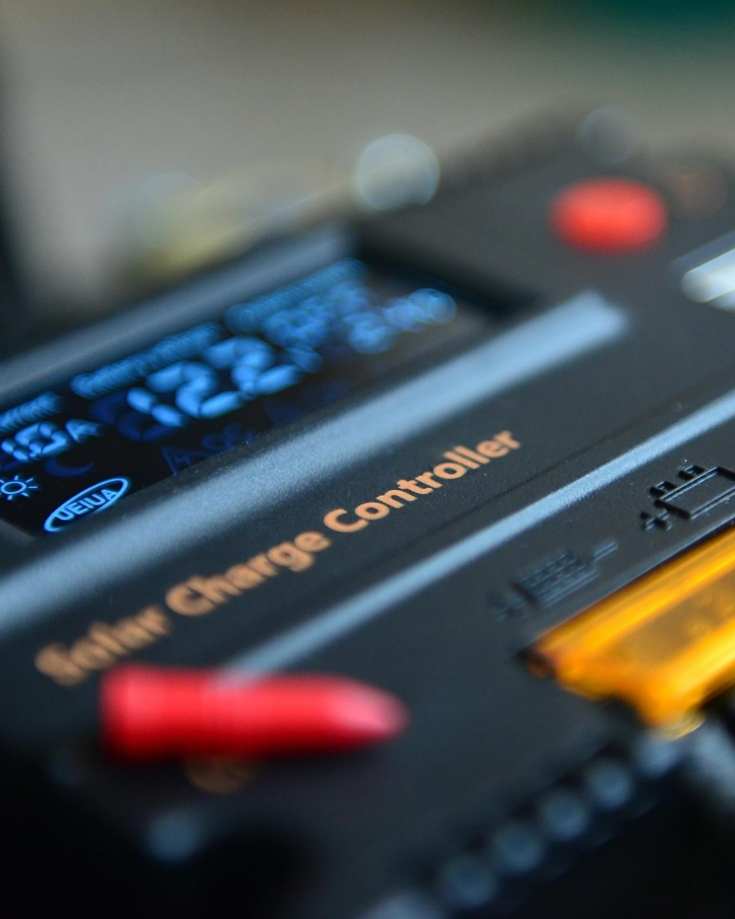
Solar Charge Controllers
Solar charge controllers regulate the current from the panels to a safe level so it can charge the batteries. There’s 2 types of solar charge controller: PWM and MPPT.
- A PWM charge controller is a low cost, budget friendly option. Note if you have a PWM charger the solar panels must be wired in parallel.
- An MPPT charge controller has more complex electronics so costs much, much more than a PWM. However, it is far more effective at charging the batteries.
As with other aspects of camper solar set-ups, there’s no one size fits all answer to which is best.
Check out our complete guide on how to select the right solar charge controller for your setup.
If you need to know what size to get, use our interactive solar charge controller calculator.
Batteries
Batteries store the energy generated.
An RV battery bank is made up of at least one 12v deep cycle (or 2 6v batteries).
Deep cycle batteries are sized in amp hours or Ah. The higher the amp hours, the more energy is stored.
Different types of batteries perform in different ways so 100ah of one type of battery is not equal to 100ah of a different type.
There’s 4 types of deep cycle battery: lithium batteries, Gel batteries, AGM batteries and lead acid or FLA batteries.
Use our battery sizing calculators to get the right size and type for your needs:
You can read more detail about them in our post on campervan batteries and see why we recommend choosing Gel or Lithium-ion.
Solar Panel Mounting Brackets
Solar panel mounting brackets allow you to fit the solar panel to your van without needing to drill holes in the roof.
MC4 Connectors
MC4 connectors allow you to extend the solar cables.
There’s different types of connectors for joining multiple panels.
Solar Panel Cable
Solar panel cables (or solar wires)are rated to handle the current from the panels, connecting them to the charge controller.
By increasing using bigger cables, you can minimise voltage loss between the solar panel and the charge controller.
Choosing the correct campervan wiring sizes is critical for safety and efficient performance of a solar power system.
Solar Panel Gland
A solar panel gland seal is a weather proof seal to plug the hole needed to run the solar cables into the RV.
Fuse Holder
Fuse holder sits between the solar charge controller and the battery cut off switch, holding the fuse to protect the battery.
Battery Cut Off Switches
Isolators or battery cut off switches are safety mechanisms allowing the battery to be isolated.
Choose a cut off switch plenty big enough to cope with the entire amp hour capacity of the batteries with wriggle room for future expansion.
Battery Terminal Eyes
Wire Lugs or battery terminal eyes allow you to connect the solar panel cable to the battery.
Heat Shrink
Heat shrink seal electrical joints to cover the bare wires.
Solar Panel kits
Solar panel kits are pre-packaged configurations including most of the components need to install an RV solar panel system.
How To Install Solar Panels On A Camper Van Conversion
The more free power you can harvest from the sun, the more van life freedom you can enjoy.
At the bottom of this post you’ll find simple step by step instructions on how to install solar panels on a camper van conversion, RV or motorhome.
This section provides more information about parts of that guide so useful for background information before you get to the instructions.
Steps 1 – 6 | Install Isolator Switches, Battery & Fuse Holders
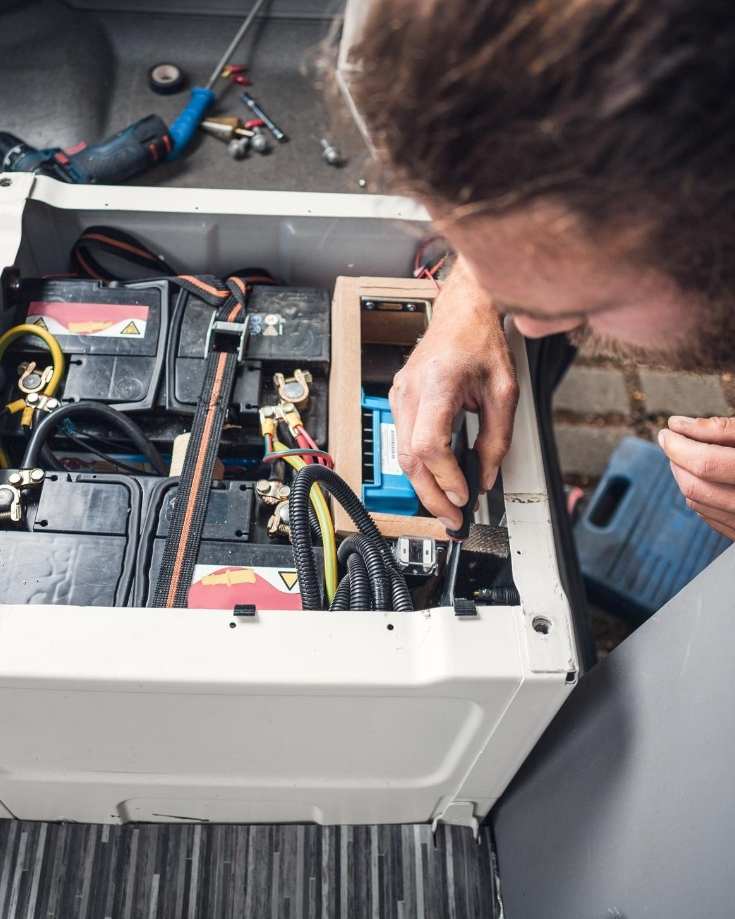
You can skip these steps if you already have your deep cycle, house batteries and cut off switches installed.
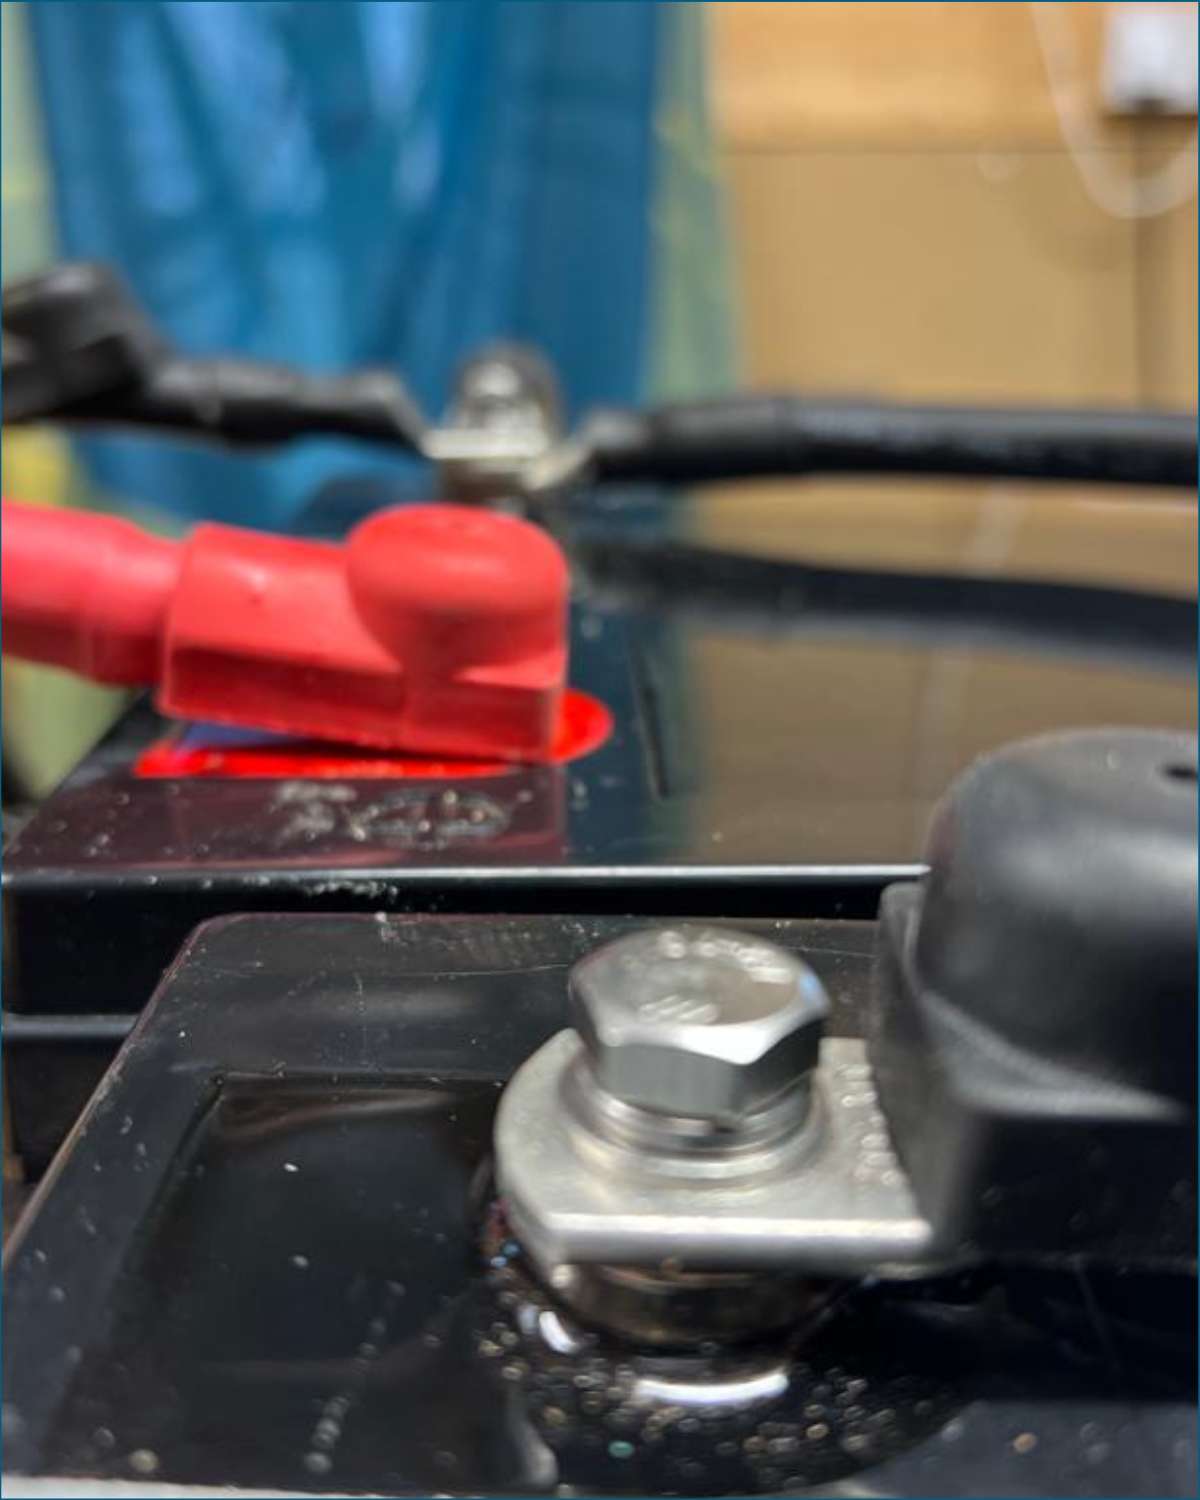
When fitting the battery, make sure to completely secure it. You need to make sure it won’t move in the event of an accident.
Grounding the battery is also critical early on.
It helps create an efficient campervan electrical system and protect you and your van in the event of any shorts in the circuits.
Fit the fuse holders early too but make sure the fuses are out. We want a system ready to commission but not one we could do so accidentally.
In these steps, we’ll wire up the fuse holders to the battery, via the cut off switches.
With no fuses and the cut off switches in their off positions, the battery is safe and ready for connection later on.
It’s time to get up on the roof.
Steps 7 – 12 | Prepare The Solar Panels
We encourage you to check, check and check again as you progress through the installation of the solar panels.
It’s better to find any problems earlier than later, saving time, rework and money.
Working on the roof of your camper van isn’t as easy as working from the ground so do as much as you can before climbing up there.
Double check all the panels will fit where you expect them to. Their cardboard packaging make ideal templates for this.
When marking the hole to feed the cables through, make sure you locate it in a position clear of the panels.
If you ever need access to this is in the future, the last thing you’ll want is to have to take off solar panels to reach it.
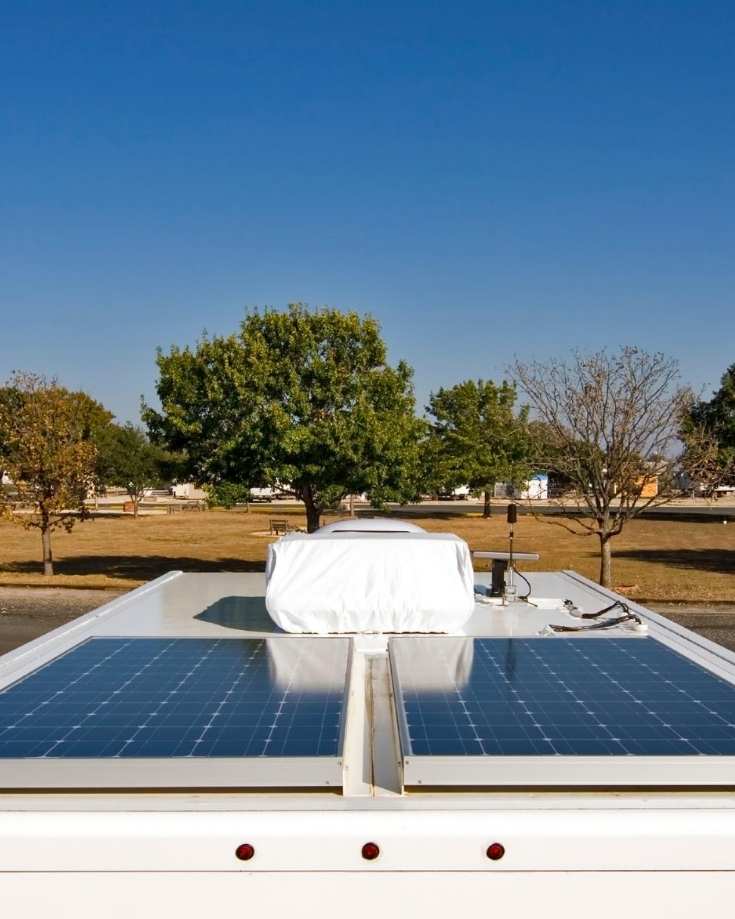
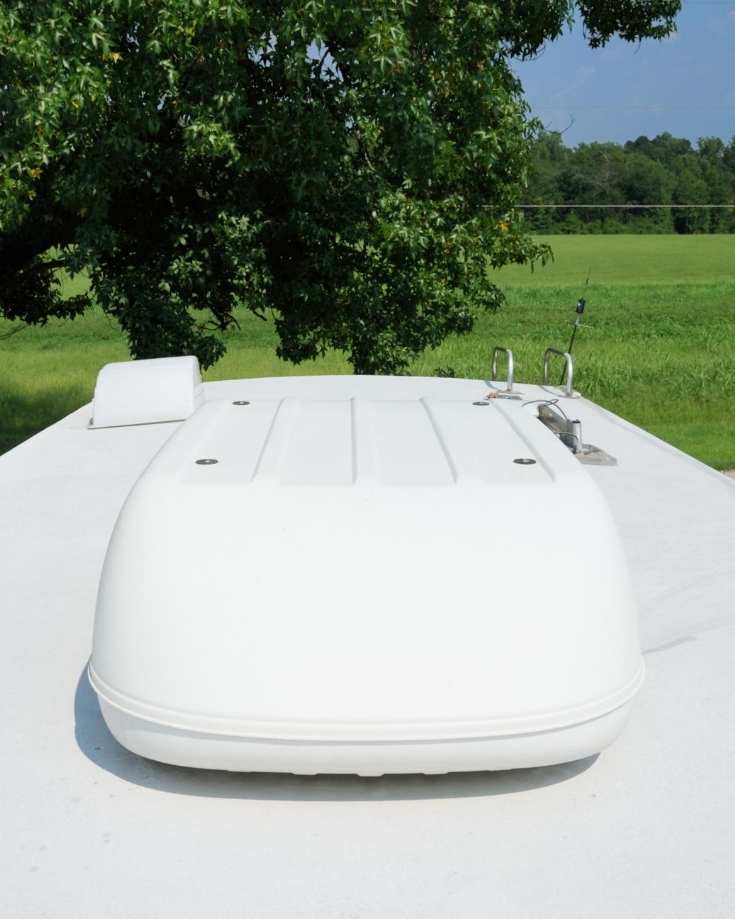
Some camper vans don’t have flat roofs. Our Sprinter van roof has ribs running along the length of the van.
Make sure to attach the mounts in a position where they’ll be flat on the roof or the rib.
If they balance over the edge of the rib, they won’t get as much of a connection when it comes to bonding them.
Mark the position of the mounts on the cardboard templates so you can attach the mounts on the ground.
If you have a flat roof, you can be more flexible in where you attach the solar panel mounts.
Before fitting the solar panels or attaching the mounts, test them. Place each in good sunlight and using a multimeter, test the voltage at the end of the cables.
Doing this before attaching the mounts means you can return them in the unlikely event you find any faults.
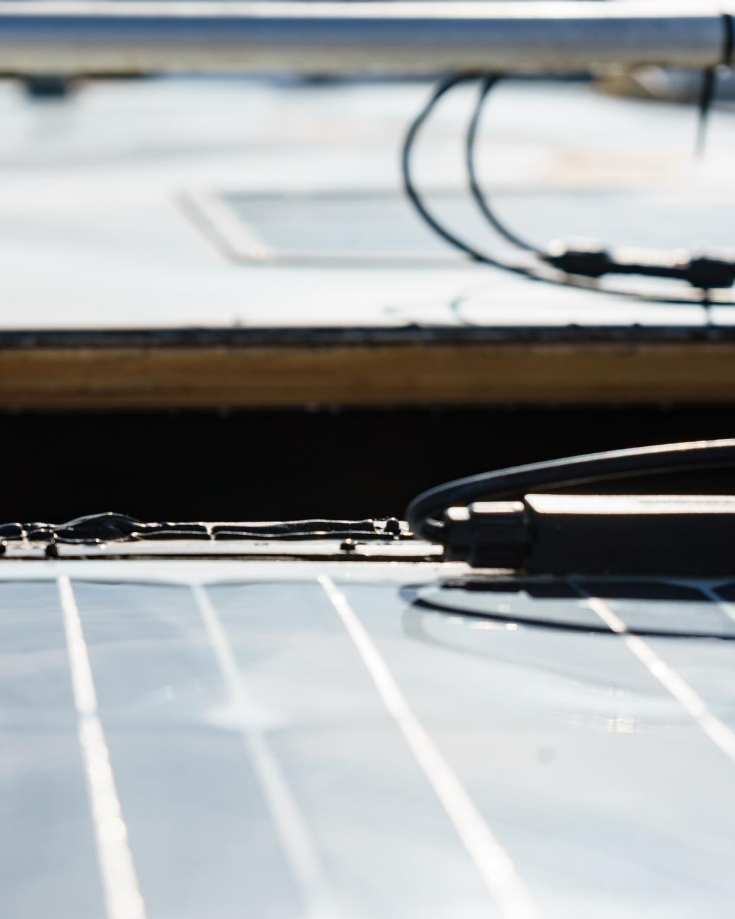
Steps 13 – 19 | Fit The Solar Panels To The Roof
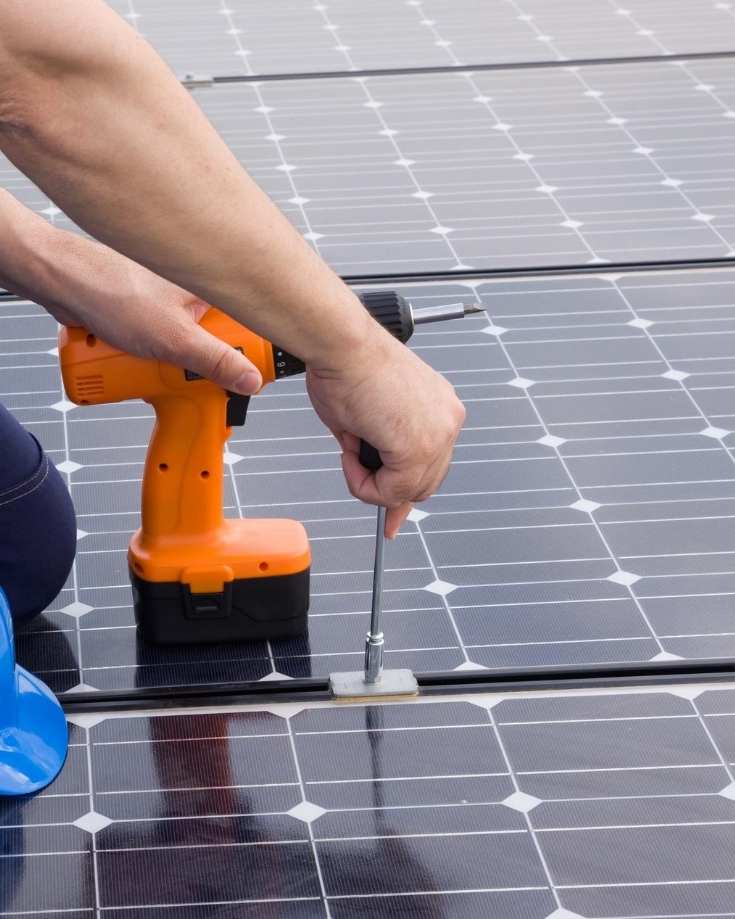
Fit the mounts and get them up onto the roof and bond them in position.
Drill the hole for the cables in your roof now too, cover and seal with the cable gland. Make sure to remove the cable gland collars.
You’ll fit these to the cables separately.
Finish the hole by sanding the edges, clean any debris away with a dry cloth before priming and painting it to protect it from corrosion.
It’s best to do this on a dry day, then leave all the bonding and seals for 24 hours before you move the van or move onto the next steps.
Steps 20 – 25 | Wiring Solar Panels
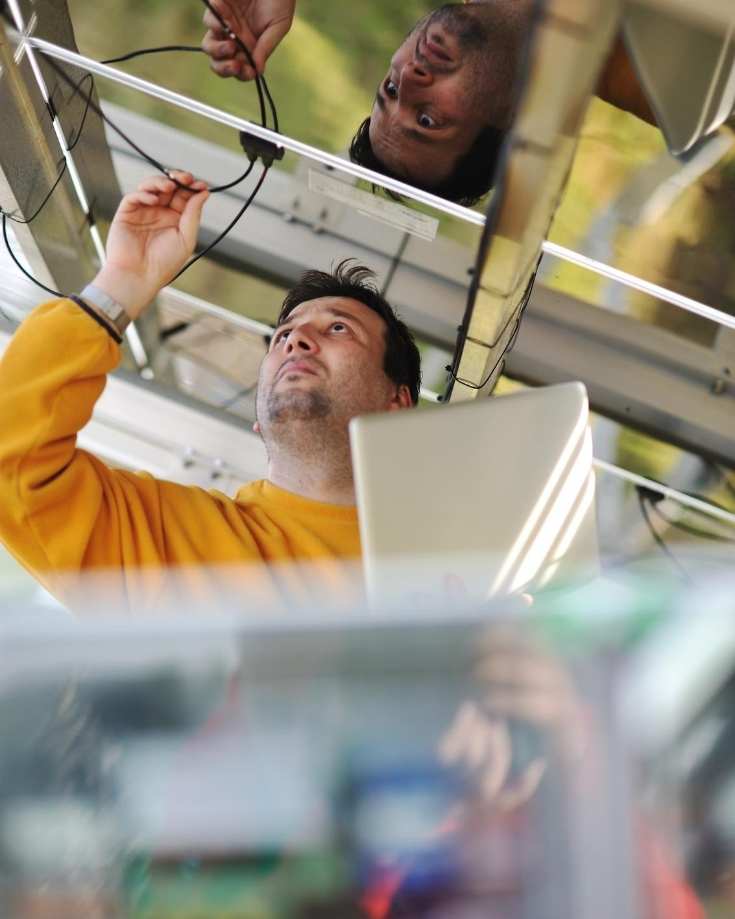
Armed with your wiring diagram, it’s time to wire the solar panels together.
Solar panels come with about a metre of positive and negative cable, each with a connector already fitted.
Most camper van solar panel installations will need to extend that cable to reach the solar charge controller.
While keeping the cable lengths as short as possible is important to reduce voltage loss, try to keep this length of cable intact on the outside of the van.
If you ever need to replace the panel in future it’ll be much easier.
Keep extra length of cable tidy by coiling and taping it to the underside of the panel.
Notice where you need extra length of cable and attach the correct connectors.
It’s a good time to attach the cable gland collars to the cable too.
Threading the cable through the gland collars can be bit tricky so it’s best to fit these from the ground.
Once you’ve wired it all together, check all the connections are tight and the wiring is as per your design.
The multimeter comes in handy again here so you can check the connectivity and voltage output of the solar panel array.
Remember, wiring in series will give a higher voltage than wiring in parallel.
Once you’re happy everything is in good order, thread the cable through the cable gland, securing the collars in place.
To keep the wires on the roof tidy, we used cable ties and P-clips.
You should be finished on the roof now.
Steps 26 – 36 | Install & Connect Solar Charge Controller
Installing the charge controller input fuse holder and solar charge controller isn’t as difficult as you may think.
Before you start, read the manufacturer’s instructions. If they differ in any way to ours, they trump us and you should follow their advice.
Wire the controller up in the order explained in the instructions below, unless the manufacturer’s instructions suggest otherwise.
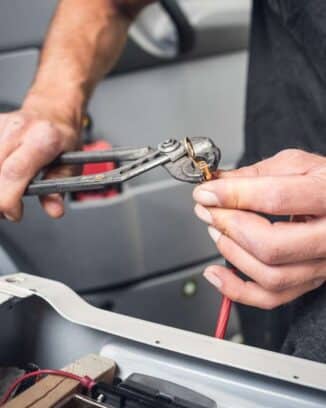
Depending on the fuse holder, you may need to crimp terminal eyes onto end of the solar cable.
You may need to install a battery temperature monitoring sensor to the battery bank, though usually only for lithium batteries.
If so, do it now, following the manufacturer’s instructions.
You’ll need to add the fuse when the wiring is complete so you can get power to the solar charge controller and configure it for your battery configuration.
At this point, you solar system is pretty much fully installed.
The only thing left to do is close the circuit to allow the solar power to charge the batteries.
But wait.
If it’s getting late in the day, if you feel tired or light is fading, come back to it tomorrow.
Switching it on is easy but if there’s a problem, you want to be in a fresh frame of mind to begin trouble shooting.
Now is the perfect time to at least take a break.

Step 37 – 43 | Commission Your Camper Solar Setup
Firing up your newly installed camper solar set up is as easy as inserting the fuse into the battery input fuse holder and switching on the battery input cut off switch.
Assuming you’ve installed everything safely, there won’t be any sudden flashes, bangs or sparks.
If there are, turn your battery cut off switch to the off position and remove the fuses before testing everything again until you find the fault.
Check the solar charge controller display is reading as you’d expect given the time of day and available sunlight on your solar panels.

Check the voltage going into the battery is the same as the solar charge controller reading states using the multimeter.
And that’s it.
You’ve just successfully installed a camper solar set up – must be time to hit the road!
Or maybe finish the rest of your campervan conversion first!
Automatically Create Your Bespoke RV Wiring Diagram
Includes 110v & 240v, solar, B2B, batteries, inverters, 12v, 24v & 48v systems, wire gauges in AWG & mm² & much more!
Step by Step Guide To Installing Camper Van Solar Panels
How to Install Solar Panels on RVs, Campervans and Motorhomes
The more free power you can harvest from the sun, the more van life freedom you can enjoy.
Follow these step by step instructions on how to install solar panels on RVs, campervans and motorhomes.
Materials
- Solar panels
- Solar charge controller (MPPT or PWM)
- Battery
- Cable
- MC4 connectors and combiners
- Panel bonding
- Solar panel mounting brackets
- Solar panel gland seal
- Fuse holder and fuse
- Battery isolator or cut off switches
- Battery terminal eyes
- Battery ground strap
- Battery tray
Tools
- Drill
- Wire cutter
- Wire stripper
- Soldering iron
- Wire crimper
- MC4 connector tool (pliers will work just as well)
- Sealant applicator gun
- A selection of screwdrivers and spanners
- Multimeter
Instructions
- Fix battery input and output cut off switches to their operating positions and turn them to off
- Fit the battery. Use a battery tray if necessary and a strap to secure it in position
- Ground the negative battery terminal by taking a battery strap and attaching it to an earth point on the chassis
- Install battery input fuse holder
- Connect fuse holder to the battery input isolator
- Connect the battery +ve terminal to the input and output cut off switches
- Use the solar panel packaging boxes to create templates matching the solar panel sizes
- Place the templates on the campervan roof in the positions you expect to install the solar panels.
- When confident they all fit, mark the final position
- Mark the spot where you’ll drill a hole for the cables to enter the camper, taking care to double check this is clear on the inside of the van
- Check each solar panel is not damaged
- Place each panel in sunlight and test the voltage at the end of each cable is as expected with a multimeter
- Attach mounting brackets to each solar panel
- Place the panels on the roof, making sure one final time they all fit as expected
- Bond the panel mounts and solar panels to the roof
- If a new hole in the roof is needed, drill a hole just big enough for the cable gland to fit
- Finish this hole by cleaning it thoroughly with a dry cloth, priming and painting it to protect it from corrosion. Once the paint is dry, seal and bond the cable gland in place
- Let all the sealant and bonding set for 24 hours
- Connect the cables in series or in parallel, depending on your wiring design
- Assess if the cables need to be extended to reach the location of the charge controller. If they are too short, extend them using the appropriate connectors
- Attach the cable gland collars to the cables to be inserted into the cable gland
- Test the connectivity and voltage output of the solar panel array with a multimeter to check its providing the voltage you expected. Remember series will give a higher voltage than wiring in parallel
- Double check the cabling connections and your multimeter readings are as per your wiring diagram and design
- Tidy all the cables on the roof. Secure excess cable with gaffer tape beneath the solar panels and use P-clips and cable ties to key the wires tidy and secure.
- Fit the solar charge controller input fuse holder to its operating location (without a fuse)
- Fit the solar charge controller to its operating location
- Connect the +ve cable from solar charge controller input fuse holder to the charge controller as per the manufacturer’s instructions
- Connect the -ve cable from solar panel to the charge controller as per the manufacturer’s instructions
- Connect the +ve cable from solar panel to the solar charge controller input fuse holder
- Connect the -ve battery cable to the charge controller -ve output terminal
- Connect +ve solar charge controller output cable to the battery input fuse holder
- Insert correct size fuse to the solar charge controller input fuse holder
- Check input and output voltage of the solar charge controller is as per the manufacturer’s guidelines for your given wiring set up using the multimeter or the display on the charge controller
- Configure the solar charge controller for the your battery bank as per the manufacturer’s instructions
- Have a cup of tea and a break
- Now check everything again with your multimeter and double check all connections remain tight
- Insert fuse into the battery input fuse holder
- Switch your battery input cut off switch to the on position
- Assuming you’ve installed everything safely, there won’t be any sudden flashes, bangs or sparks. If there are, turn your battery cut off switch to the off position and remove the fuses before testing everything again until you find the fault
- Check the solar charge controller display is reading as you would expect given the time of day and available sunlight on your solar panels
- Confirm the voltage going into the battery is the same as the charge controller reading states using the multimeter
- Well done! You now have a working camper solar system!
Notes
- Measure the roof of your campervan before buying solar panels to ensure they fit.
- Where possible, use an existing hole in the roof to feed the solar panel cables through.
- If you need to drill a new hole in the roof you will need access to the inside of the roof. So try to do this job before you fit your campervan insulation.
- We don't recommend drilling holes to fix your solar panels to the roof but if you choose to, you'll need access to those areas of the inside of the van too.
- It's worth marking the positive solar cables with red tape.
- Aim to make your cable runs as short as possible to minimise energy loss.
- Solar panels come with about 1 metre of cable. This is often not long enough to reach the charge controller so you may need to extend them. The cable needs to be big enough to accommodate the total amps from the solar panel array (so more if you're wired in parallel) plus a surge capacity
- You need enough cable to reach from the charge controller to the battery too
- If you're converting a campervan and installing the entire electrical system, it's frugal to buy a whole 100 metre drum of cable. You will use it!
- Solar panels come with a male connector attached to the black negative cable and a female connector attached to the red positive cable.
- See our 12v solar panel wiring diagrams to work out how many connectors you need for your set up
- Don't bond solar panels directly to the roof. It'll be a messy job if you ever need to change one. Instead, use mounting brackets.
- Battery terminal eyes need to be the right size to fit the bolt on your battery and the physical size of your cable.
- Our instructions include checking and rechecking throughout the installation. Mistakes can result in damage to the panel, the charge controller or yourself.
- When testing the voltage being applied to the battery, you must disconnect any other charging sources so they do not skew your readings.
Graham Bogie

Graham is a seasoned marine electrical engineer with two decades of experience designing customized electrical systems for plant machinery and converting campers and overland vehicles. His expertise has led him to author the reputable Campervan Electrics Handbook and become the chief designer of the RV Wiring Design Tool. As a knowledgeable figure in the field, his YouTube channel, blog, Facebook group, and newsletter, offering electrical advice and product reviews, reach more than a million users each year.