How to tell if your RV converter is bad? Is your RV power source unreliable? Learn how to identify a bad converter – the source of your woes – and get back on the road!
When an RV’s electrical system isn’t working correctly, it can be extremely frustrating – especially when the cause of the issue is unclear.
Although it’s uncommon for a converter to fail, a faulty converter could be the culprit.
Understanding how to identify the problem before it causes you no end of headaches can save you time and money in the long run.
Knowing when your RV converter is bad is vital to maintaining an efficient electrical system.
In this article, we’ll explain how to tell if your RV converter is bad and what you should do if it is.
What Is An RV Converter & What Does It Do?
When you plug into an electrical socket in your house, you get a steady 120V AC.
That’s true anywhere you go in the US.
In Europe and most of South America, the supply power is 240v AC, something to consider if you plan to travel further afield.
The RV electrical system, however, is different.
Most RV batteries use a 12V DC system. So how do those 120 volts (or 240V AC) charge a 12V system?
Enter the RV converter.
As the name suggests, the converter converts AC current from a power source to DC current so that you can charge your battery.
You can then use the battery to run your appliances. That’s invaluable when boondocking and powering 12v appliances.
Depending on the model, you can use the RV converter to run some appliances directly.
What Happens When The RV Converter Goes Bad? The Tell-Tale Signs
So the question is – what happens if the RV converter fails?
If you’re attempting to charge your RV batteries from a shore hookup and the converter fails, your batteries won’t charge.
If you overlook that and continue to use your battery bank as your power source, it will eventually drain.
If there is a problem with your converter, typically, you’ll notice some symptoms. The warning signs may include:
- the battery monitoring panel might indicate an issue with a low battery charge level,
- appliances may run slowly,
- dimming or flickering lights.
The problem is that all those symptoms have simpler but more likely explanations. For example:
- appliances may not be connected to the battery correctly,
- you’re running too many devices, essentially overloading the battery,
- a fuse has blown,
- isolator switches are off,
- etc.
If you notice any symptoms, you should fault-find the simple things first.
Troubleshooting Techniques for Beginners
Knowing where to start when things go wrong with your RV’s electrical system allows you to methodically fault-find the cause.
There’s no point assuming an appliance is broken if the real problem is more straightforward and less costly.
But where do you start?
When there’s an electrical problem with a single component, either supply or load side, you can be confident it lies somewhere on its circuit.
If you have an electrical wiring diagram for your RV or camper, it should clearly show how each circuit is installed.
It will show switches, fuses, wire sizes, circuit breakers, and shared components like bus bars or inverters.
Your troubleshooting efforts aim to locate which component is causing the problem.
There are three things you need for effective electrical troubleshooting:
- A multimeter.
- A high-level understanding of electrical circuits.
- Your electrical wiring diagram (optional but a huge benefit).
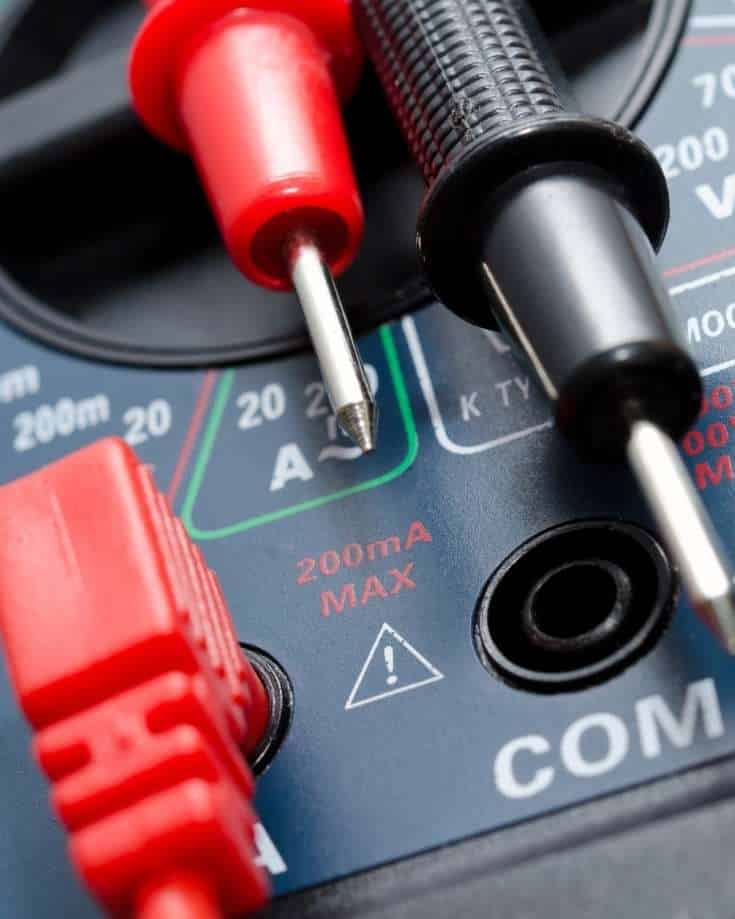
A multimeter is an essential tool to have in your RV toolkit. Without it, your ability to fault-find is next to zero. For example, you can see if a fuse is blown but not much more.
Multimeters are low-cost, and they’re not difficult to use.
The troubleshooting techniques you need rely on using a multimeter to test different electrical system parts, so you must know how to use it.
Our Campervan Electrics Handbook has an entire section providing a step-by-step guide to troubleshooting your RV’s electrical system.
Following the steps outlined there, you will go through fault-finding methodically, beginning with the simple things.
Use Mowgli10 for 10% off at the checkout.
How To Tell If RV Converter Is Bad With Systematic Troubleshooting
The first symptom of any RV electrical problem you notice will likely be on the load side. You’ll switch on an appliance that won’t operate as expected.
Firstly, stay calm, as there’s no point in jumping to conclusions.
The systematic approach is to ascertain where the problem is on the circuit.
Step 1 – Check For Low Battery Voltage
The first thing to check is usually the most obvious: is the appliance switched on? If it is, does the circuit also have a switch? If so, make sure that’s switched on, too.
To rule out a load-side problem, the next step is to check the battery voltage.
DC power appliances won’t work without a charged battery, especially those with voltage-sensing relays like a 12v fridge.
Check the battery voltage by reading your battery monitor or using a multimeter.
Anything less than 12v indicates insufficient battery charge to power your system.
Step 2 – Rule Out Usage Issues
Battery monitor readings may indicate the battery’s voltage is falling faster than usual or doesn’t seem to be charging or holding its charge.
We know battery monitors aren’t 100% accurate, so it’s often just a suspicion. So how do you figure out if you have a problem?
It may seem silly, but check if you’re using more electricity than usual before reaching for the multimeter.
If you’re using more electricity than usual, the battery levels will likely be lower than average.
If you’re unaware of using excessive load, check that you’ve not inadvertently left the inverter running with a load.
Check the RV refrigerator door isn’t open, too. This would result in the compressor running more than usual and could be the culprit.
If you’ve used more electricity than an average day, a lower than expected battery voltage may only indicate overuse rather than an electrical problem.
If there are no apparent problems on the load side, the problem is likely related to the supply side or the battery bank.
If you have an isolator switch that prevents all battery charging, ensure this isn’t off. If it is, the battery bank won’t receive any charge, and it’s the likely culprit of the low voltage.
Switch it back on, and the battery bank should start charging again with solar, hookup, a generator, or driving.
You could use your multimeter to double-check the continuity between the isolator switch and the battery.
Step 3 – Rule Out A Battery Monitor Problem
It’s usually easier to read the battery monitor than to test the battery voltage directly with a multimeter.
However, if the battery monitor displays a low voltage, you need to be confident the battery monitor isn’t at fault.
Your aim is to test that the voltages displayed on the monitor and measured at the battery match.
Use your multimeter to test the battery voltage.
You should get a reading that matches or is close to what is displayed on your RV’s battery monitor gauge.
If not, this indicates that there may be an issue with your battery monitor which needs to be addressed before continuing.
Step 4 – Identify If The Onboard Batteries Are At Fault
If you’ve ruled out any oversights or excessive use and still suspect a problem charging the onboard batteries, you must identify whether a charging source is at fault or the battery is the problem.
Diagnosing a battery problem involves disconnecting and letting it sit for a few days without charge or load.
Measure the voltage daily and around the same time to account for ambient temperature.
If the battery is good, you should only see a few millivolts lost over a few days.
Any more than this, and you’ll need to make a judgment call as to whether the battery is old, excessively used, or has been drained to below 11.7 volts. You may need a new battery.
Testing the battery this way isn’t always practical, especially when living in your RV full-time.
Checking each supply source is cheaper than rushing out to buy a new battery bank.
Step 5 – Troubleshoot EHU (Shore Power Electrical Hook Up)
A word of warning! AC electricity is dangerous and can kill.
If you don’t know what you’re doing, always seek a qualified electrician’s advice or services.
The steps that follow are investigative only. They will help you identify the problem area.
We do not encourage using a multimeter on any shore power AC circuit unless you’re a qualified electrician.
When you hook up to a campground power supply, your battery monitor will immediately show an increase in voltage at the battery bank.
No voltage increase indicates a problem.
Here’s a typical wiring diagram for a shore power installation for a 30A 110v setup with a battery bank.
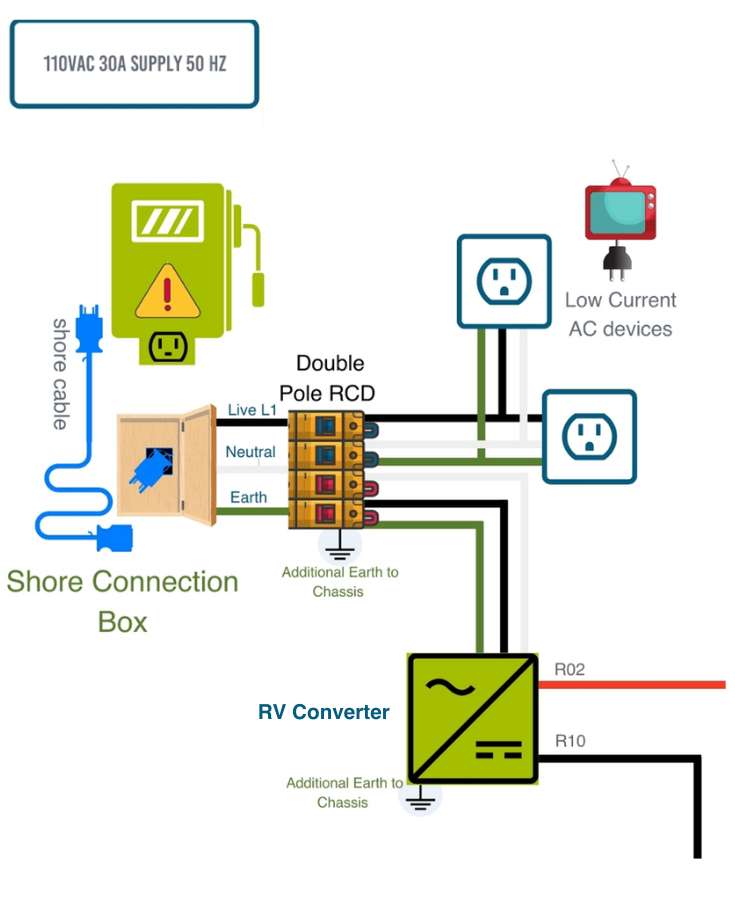
The main principles are the same if you have a 50A 110v or a European 240v system.
Your aim is to assess the circuit, working towards the battery methodically.
Before you begin:
- Turn off the engine.
- Unhook the generator and solar panels.
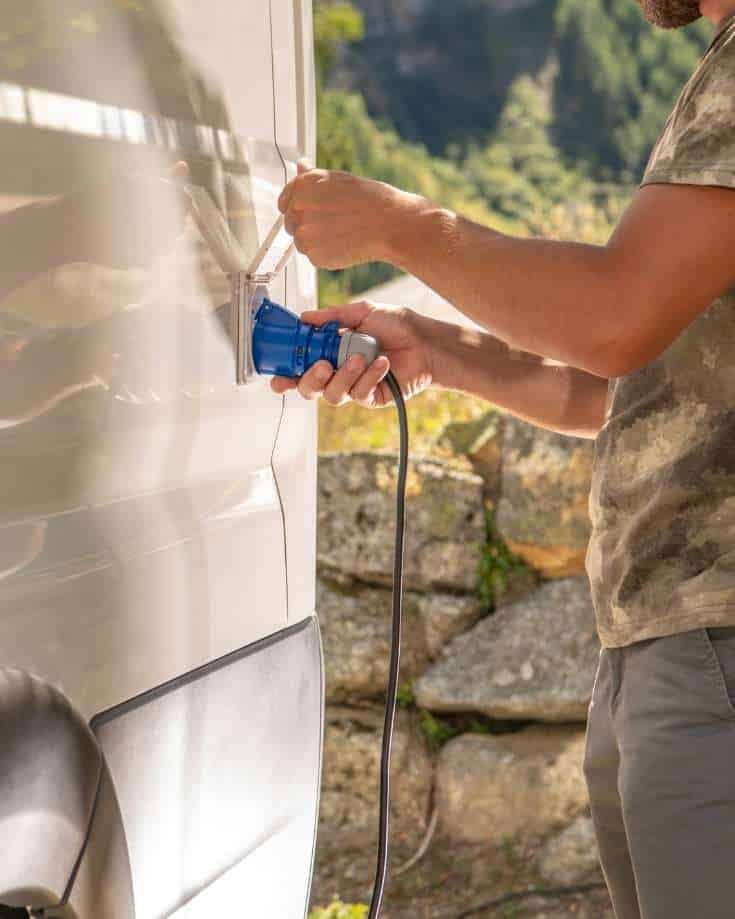
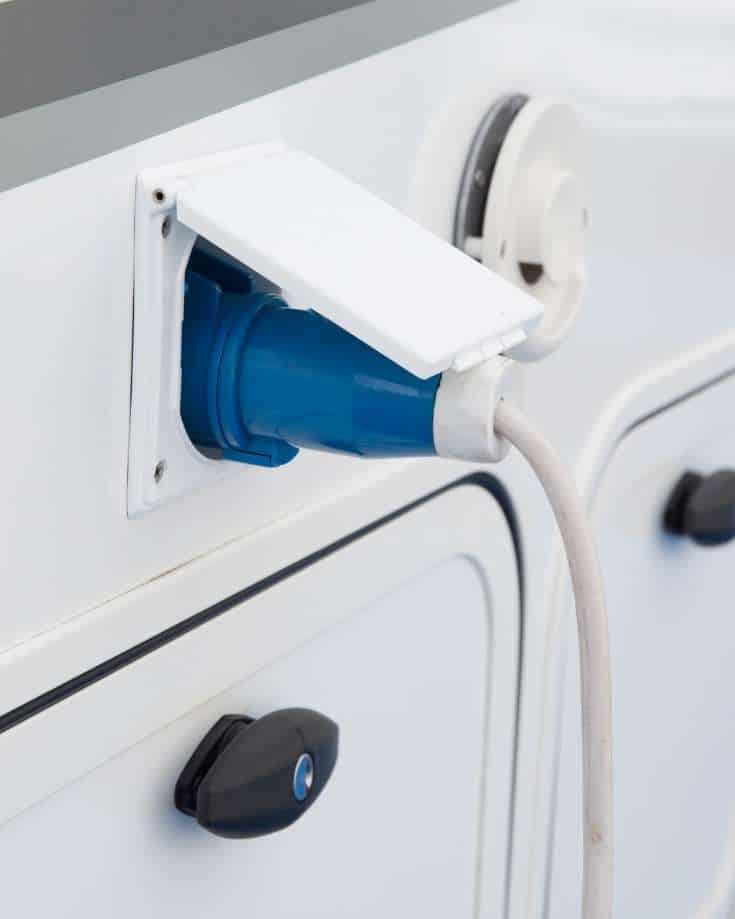
- Check the shore cable is plugged in securely at both ends.
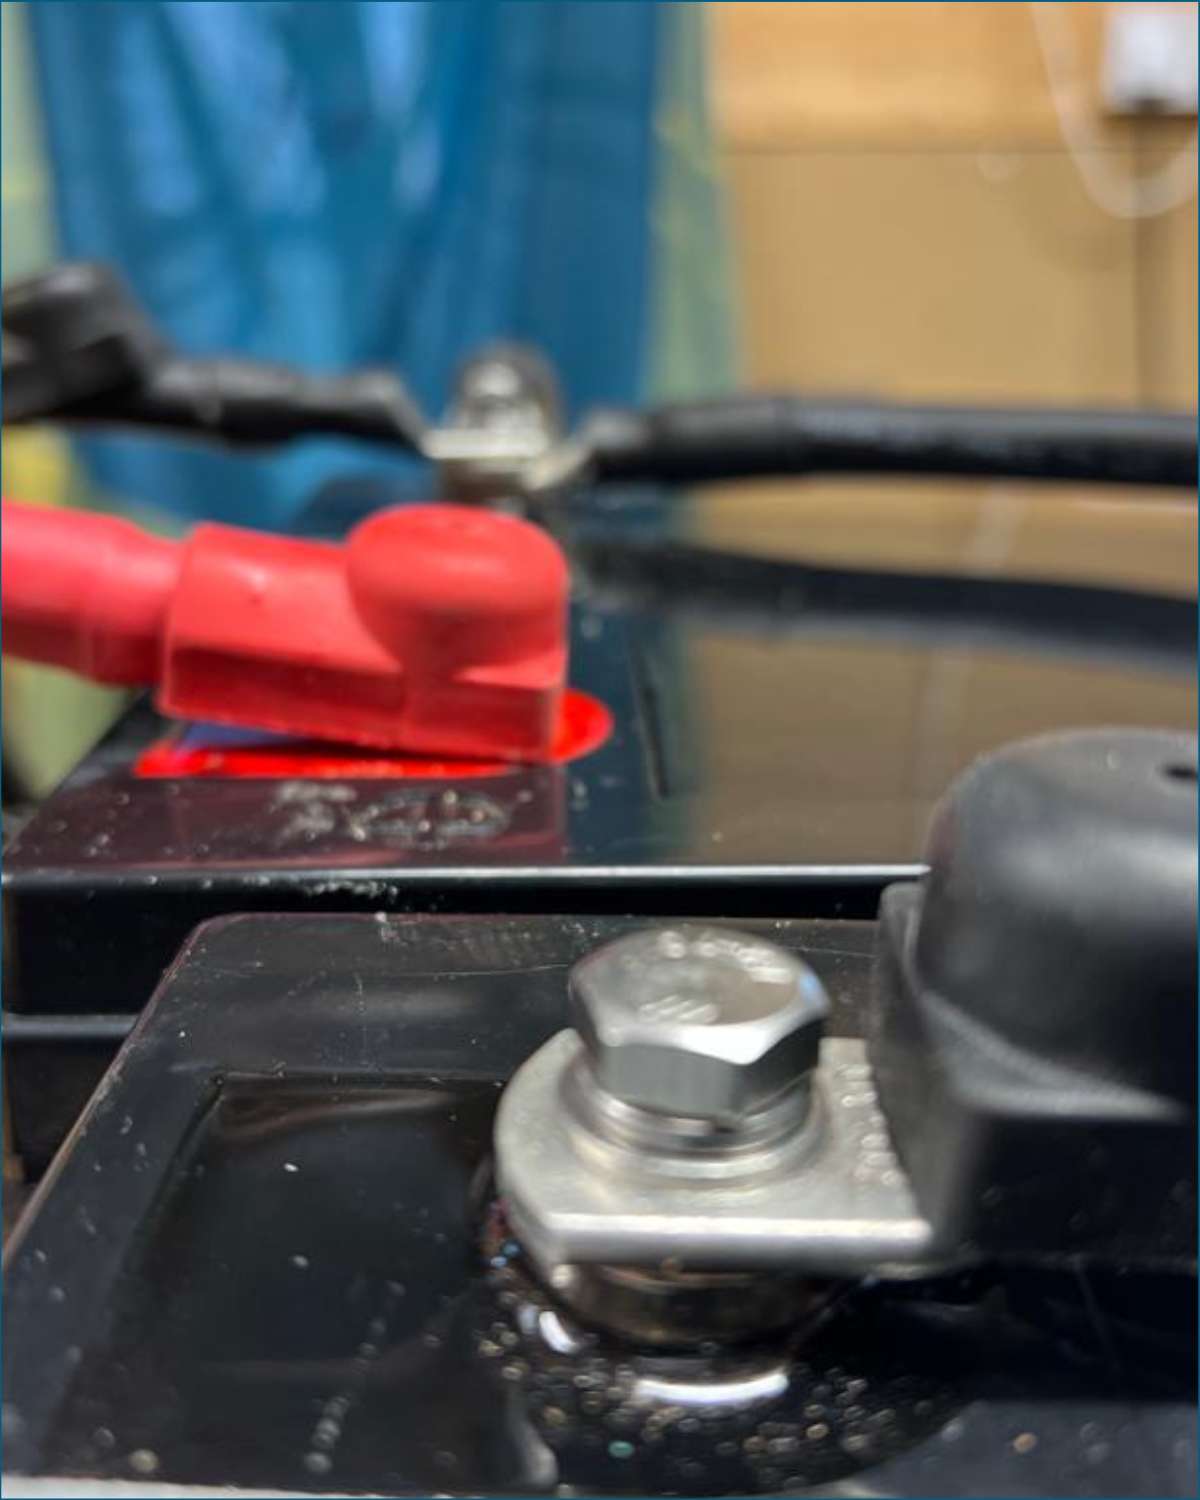
- Confirm the battery isolator switch is on.
- Check the RV converter is on.
How To Test Your RV Converter
If you have gone through all the fault-finding on the load side and established that the battery is not getting properly charged, it’s time to figure out if the converter is the problem.
RV converters don’t often fail (although they can), so more often than not, the problem is on either side of the component rather than the converter itself.
The following steps will methodically guide you through the troubleshooting process.
Step 1: Test Your AC Input To The Converter
The first thing to see is whether the AC power from the grid is coming to your RV correctly.
Start with the simple things:
- Is the hookup cable connected to the campground pedestal properly?
- Is the hookup cable connected to your RV properly?
- Is there a power cut at the campground?
- Are your neighbors experiencing any issues?
If there are no external reasons why you shouldn’t get power into the RV, check your supply breakers.
If they’re open, this explains why the converter isn’t getting any power.
Close them, and if they trip again, begin troubleshooting what is causing that.
Assuming that’s all sorted, you’ve established you have power into your RV, but is it reaching the converter?
We don’t recommend using a multimeter on the AC input unless you’re a qualified electrician.
If your RV’s converter has operating lights, that confirms AC power is reaching the unit.
Step 2: Check The RV Converter Fan Is Operating
If you’ve confirmed the converter is receiving power, ensure its cooling fan is clear of any obstructions.
An overheating converter will cut out in a short time.
The purpose of an RV converter cooling fan is to help keep the internal workings of the appliance from overheating.
If the fan fails or stops operating correctly, it can cause an RV power converter to overheat and potentially fail.
To prevent this, many converter models feature an overheating protection system that will kick in if the cooling fan fails.
Listening to it is the best way to confirm if an RV converter fan is working.
It usually operates intermittently, so you should hear a motor running every few minutes while the appliance is powered on.
If you don’t hear the motor running, then it could mean the fan has failed or isn’t wired up correctly.
You can test the fan’s cables with a multimeter, but this would require taking the appliance apart and could invalidate any warranty.
Step 3: Test Your Converter For Output Power
Now that you have confirmed the RV converter is receiving AC power and its fan is operating correctly, it’s time to test for output power.
The best way to do this is with a multimeter, which will allow you to measure the converter’s voltage and current output.
This will help identify any issues with your electrical system, such as loose connections or faulty wiring.
RV power converters output DC power, so using a multimeter to check is safe.
However, take all necessary safety precautions when handling an appliance connected to mains electricity.
Additionally, always follow manufacturer instructions while using a multimeter on any AC circuit – unless you’re a qualified electrician.
If you’re sure your converter is working correctly, you’ll get a voltage reading on the multimeter between 12.8 and 14.4v, depending on the charge state of your batteries.
Anything higher or lower than this and your converter looks to be the problem and requires further investigation.
What To Do If Your RV Converter Is OK, But The Batteries Still Aren’t Charging
If all the tests confirm your converter is in good order, and you still have a problem charging your batteries, the issue lies in the circuit between the converter and the battery bank – or the battery bank itself.
- Check there is charging voltage on the battery bank terminals,
- Confirm the battery isolator is on,
- Check for blown fuses or circuit breakers between the converter and the battery bank,
- Ensure the wiring is in good order.
Check Your Battery
If everything along the circuit, from the AC power to the battery, is fine, the fault must be with the battery itself.
To check your battery, first of all, isolate it.
Now check the battery’s voltage using your multimeter. Your battery reading on the multimeter should be between 12.3 and 12.7 V. If it is lower, your battery is flat and needs either a charge or replacement.
Learn more about how to carry out a full battery test in our Campervan Electrics Handbook.
RV Converter Troubleshooting
If your converter is bad, replacing it’s often easier and more cost-effective than trying to repair it.
Geekery Alert – How To Check tAn RV Converter’s Resistors & Circuit Board
If you’re sure that the problem is with the converter and know a thing or two about electrics and electronics, you might want to delve a bit deeper before buying a new converter.
The converter’s resistors, diodes, capacitors, or circuit board could be the cause of your troubles.
Before proceeding any further, let us warn you:
- Trying to repair the circuit board yourself will likely void your warranty.
- In most cases, replacing the circuit board will cost more than replacing the entire unit.
- We recommend simply replacing the converter.
- Electricity can kill! Even small and seemingly insignificant circuit components are dangerous if touched when live!
If you still want to try your hand at it, read on.
Circuit boards are susceptible to wear and tear, just like any other component of the RV.
Inspecting a circuit board will only come easily if you are trained in electrical and steady-state electronic components.
Inspect the circuit board for signs of damage, and consult with an expert if you find something wrong.
You might have to replace the entire converter if the circuit board has been damaged.
Sometimes, RV converters might also use resistors. Resistors bring the voltage and current of the battery in line with the required output.
If your converters resistors are faulty, they may cause your battery to get overloaded.
If your diodes and capacitors are faulty, they will prevent the electrical current flow conversion from AC to DC or the regulation of the voltage level being supplied.
Fixing a faulty circuit component is difficult because you must take apart the whole converter.
If you are not handy with electrical equipment, soldering irons, advanced use of the multimeter functions, and knowing how to read the circuit board, we suggest avoiding it.
How To Take Care Of Your RV Converter
RV converters rarely fail due to anything other than wear and tear. Ensuring it remains clean, dry, and dust-free when not using it will help prolong its life.
Before heading out on an extended RV trip, give your system a thorough health check.
Test your battery, inverter, converter, appliances, and electrical devices.
Ensure that everything works as expected and there are no faults, blown fuses, or other problems.
Missing out on routine checks can cost you a lot, especially since once you’re in a remote area, qualified technical help will be hard to find and expensive to boot.
Here are some things to take special care of before your next RV trip:
- Test all your electrical components (with a multimeter if necessary). Ensure that your battery, converter, and AC inlet are all working properly and in tandem.
- If you have an older RV, ensure that parts aren’t worn out. Check for blown fuses; if you find any, investigate to determine the cause.
- Keep track of how many cycles your RV battery has. That’s not easy, but if you are a heavy user, make assumptions about how often they will have cycled. If you’re a low user, use the battery’s annual life span as your guide. Most batteries come with rated cycles and/or years, letting you know how many times you can recharge them. Beyond that, they start losing their capacity to charge.
- RVs that spend much time in humid areas near the coast (like Florida) seem to have a shorter battery lifespan. Give that due consideration.
Here are a few things to take care of when you reach your campground:
- Before plugging into the campground’s power supply, turn off your RV’s circuit breaker. If you don’t cut off the circuit breaker, you might experience a power surge when plugging in. This can cause damage to your electrical system. You open the circuit breaker only when you are plugged in and ready.
- Ensure that your connection is good when you plug into the charging port and the breakers are correctly connected. If you need help with anything, talk to the campground officials and get it sorted out before plugging in.
Frequently Asked Questions
When Should You Take The Problem To A Professional Repair Shop?
This is all a question of understanding your limitations as far as electrical systems are concerned.
Most of us RVers are pretty handy where DIY is concerned; we love to solve our problems on our own or with the help of fellow campers.
However, dealing with mechanical problems is more intuitive and easier. Dealing with electrical circuitry is a whole other beast.
If you don’t have the skills to follow the fault-finding steps above, it’s best to get a qualified electrician to diagnose the problem.
If you’ve followed all the fault-finding steps described here and are confident you have a bad RV converter, it’s rarely worth the trouble or cost of going to a professional repair shop.
The easiest and most cost-effective solution is to replace the unit.
What Is The Cost Of Replacing An RV Converter?
To understand what it might cost you to replace your old converter, you first need to know what size RV converter you need.
Several online calculators are available to help you find the right size. Our complete RV electrical design tool will do the job for you (and much, much more).
The size you need depends on your RV battery bank and how fast you want the RV converter to recharge it. RV converters mostly come in sizes between 10A and 80A, and quality varies between manufacturers.
Victron sits at the high-quality end of the scale, and you can expect to pay at least $200 for a 30A Victron Converter, but you can find more budget-friendly options too.
In Conclusion
Fault-finding electrical systems in an RV can be a daunting task.
But with patience and systematic attention, it’s often possible to identify the culprit without too much hassle.
RV converter problems are relatively rare. But if you have a bad converter, you may prefer to replace it than try to fix it. It’s usually simpler and often more cost-effective in the long run.
Plus, learning to use a multimeter is a valuable skill you’ll likely use repeatedly during RVing adventures.
Leave us a comment below and let us know how you’ve encountered troubleshooting electrical systems on your travels!
Graham Bogie

Graham is a seasoned marine electrical engineer with two decades of experience designing customized electrical systems for plant machinery and converting campers and overland vehicles. His expertise has led him to author the reputable Campervan Electrics Handbook and become the chief designer of the RV Wiring Design Tool. As a knowledgeable figure in the field, his YouTube channel, blog, Facebook group, and newsletter, offering electrical advice and product reviews, reach more than a million users each year.

Hello, great informative article!
I have a question after systematically determining my Progressive Dynamics converter, which I installed 4 years ago, is the cause of batteries not charging. I have 118V AC power to the circuit board of the converter, no DC output. I found a blown ceramic fuse on the circuit board after continuity tests. (This fuse had continuity from the black hot lead to the fuse, but none after the fuse). I had another fuse soldered in, confirmed continuity and reinstalled the converter carefully powering the system back on. Fuse blew again.
My question is, is this circuit protection fuse only going to blow due to bad diodes, resistors, capacitors, or a short on this circuit board itself, meaning a simple replacement of the converter will fix it or can there be something else in the whole system causing that specific fuse to blow? All fuses on the DC panel after the output are good. The fault is at the fuse on the board. I would like to avoid buying another converter just to have that same fuse blow.
My thoughts are that if it’s elsewhere in the system, other fuses on the DC panel would blow, or the breakers would trip and that this specific fuse is just to protect the converter’s circuit board itself, and the issue is isolated to it.
Thanks
Bill
Thanks Bill, we suspect there is a component that has failed or insulation / short circuit that’s failing when voltage is put on the circuit board. Without being able to look I suggest it’s kaput. So either ask at a repair shop that can check the components or a new replacement is probably the answer I am afraid to say.