Need a definitive list of solar system components, including all the fittings and tools needed to install it? Here it is!
Are you tired of being tethered to noisy, expensive campsites with unreliable electrical connections?
Do you want to experience the freedom of off-the-grid camping with the added benefit of sustainability?
If so, a DIY solar power system is perfect for your campervan, motorhome, RV, or boat!
If you’re starting out, check out our beginner’s guide to RV solar systems.
When you click on links to various merchants on this site and make a purchase, this can result in this site earning a commission. As Amazon Associates, we earn from qualifying purchases. For more info, please check our disclosure page.
Solar Components Shopping List: Parts, Fittings & Tools
You will need the following main components to install a solar panel system for your RV.
We’ve also listed all the tools and fitting you’ll need to install an off-grid solar system.
Solar Panels
Solar panels are the backbone of your solar system. Their solar cells collect sunlight and convert it into electrical power. 12-volt solar panels are the most common for RVs, but you can also use 24-volt or higher panels, depending on your needs.
We use 4 x 100w Renogy monocrystalline panels on our camper’s solar array, and the dimensions work for our roof.
Learn more in our guide to campervan solar panels.

Enter coupon code MowgliAdventures for 10% off at Renogy
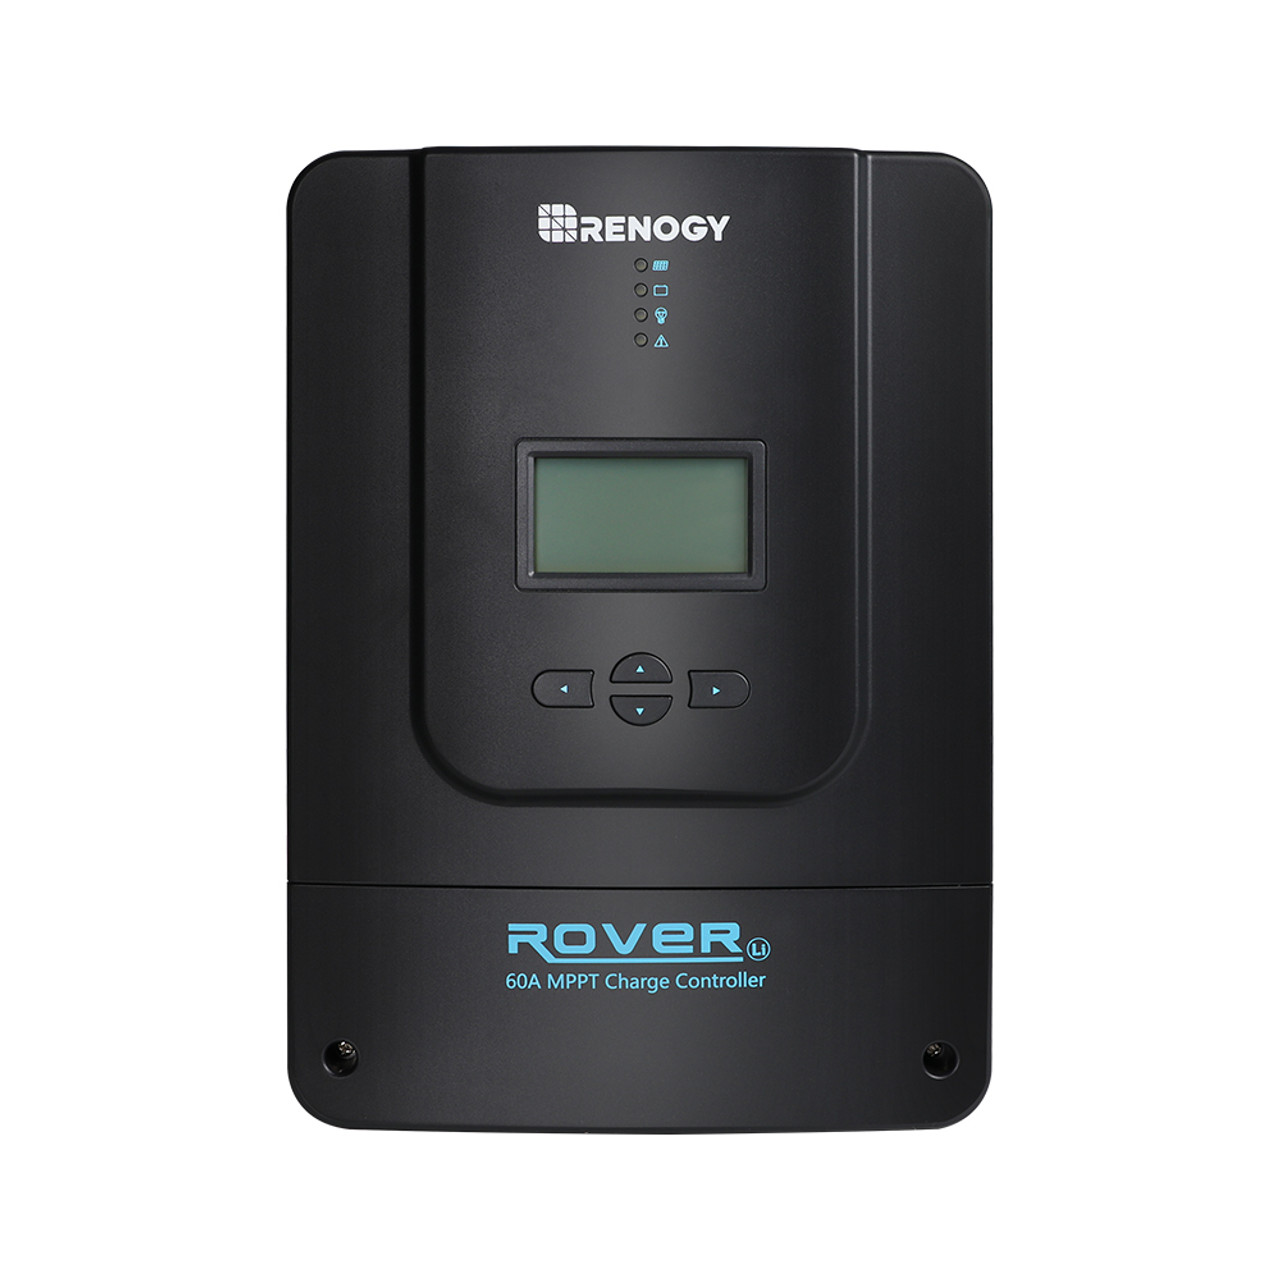
MPPT (Maximum Power Point Tracking) Solar Charge Controllers
A solar charge controller regulates the flow of electrical power from the solar array to the battery bank. It prevents overcharging and helps maintain battery health.
Ensure the charge controller you buy is compatible with your solar panel’s voltage.
We use a Renogy 60A MPPT Solar Charge Controller to regulate electricity from our solar array.
If you need help determining what size you need, use our online RV solar calculator to help.
Enter coupon code MowgliAdventures for 10% off at Renogy
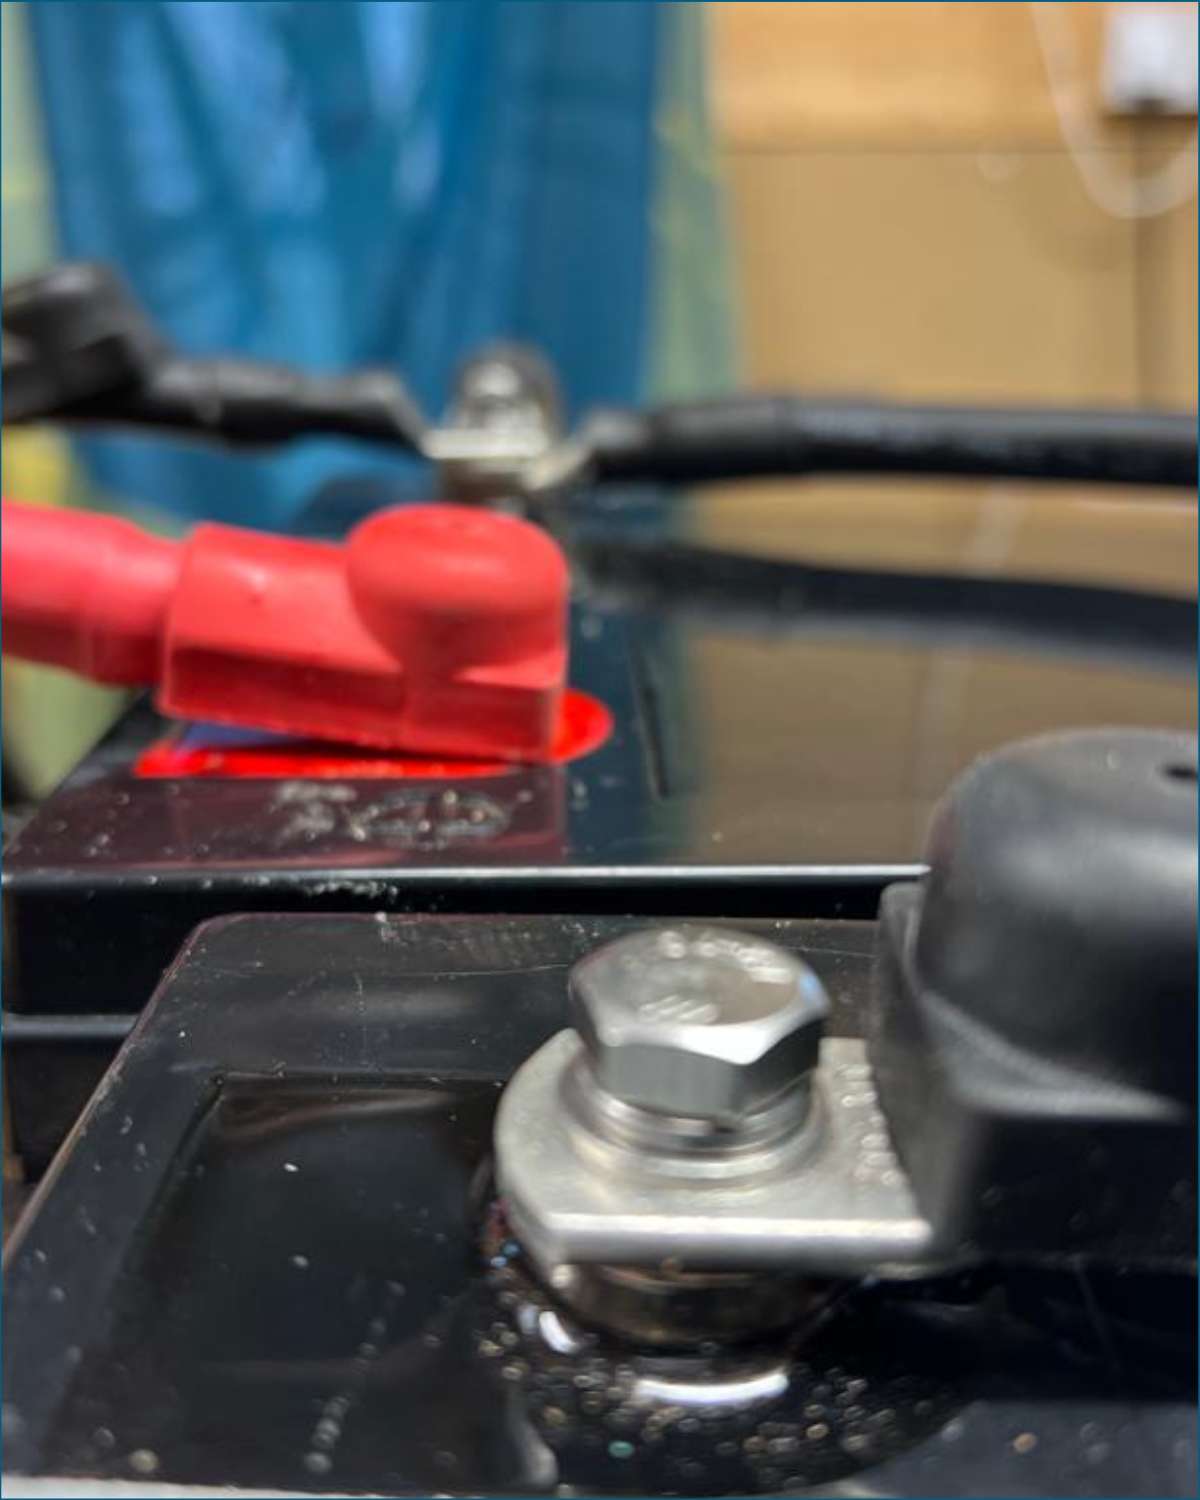
Deep-Cycle Batteries (Preferably Lithium)
Deep-cycle batteries store the electrical power generated from solar power systems. They are specifically designed for long-term energy storage and discharge, making them perfect for RVs.
We’ve installed 2 x 200Ah Renogy Lithium batteries in our camper van conversion and love them! Read more about the best lithium batteries here.
We highly recommend investing in lithium batteries if your budget will stretch. They save space, are far more efficient, and help you stay off-grid longer.
Alternatively, take a look at AGM or gel batteries.
Flooded lead-acid batteries are dated and are now the most inefficient energy storage system. So they’re best avoided if you can help it.

Enter coupon code MowgliAdventures for 10% off at Renogy
Inverter
An inverter converts the batteries’ direct current (DC) power into alternating current (AC) power. This allows you to run household appliances and electronics that require AC power, such as TVs and laptops.
They aren’t essential if you don’t use any AC appliances in your van. Read more about what an inverter does and if you need one here.

Enter coupon code MowgliAdventures for 10% off at Renogy
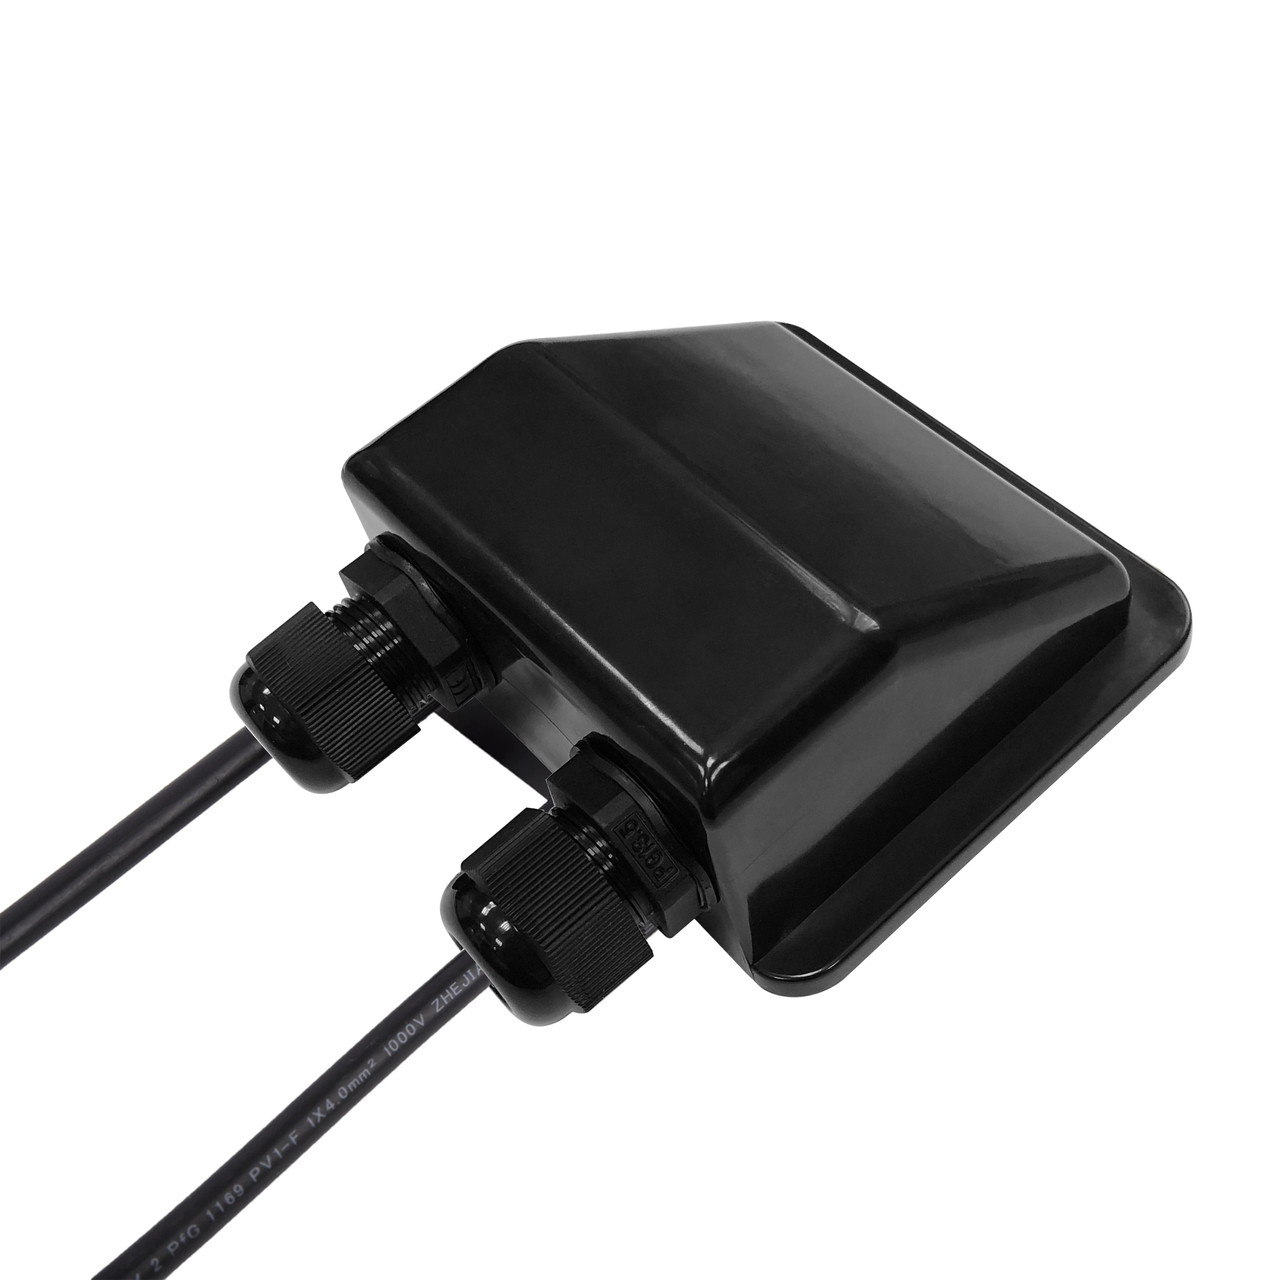
Solar Entry Gland
A solar entry gland is a waterproof fitting that allows you to pass your electrical cable safely into your van.
It’s essential when installing solar on your RV’s roof, as it protects from water, dust, and other debris.
Enter coupon code MowgliAdventures for 10% off at Renogy
Solar Panel Mounting Brackets
Solar panel mounting brackets are necessary for attaching your panels to your RV’s roof.
Choosing ones specifically designed for solar panels and strong enough to withstand wind, rain, and other elements is essential.
We used these mounting brackets on our campervan conversion. Check out our post for other solar panel mounting ideas.

Enter coupon code MowgliAdventures for 10% off at Renogy
Solar Wires & Battery Wires
You need wires to connect the solar components. For a safe and efficient installation, you must choose the correct wire size.
The size of the cables will vary based on the solar panel sizes and how you configure the installation. Plus, you’ll need a wire to connect the MPPT controller to the battery bank.
They are usually different wire sizes. You can learn more in our definitive solar panel wire size guide.

ANL Fuses
Fuses are an essential safety feature in a solar installation. They protect your system and components from short circuits and overloads that can cause severe damage.
It’s important to choose the correct size fuse for your system based on the amps and voltage of the solar panels and wires you are using.
Most RV camper solar setups need an ANL fuse between the MPPT solar charge controller and the battery bank. They are rated to handle higher currents than inline fuses.

Enter coupon code MowgliAdventures for 10% off at Renogy
Inline Fuses
Inline fuses provide additional safety for wiring between the solar panels and the MPPT controller.
They are usually lower amperage than ANL fuses, so it’s essential to choose ones that handle the combined current of your solar system.
If you haven’t already, sign up for a free copy of our Interactive RV Solar Design Tool, which will do all the hard work for you!

Enter coupon code MowgliAdventures for 10% off at Renogy
MC4 Connectors
MC4 is the most common type of connection used on RV solar panels.
They fit together, providing a secure and waterproof connection between the solar panels.
There are four types of MC4 connects:
- regular MC4 connector (1-to-1)
- Y branch connector (2-to-1)
- 3-to-1 branch connector
- 4-to-1 branch connector
How many and what combination you need depends on how many panels you have and whether you wire them in series or parallel. You can read more about whether series or parallel is best here.

Enter coupon code MowgliAdventures for 10% off at Renogy
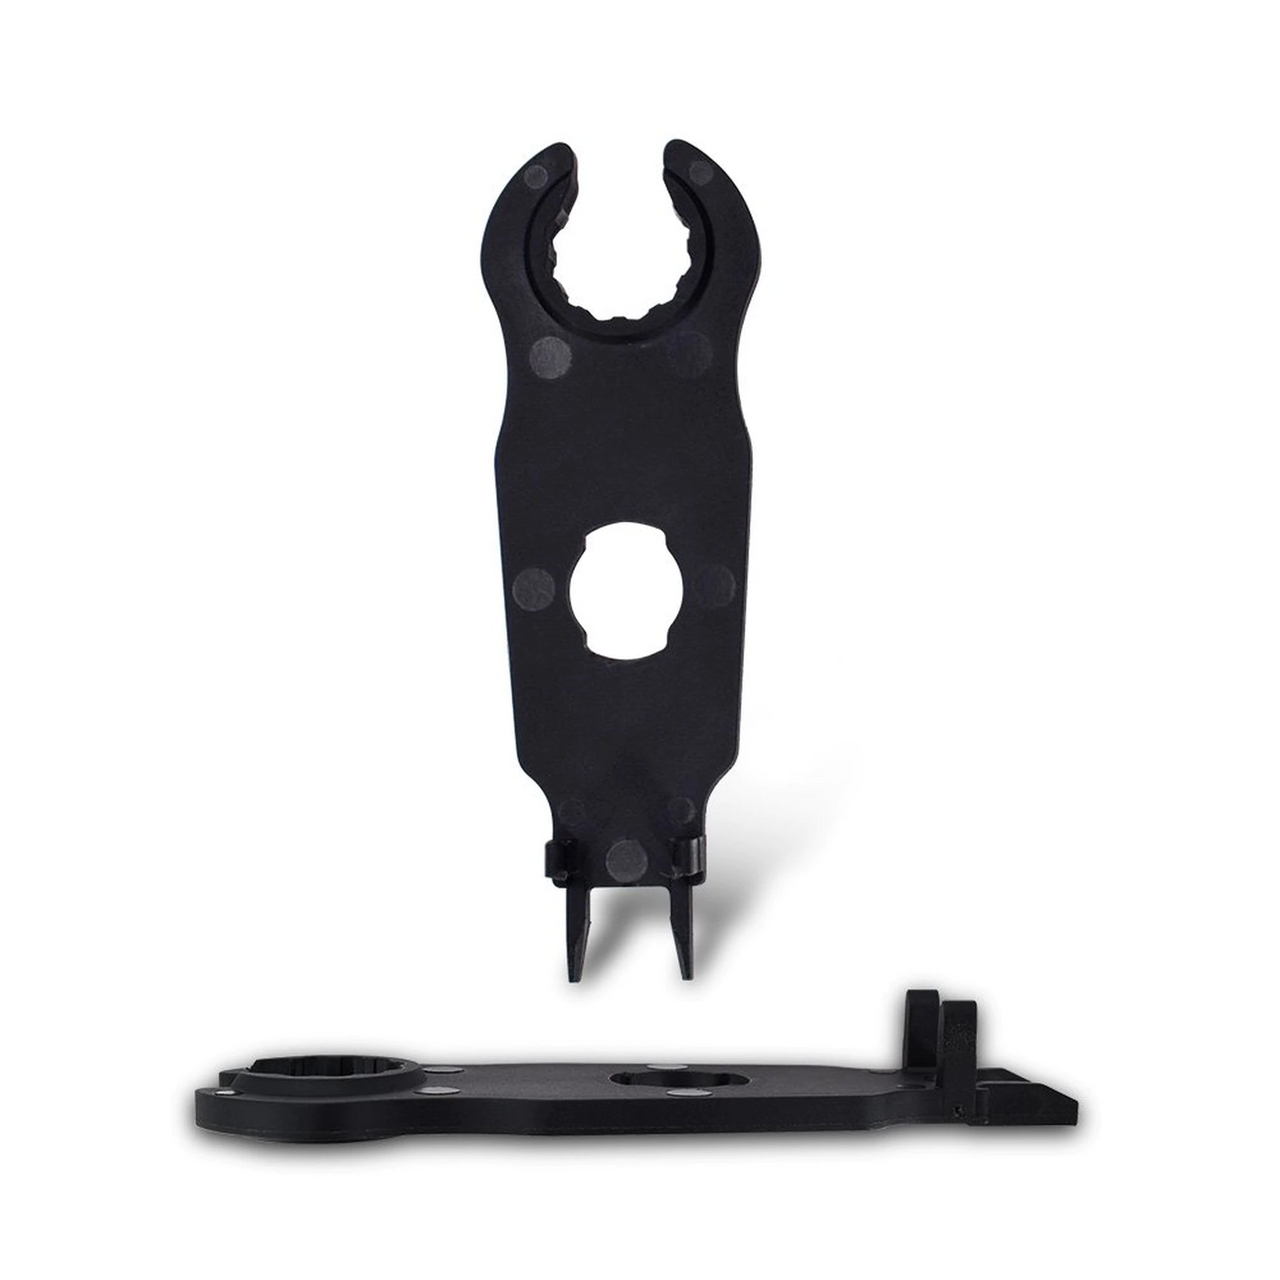
MC4 Assembly Tool
An MC4 assembly tool kit helps connect and disconnect solar panels. It can make the process much easier and quicker.
Enter coupon code MowgliAdventures for 10% off at Renogy
Pin Crimps
The pin crimpers are used to tidy the ends of wires before they’re connected to the MPPT controller. Therefore, ensuring they are done correctly and securely is very important.

M8 Ring Crimps
M8 ring crimps are perfect for connecting solar wires to the battery terminals.

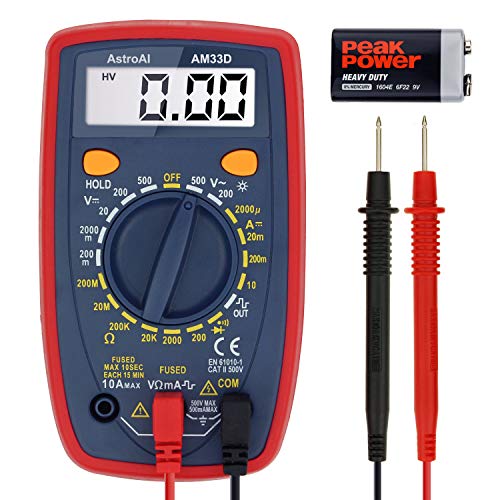
Multimeter
A multimeter is essential for testing the electrical connections and ensuring everything is connected correctly and wired before turning it on. It’s a small but invaluable tool to have in your RV toolkit.
You can learn more in our guide to using a digital multimeter.
Electrical Screwdriver
An electrical screwdriver is also handy for ensuring all the screws are tightly fastened. It’s a good idea to check them periodically, especially after a long journey.
Electrical screwdrivers are insulated to prevent shocks.

Adhesive Sealant
Adhesive sealant is essential in campers for maintenance repair jobs.
You’ll also need it to seal your RV’s roof after you install your solar panel setup. It’s an important step that should not be overlooked.

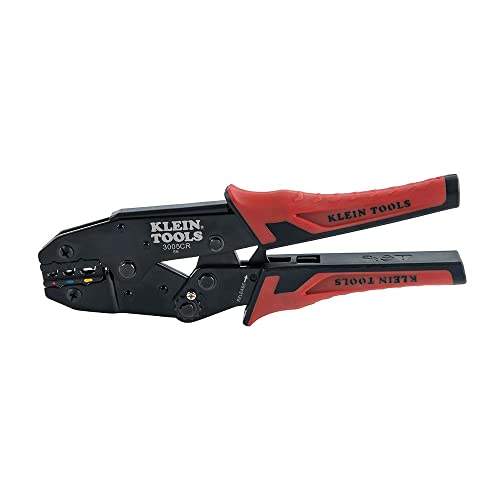
Wire Crimpers
Wire crimpers are special tools that are used to connect wires. They are important for ensuring the electrical connections in an RV solar system installation stay safe and secure.
You’ll use this tool for most electrical jobs in your camper.
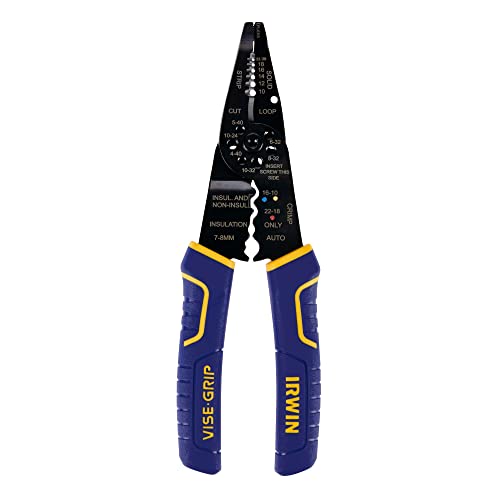
Wire Strippers
Wire strippers are tools used to remove the plastic cover from wires.
When you prepare wires for attaching the MC4 connectors, or crimps, you’ll begin by stripping its protective sheath. This tool makes that job simple.
Wire Cutters
Wire cutters are tools used to cut wires.
For example, they can be used when installing an RV solar system to cut wires to the correct size before attaching them to the solar panels.

Designing Your RV Solar System
Our user-friendly and powerful tool is designed to help you create a complete blueprint for a customized and efficient solar system to power your entire RV.
Whether you’re a seasoned RVer embarking on a long expedition or a new camper looking to enjoy nature off the grid with all the amenities of home, our tool can help you build the perfect solar system for your needs.
Our Interactive RV Solar Design Tool is so easy to use that you don’t need to be a technical expert to create a customized solar system for your RV.
Input your preferences, and our tool generates a personalized wiring diagram for your solar panel system. It includes:
- Bespoke series and parallel wiring diagrams from solar panel to battery.
- Wire & fuse sizes
- Correctly sized MPPT solar charge controller
Don’t settle for a generic solar system when you can easily create a personalized solar blueprint that fits your unique needs.
Our Interactive RV Solar Design Tool makes it easy to get started and ensures you make the correct setup decisions.
You can buy a copy of the RV Solar Design Tool here or, for a limited time, sign up and download a free copy.
RV Solar Panel Kits
If you’re looking for a reliable and easy-to-install option, RV solar panel kits might be just what you need.
RV solar panel kits come with the necessary components, including solar panels, charge controllers, and mounting hardware. Some even include the inverter.
A few types of RV solar panel kits are available in the market, each suited to specific power requirements.
For example, if you have a smaller RV and only need to power essential appliances, a 100-watt kit might be sufficient.
However, consider a higher-wattage kit if you have a larger RV and need to power more advanced appliances like air conditioning units or refrigerators.
When selecting a kit, it’s also essential to consider the type of solar panel you want. There are two main types of solar panels: flexible and rigid.
Flexible panels are lightweight and easy to install but may not last as long as rigid panels.
On the other hand, rigid panels are heavier and more expensive, but they tend to be more durable and produce a higher quality of electricity.
Experience The Freedom Of Solar Power Today!
With a DIY solar panel system for your RV, you can experience the freedom of off-the-grid camping and the benefits of sustainable and clean energy.
Invest in your RV lifestyle today and join the thousands of RVers who have switched to solar power.
Graham Bogie

Graham is a seasoned marine electrical engineer with two decades of experience designing customized electrical systems for plant machinery and converting campers and overland vehicles. His expertise has led him to author the reputable Campervan Electrics Handbook and become the chief designer of the RV Wiring Design Tool. As a knowledgeable figure in the field, his YouTube channel, blog, Facebook group, and newsletter, offering electrical advice and product reviews, reach more than a million users each year.