Most RVers aren’t fans of rain. It’s awful to drive through, and it’s worse when you’re trying to camp.
However, rain quickly turns from annoyance to concern when water ends up inside of your RV.
An RV air conditioner leaking water inside when it rains is a common occurrence, and it’s one that you must address as soon as you notice it to prevent widespread and costly damage.
Thankfully, it’s usually relatively easy to fix an RV air conditioner that leaks when it rains.
Whether you’re at home or on the road, pull out your RV toolkit to get started.
Follow the steps below, and we’ll help you pinpoint the problem and make repairs so you can stop worrying about a ruined RV interior, mold growth, and other water damage.
Instructions: How to Fix Air Conditioner Leaks When It Rains
Diagnosing leaks can be difficult because the spot where water enters your RV may not be the spot where you notice the leak.
This is because water runs until it reaches the lowest entry point, which could end up being quite a distance from the origination point.
However, if you notice that water is coming in from around your AC unit, there’s a good chance there’s something wrong in that specific spot.
To figure out what that may be, you need to be methodical in looking over every point in which water may enter.
Warning! Always seek the assistance of a helper when climbing on the roof of your RV, especially when moving heavy equipment like an air conditioner.
Time: 30 to 90 minutes
Project difficulty: 2 out of 5
Equipment and Supplies You’ll need
- Ladder
- Screwdriver
- Wrench
- Caulk or sealant
Confirm the AC Shroud is Intact
The shroud is the plastic or metal cover that goes over your RV air conditioner to protect it from the elements. This cover helps keep out leaves, dirt, and water that may damage your AC or keep it from running optimally.
The best way to confirm that the AC shroud is intact is to climb to the roof of your RV. Inspect the cover from all sides.
If you notice that it’s missing, deteriorating, cracked, or broken, review your user’s manual to find your AC’s model number so you can purchase a new cover.
These defects could be what’s allowing water into the system and ultimately inside your RV.
Check for Loose Mounting Bolts and Bad Rubber Gaskets
Your air conditioner is attached to your RV’s roof with mounting bolts, and water is kept out courtesy of rubber gaskets that seal against the RV roof once the bolts are tightened.
However, as you drive, the vibration of the road may cause these bolts to loosen, providing water with the perfect entry point into your RV.
If this is the issue, fixing it can be as simple as tightening the bolts or replacing the rubber gaskets.
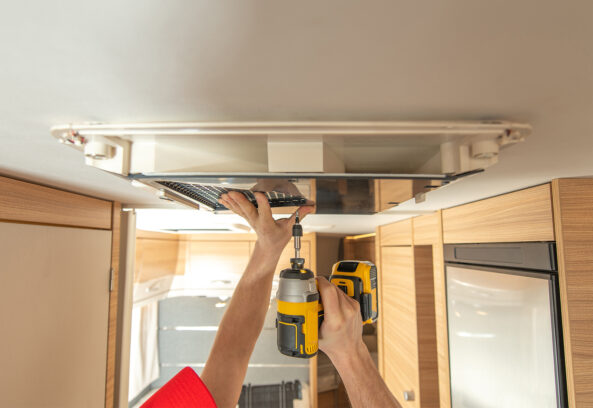
- The easiest way to access the AC’s mounting bolts and rubber gaskets is from the interior of the RV. Remove the AC grill, and locate the mounting bolts. In most RVs, there will be four total.
- Using your hand, first inspect the rubber gaskets. They should be springy and flexible. If they’re hard, crumbling, or broken, you need to replace them.
- To replace the gaskets, head to the RV’s roof with tools to remove the AC unit.
- Untighten the mounting bolts, and remove the AC unit.
- Remove the broken rubber gaskets, and replace them with new gaskets.
- Reattach the AC unit, and tighten the mounting bolts. When tightening the bolts, tighten until firm, and then a little more. When you’re done, the rubber gaskets should be compressed by about 50%. Overtightening the bolts can damage the gaskets or prevent them from creating a watertight seal.
- Assuming the gaskets are in good condition or you’ve already replaced them, check the tightness of the mounting bolts.
- Use a wrench to slowly test the bolt. If it doesn’t move with light pressure, move on to the next bolt.
- If you locate a loose bolt, tighten it until the gasket has been compressed by 50%.
- Repeat each step for each bolt.
Ensure Adequate AC Clearance
RV air conditioners need to have some space between the bottom of the unit and the roof of your RV. T is gap gives accumulating water, from rain or condensation, a way to drain away.
If your AC sits on the roof, or the gap is sealed off with caulk, water will have nowhere to escape and will pool, eventually making its way into your RV.
Assuming your AC was professionally installed, this gap will be present. E sure that it’s clear by removing debris or caulk that may have been added later.
Locate Other Points of Entry
You may assume that your RV air conditioner leaks when it rains due to the location of the drip or water damage, but it’s possible that water is coming in from somewhere else entirely.
Assuming you’ve checked your AC’s mounting bolts and gaskets, the next likely culprit is another opening somewhere on your roof.
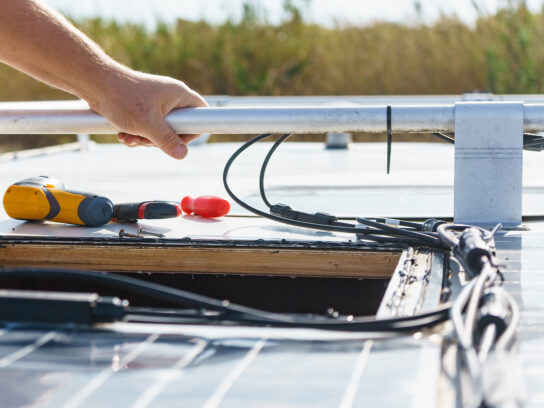
Have you recently installed solar panels? Do you have a wobbly antenna connection?
Carefully inspect the entire roof of your RV, looking for plumbing vents, ladder mounts, lighting fixtures, skylights, and other openings that may not be completely sealed.
If you notice cracking, crumbling, or missing caulk, scape off what remains, carefully clean the surface, and then apply new sealant.
Look for Roof Damage
The worst-case scenario when you have water dripping into your RV is that your roof is damaged.
Roof damage can be as minor as a missing sealant at a seam or as serious as considerable deterioration due to exposure to the elements.
In some cases, you may be able to repair the damage and stop the RV air conditioner leak yourself by using a sealant or rubber coating on the compromised area or even the whole roof.
However, in most cases, it’s best to seek the advice of a professional rather than take on this big job yourself.
There’s no need to panic when you notice that your RV air conditioner leaks when it rains.
As long as you move fast and carefully, you can figure out what’s causing the issue and fix it so that you can get back on the road without fear of water damage.
In most cases, it’s loose mounting bolts, broken rubber gaskets, or compromised seals around other fixtures that allow water to leak in.
However, in some cases, you may discover roof damage that requires the help of a professional for proper repairs.
Angela Devaney

Angela Devaney, a former IT project management professional, embarked on an adventurous journey of full-time travel, which included touring West Africa in a converted overland truck and converting an ex-military 4×4 Sprinter van into a camper for a five-year South American expedition. She now utilizes her hands-on experience to create practical RV living and van life advice as a full-time digital media producer, reaching over a million users annually through her YouTube channel, blog, and newsletter. Angela also lends her expertise as the editor-in-chief of the Campervan Electrics Handbook.