Your camper van insulation and ventilation is integral to the comfort level of your van life.
A well ventilated van will help remove hot air, cooking smells and water vapour so will smell fresh.
A well insulated van will be warm and cosy in the cold and cool in the heat. Insulation and ventilation work hand in hand so consider both before you start your installation.
Camper van conversions are time consuming and can cost a lot of money so it’s important to get this right. Even if you’re buying a campervan, used and pre-loved, it’s worth understanding what to look for in this respect.
This post will guide you through all you need to know about campervan ventilation and insulation to help you in your van build.
It’s a long post and we’ve been pretty thorough on both subjects. If you want to jump forward to the sections you’re most interested in you can click these links:

DIY Campervan Conversion Plans
Before we delve deeper into all things insulation and ventilation, here’s some quick links to help you with your detailed DIY campervan conversion plans.
Campervan Ventilation
All the hard work and expense of your camper van conversion is bound to end up in a comfortable van right?
Not if you don’t have appropriate campervan ventilation installed.
If you’re converting or buying a campervan, used and pre-loved, understanding ventilation is critical.
It’ll help you get the air flow you need in your van so you don’t live in a space that stinks like a rugby team changing room on a wet day!
This section guides you through everything you need to know about campervan ventilation including why you need it, types of van ventilation, the best roof vents, installation tips and an overview of our Sprinter van ventilation too .

Why is ventilation in your camper van important?
Compared to modern houses, space in a campervan is severely restricted.
Space is limited even in the largest campervans, motorhomes and RVs.
Living in such a confined space, cooking, showering, sleeping and so on, will naturally generate lots of hot air and odours.
Without good ventilation all this will introduce issues, making living in a van a bit grim.
- Unpleasant odours
- Hot and stuffy air
- Condensation
Let’s take a look at how good ventilation helps each of these issues.
Getting rid of smells and air pollutants
Imagine how a teenager’s bedroom stinks. It doesn’t just smell that way because the occupant is young.
He (because he’s probably not a girl) may have dirty laundry piling up. He may eat snacks in his room without emptying his bins or hoovering up.
He may even have a minor BO problem.
And the last thing he’ll do, is leave his door ajar and open a window.
It’s kind of a similar situation in your campervan, albeit you’re hopefully a bit more tidy than our imaginary teenager.
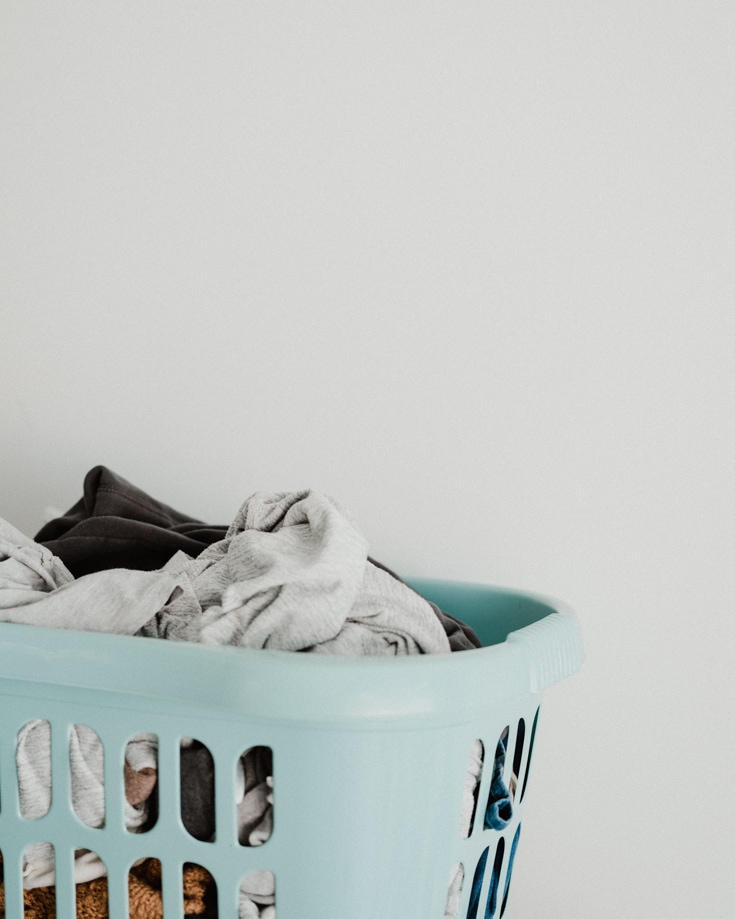
Cooking smells, food waste, van life laundry and body odour can all add up to a stinky concoction if not kept in check.
Good ventilation will keep fresh air circulating through your van.
Stale air containing cooking smells and other odours is replaced by clean air, helping to eliminate unpleasant odours completely.
Climate control in your camper

Without ventilation, a campervan’s interior can get pretty hot, much hotter than the outside temperature.
Your metal box can become a bit of an oven in direct sunlight. And the insulation you worked so hard on installing, hinders the escape of the heat too.
Indoor cooking inside your camper van adds lots of hot air to an already small space. This makes your van hotter than is comfortable for most of us.
The answer is good ventilation to help regulate the temperature. Hot air can escape and is replaced by fresh, cooler air.
Avoiding the dreaded condensation

The more moisture in the air, the higher the humidity. Left unchecked humidity in a campervan is a recipe for all sorts of problems, sooner or later.
Mould blooms in humid conditions, not ideal for those with allergies. And your campervan interior will begin to suffer too.
Any fabric and wooden materials can begin to deteriorate and it’ll be another source of unpleasant odours.
When warm, moisture laden air hits a cooler surface, condensation is formed. Inevitably, the condensation will form on the windows, furniture and any bare metal it hits.
In turn, this will eventually lead to rust.
Condensation is the one thing you’ll want to avoid at all costs in a campervan
Where does all the moisture come from?
It’s remarkable just how much water vapour we create from simple activities in a van.
Steam from cooking and showering can produce a shed load of water vapour but so does breathing.
You can do things to minimise the water vapour produced.
- Cook outdoors as much as possible
- Avoid using the indoor shower (but not as much as a teenage boy)
- Keep the van warm
- Avoid hanging up wet clothes, towels and equipment
- Keep leak free!
Despite good intentions, you still need to live your life and your definitely need to keep breathing! You won’t eliminate water vapour in the air completely.
The only answer to solving the condensation issue is excellent campervan ventilation.
How much ventilation does your campervan need?
How much ventilation a camper van needs depends on a few factors. There’s no hard and fast rule, but more is definitely better than less.
The fundamental principles of ventilation remain the same.
The ventilation system in your camper will bring in clean air from the outside area and get rid of hot air from the interior. This will also help to remove any type of moisture that is hanging around in the air.
Your van needs enough ventilation to keep air circulating, removing the water vapour being produced.
So the more people using the camper van and sources of moisture, the greater the ventilation system needed.
Types of campervan ventilation
When you click on links to various merchants on this site and make a purchase, this can result in this site earning a commission. As Amazon Associates, we earn from qualifying purchases. For more info, please check our disclosure page.
A good campervan ventilation system will use a combination of methods for the most efficient air flow.
Your van isn’t airtight. The dash vents, door and body seals already provide an amount of fresh air into the van. This isn’t enough alone though.
Windows & wind deflectors
Opening windows in your campervan is a simple way to increase ventilation.
You don’t need to make any adaptations to your van so it’s cheap, quick and trouble free.
Of course, it’s not always an ideal solution.
Relying on natural airflow, on a still day with little or no wind, A couple of open windows doesn’t provide enough ventilation in a campervan to avoid condensation.
Open windows, especially when you’re asleep, are a security risk.
And if it’s raining, you’ll end up with water coming inside the van – the exact opposite of what you’re trying to achieve.
By adding wind deflectors, you can still open the windows and protect the interior from the rain.
Because they’re tinted, they also disguise the fact the window is open.
The opportunistic thief probably won’t easily notice the open window. It’s not 100% safe but it helps.
Alone, this still isn’t enough, but every bit of fresh air intake counts when it comes to ventilating a camper van.
Note | If you have a bulkhead separating the cab from the camper, you probably don’t have windows in the back compatible with wind deflectors.
Louvred air vents
A few louvred air vents fitted in strategic positions in the walls of your camper van will give a constant fresh air intake.
Vents located on the bottom of walls in the camper will help to bring in the cooled fresh air. Vents installed at the top of the walls will allow hot air to escape quickly.
Ideally, place vents in both positions to create air flow circulation.
You’ll need to cut holes in the side of the van to fit the vents but the products are low cost.
Make sure to fit fly screens behind each vent to stop unwanted bugs entering your camper van.
Like the opening windows, louvred air vents won’t offer a complete solution but they do have a part to play in the overall campervan ventilation system.
Wind powered roof vents
These wind powered roof vents are small so ideal for ribbed roofs such as those on a Sprinter van.
Powered only by the wind, they won’t drain your campervan batteries.
They can pick up quite a speed when driving to draw out air.
The extraction rates can get quite high so they’re more effective than the louvred air vents on the roof.
If fitted correctly, these roof vents are waterproof. Inconspicuous, they’re ideal for stealth camping and low cost too.
Roof vents
Now these are the best way to finish off a complete campervan ventilation system.
You’ll need to cut holes in the roof to install them.
Our Unimog camper, Mowgli had 4 of these pop up roof vents. Fly screens are already fitted and they open on all 4 sides, allowing for a fair amount of ventilation.
We used to drive with them open so we know they’re strong and robust.
The ultimate solution to campervan ventilation though is an electric roof vent. These 12v roof vents run off your campervan electrics.
Because they’re driven by a motor, you don’t have to rely on the wind for ventilation.
To have the best camper ventilation possible, install an electric roof vent. It’s one of the top ways to circulate air.
When choosing the best van roof vent for your setup consider:
- How much power they use – and make sure your campervan electric design accommodates it.
- 2 vents can work great together – one drawing clean, fresh air as the other expels stale, warm air.
- The size of your van v the power of the fan – small vans may not need the full capacity of some of the most powerful models.
- If you’re replacing an existing fan, check the size fo the opening.
- Ceiling height – can you reach the controls on a roof vent? If not, consider the remote control models.
- Height of the vent cover – tall covers may cast a shadow over your camper solar panels and may not be especially aerodynamic.
The best campervan roof vents
The range of electric roof vents varies a lot as does the features each offer.
They have features like automatic rain sensors, remote control, adjustable speeds and climate control.
There’s 3 main brands dominating the market: Fiamma, Dometic and MaxxAir.
Fiamma Turbo Vent
The Italian company, Fiamma are world renowned as a leading brand of motorhome and campervan accessories.
Their Fiamma Turbo Vent is their one and only offering for electric roof vents.
A 10 blade fan operates are 5 different speeds. The vent can be adjusted to either intake or exhaust air.
Technically it can shift upto 989 CFM of air (the higher the number, the better) and draws between 1.1 and 1.8 amps of power per hour, depending on settings.
It has an in-built thermostat to help control the temperature inside the campervan.
The cover is opened manually and finger touch controls allow for simple setting changes.
A Fiamma Turbo Vent will set up back around GBP £195 or US $223.
Check the latest prices and availability of the Fiamma Turbo Vent.
Dometic’s Fantastic Fan

In the 1970’s, the first battery operated fridges were made by WAECO. They’re now part of Dometic, who have a huge range of gear to support van life.
Their product range includes campervan toilets, fridges, awnings and more recently ventilation systems.
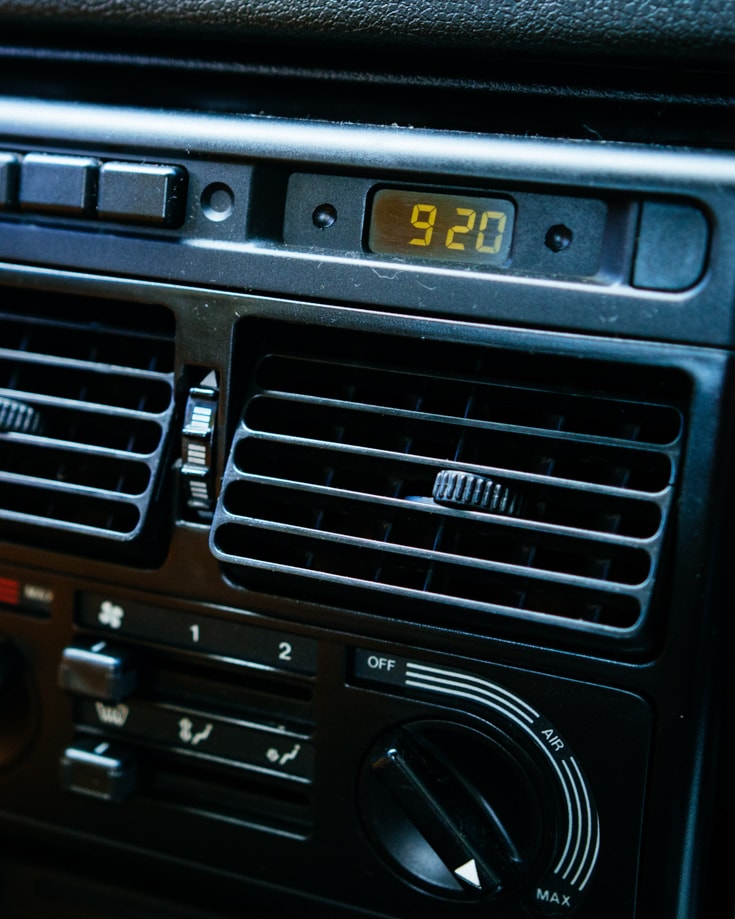
Dometic’s Fantastic Fan is popular for camper van conversions and it comes in 4 different models.
The top of the range model, the Fantastic Fan 7350, has 14 speed settings, rain sensor, so it closes automatically and has a remote control.
Technically it can shift upto 920 CFM of air and draws between 1.8 and 3 amps of power per hour, depending on settings.
It has an in-built thermostat to help control the temperature inside the campervan.
A Fantastic Fan 7350 will set up back around GBP £290 or US $330.
The most popular model is the Fantastic Fan 2250. It’s a cheaper option (about GBP £175 or US $200) and doesn’t have the rain sensor or remote control.
Both of which are just fancy features you can manage perfectly well without though.
Check the latest prices and availability of the Dometic Fantastic Fan.
MaxxAir Fan
MaxxAir have been around for getting on for 40 years.
Their campervan ventilations fans are top of the range products with the most advanced technology and features.
The MaxxFan 7500k is their top of the range roof vent.
With 10 settings, the rain cover that allows it to continue to operate even when rain is lashing down outside.
At it’s highest setting, the MaxxFan can shift a massive 1158 CFM of air and upto 4 amps per hour.
You can set the temperature sensor so the fan comes on and off automatically.
A top of the range MaxxFan will set up back around GBP £324 or US $370.
Check the latest prices and availability of the MaxxFan.
Ventilation installation tips
- Because cold air sinks, hot air gathers at the ceiling of the camper. So the roof is an ideal location for installing vents to help expel air.
- Place intake vents to bring fresh air in lower down on the camper van walls, creating a good flow of air giving the natural process a helping hand.
- Decide on your campervan layout before you install the vents. Try to avoid placing vents behind your furniture where possible. Install your roof vent either over your cooker, bed or both.
- Install a roof vent in any indoor shower area in your campervan. The aim is to extract all moisture before it condenses so make sure it’s plenty powerful enough.
- Install fly screens to all vents to prevent bugs making your van their home too.
- Cutting holes in your van is a nerve racking experience. Measure, measure and measure again before you start cutting.
- If considering installing floor vents, think about where you’re going to put them. The back of the van will be more dusty than the front. Make sure you can easily access the dust filters because you’ll need to clean them regularly.
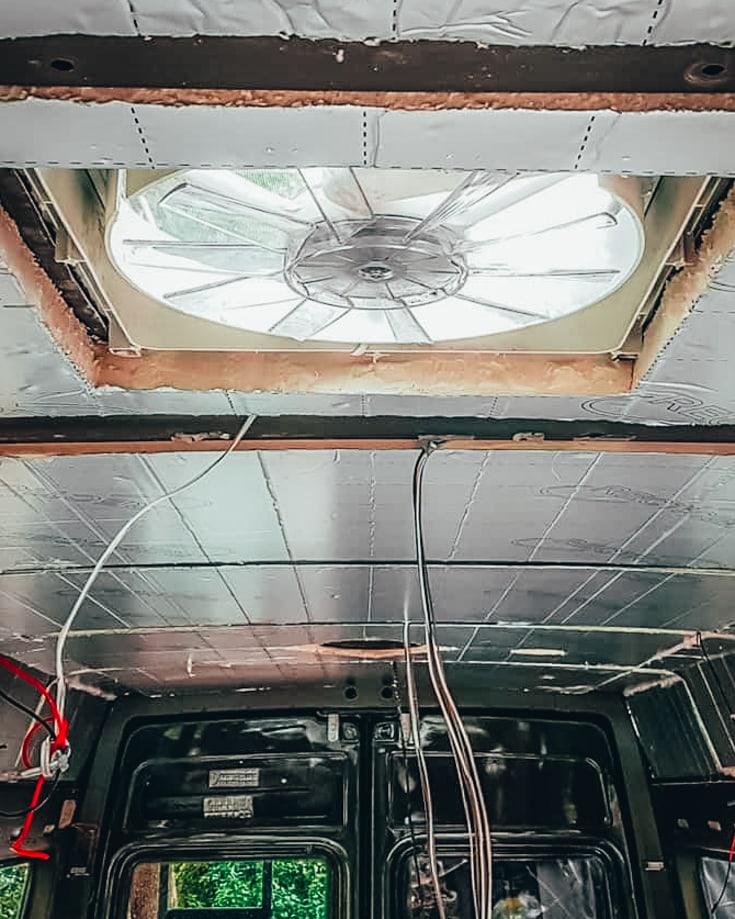
Our Sprinter conversion ventilation system

Because our Sprinter van Baloo was a minibus in a previous life, she had a factory fitted extractor fan already installed at the rear end of the living quarters.
It has one speed, is noisy and when we bought her, it only worked when the engine was running.
We changed the power supply so it now runs from the deep cycle campervan battery.
To keep our living space well ventilated without leaving doors open we needed another vent fan.
We opted for the Fiamma Turbo Vent. Not only is it the most budget friendly model of the best roof vents, it has the lowest demand on power for the amount of airflow it generates.
We’re more than happy with its performance too.
We’ve fitted wind deflectors to the passenger and driver side windows and these are really effective.
We also have a small roof vent in the bathroom ceiling. We don’t have an indoor campervan shower installed so the vent is more for keeping it fresh when the door is closed.
We’ve designed the electrics so the fan and bathroom light come on together with one switch.
The only other vent is for our composting toilet and (thankfully), this is enclosed so plays no part in our campervan ventilation system.
Campervan insulation
Regardless of the weather, if you want to be comfortable in your van you need to install the right insulation.
Planning our Sprinter campervan conversion took a while but the amount of time we spent discussing insulation outweighed everything else combined.
To insulate your campervan, you also need to think about where and where you’re going to travel.
Insulate for the conditions you expect to encounter most often. Everything else is a compromise.
So let’s take a look at what you need to know before you decide on what campervan insulation you’ll fit.
Why is insulation in your camper van important?
When you buy a van for a camper conversion it may have little or no insulation installed. It may have started life as a courier van or something of the like.
It never needed to be warm and cosy because it was never intended as a home. Now we want to convert our van into a comfortable camper van.
So how do we turn a metal shell into a home to keep us warm in the cold and cool in the heat?
Decent insulation, combined with good ventilation and sound deadening can create an environment anyone would be proud to call home.

Do I need sound deadening in my van?
Sound deadening is a nice to have.
An empty panel van is like a tin can, rattling and amplifying road noise.
Insulation will deaden this sound in the main. A lot of people also lay sound deadening pads on the wheel arches and side panels before laying the insulation.
We fitted them, but I have no idea how effective they are.
We dove Baloo when she was a minibus and she wasn’t significantly noisy. When she was completely stripped inside, she sounded like a tin can!
Once the sound deadening, insulation and carpeting was fitted she was much quieter.
I don’t know how much of a difference it’d make without the sound deadening in all honesty, but we’re happy with her as she is.
We used Noico 80 mil car sound deadening mat. It has adhesive on one side and a reflective coating on the other.
Stick the mats over the wheel arches and in the middle of each side panels.
The theory being it will reduce panel vibration and hence noise. They also add to the insulation a little.
Sound deadening isn’t cheap. As with everything else on the internet, for every person to swear by it, there’s plenty more who have the opposite opinion.
If you’re trying to keep your budget down, I think it’s safe to give it a miss.
How much insulation does your camper van need?
How much insulation you need depends on where you intend to take your van. You’ll need better thermal performance if you want to live in your van during cold winter months.
The primary aim of insulating your camper van is to reduce heat loss in cold weather and to keep the inside cool when it’s hot outside.
A nightmare of a question! You only have to google it and you’ll find a multitude of answers, everyone with an opinion on what is right and wrong and yet all inconsistent.
How, or rather where, you intend to travel is something to consider.
The climate you plan to spend most of your time will make a difference to how much insulation you need.
We’re from the UK and converted our camper to travel around South America initially. We knew we’d travel in cold, high altitude conditions of the high Andes as well as in the heat and humidity of Brazil.
But these are extremes and most of our time would be (and indeed is), spent in more moderate climates.
Too much insulation, while great for keeping the heat out for longer, is also terrific at keeping it in.
So while chilly nights would be cosy, we’d melt in the heat of the jungle.
It’s all a bit of a balancing act.
During our van build, we wanted to keep our all round windows. There’s no point travelling the world if we can’t look out on our ever changing garden.
However, glass is a good conductor for heat but not so good for insulation. We needed curtains, not just for privacy but to insulate the glass too.
When it’s cold, we leave the double lined curtains open to get the heat from the sun in during the day and close them at night.
In hot sunny places, we close the curtains during the day and open them at night to help dissipate the residual day heat.
With too much insulation the heat doesn’t escape so well. And in cold climes it takes a while for the sun to do its job in the morning.
So what is the right thickness and type of insulation?
It drove us mad when we started to research how we would insulate Baloo.
So we’re not going to even try to tell you what’s right or wrong.
It’s safe to say the colder the climate the thicker the insulation tends to be. Think of those refrigerated cargo box vans.
But we’re not planning to live in a mobile igloo, so you need to decide how deep you will insulate based on where you intend to travel in the future.
R-values and heat value per inch

A lot of insulation materials have an associated R-value to indicate the efficiency of that material in preventing heat loss or heat absorption under test conditions.
The test measures for heat conduction i.e. how well heat passes through the material.
In simple terms imagine a pan on a stove. If the handle has a low R-value then it gets as hot as the pan base because the heat is conducted into the handle.
With a higher R-value, the pan handle remains cool(er) to the touch.
For temperate climates the recommended level of R-value insulation is R30 for a house loft.
As a general rule of thumb, that’s around 8 -16 inches depth of loft insulation depending on the R-value.
We wanted to maximise the internal space inside the van, and we can’t afford to give away that much space.
Our advice is to go with the maximum R-value you can afford both financially and space wise.
OK so how thick do I go with my insulation?
How a campervan or RV conversion is used and where is unique to its owner. The variables are incalculable.
We have visited most climates in our van and we know our choices are a compromise.
It’s probably not ideal for the depths of a Canadian winter and too heat retentive in the hot humid Amazon. But on balance, our spec works for us.
So we have no prescription.
Campervan insulation materials
Here’s a list of the materials you can use to insulate your camper conversion. When deciding what combination of materials to use in your own conversion, consider your ventilation at the same time.
Avoiding and managing condensation is critical in maintaining a pleasant home.
Reflectix foil wrap
This material is like silver bubble wrap. Because it’s a radiant barrier, Reflectix is often used as sun shade on the inside of camper van windows.
There’s a lot of debate on how effective this stuff is as an insulator on the camper van walls though.
It is most effective with an air gap so this needs to consideration before adding the next layer of insulation.
The inside of most camper van walls consist of large flat(ish) panels and lots of smaller spaces too. Reflectix is easy enough to install on the larger panel areas with adhesive tape or spray.
We did not use this material.
Foam board insulation with rigid Panels
Polystyrene and styrofoam boards are low cost and quick and easy to fit to the large panel in the camper van. We used 25mm on the roof of our Sprinter van conversion and 40mm thick board in the walls.
In Mowgli our Unimog camper, we had 40mm boards all round. We used the boards that are foil lined on both sides as it gives a slight improvement on the thermal protection.
Cut the foam board insulation to neatly fit into the ridge areas of the walls. You can hold it in place with tape or glue.
A word of advice, it’d be easy to make the boards a tight fit between the ribs. There’s a risk once you have covered everything the boards might annoyingly squeak when you drive.
There is a similar risk of stacking them too loose.
Spray foam insulation
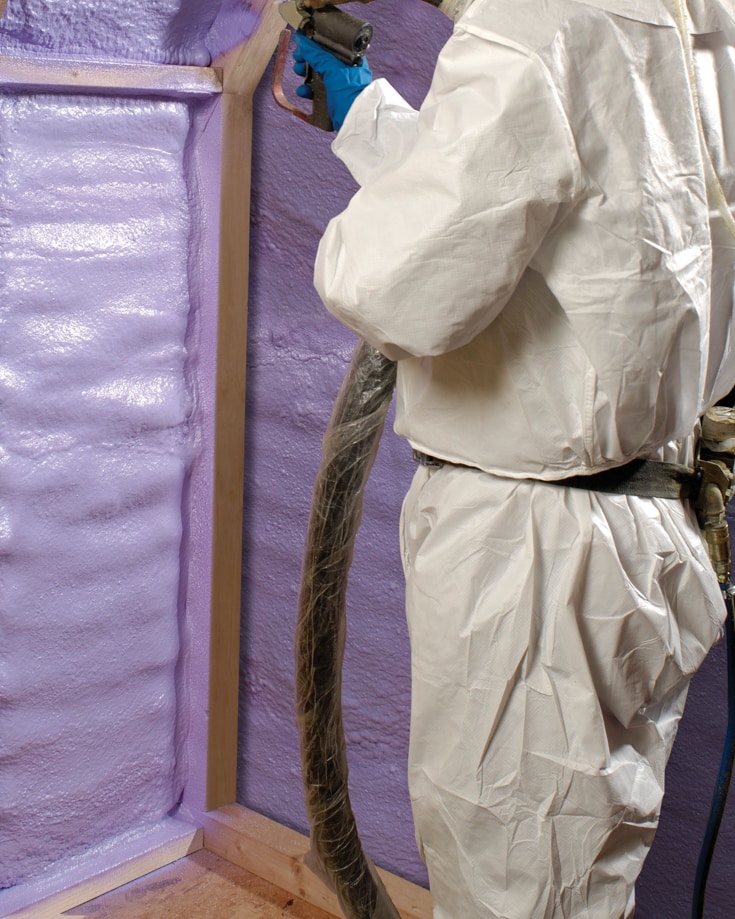
It is claimed this stuff has the highest R-value rating and so the most efficient insulation material. But it’s messy to apply and can be expensive if professionally done.
We avoided it.
I once heard of a chap who spent 9 months waiting for his brand new sprinter to roll off the production line.
He immediately got it insulated by a professional spray foam insulation firm. Later that day he shared a load of pictures of his destroyed panels on his shiny new van.
It seems the spray foam used by some firms to fill house cavities generates immense heat when applied and expands.
I don’t know if the van had interior panels fitted and they filled the cavities or just spray onto the interior panels.
Either way the panels van warped and he wasn’t a happy bunny.
I had my own bad experience using the cans of spray foam insulation I got from a local DIY hardware store. I tried to fill the gaps around our home front door. 20 minutes to apply and 2 days to clean up the expanded bright green gunge on the brick work and door frames.
It might be useful to fill the gaps in the panel ridge frames, but once in its not coming out. Ever.
So this prevents any future opportunity to run cables or service pipes. To be honest it’s just too messy for me.
We used rock wool for those awkward gaps.
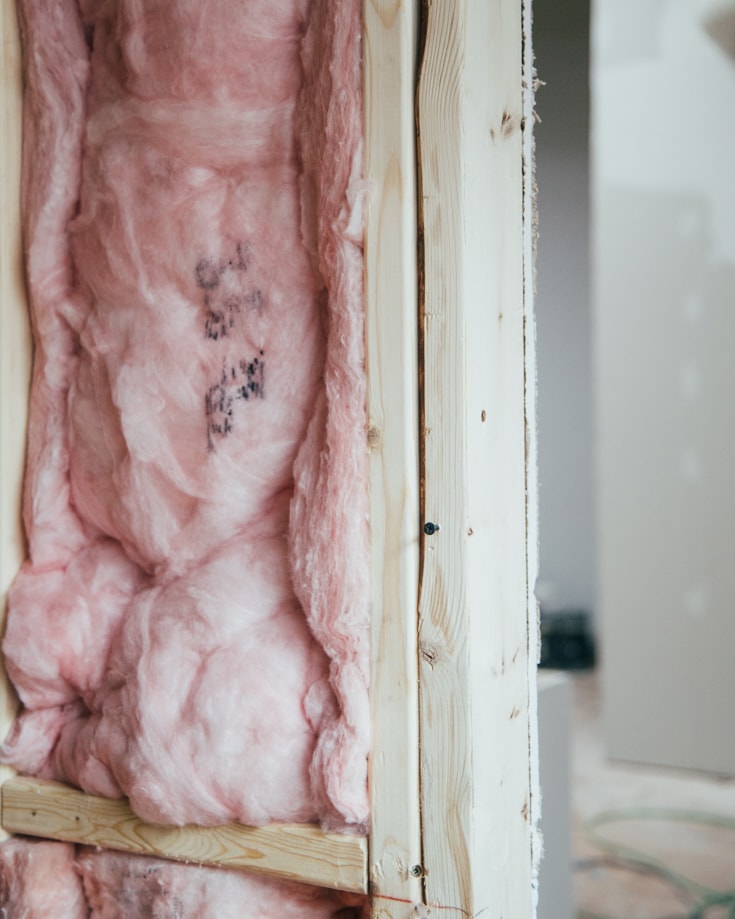
Loft insulation
This is the flexible rolls of material we find in many lofts.
The advantage of loft insulation is you can squeeze it into all the nooks and crannies you can’t fit the boards into. Again, the choice of materials is wide.
You can choose fibreglass, recycled plastic, recycled denim or wool. They all have different properties and R-value.
Wool tends to have the highest R-value (thermal protection). Fibreglass is nasty stuff to work with because it makes you itch and you need to wear a mask and gloves to install it.
It doesn’t handle moisture too well either. We used the recycled plastic bottle material in our Sprinter van conversion.
Vapour barrier
Many camper conversions add a vapour barrier over the top of the insulation and before lining the walls and ceiling. This will prevent any water vapour not ventilated making it’s way to the metal and eroding it over time.
Many converted camper vans use a combination of insulation materials. In our Sprinter van Baloo, we’ve used rigid panels with recycled plastic bottle loft insulation.
We tried to refit the original headliner as it was also insulated with wool and a vapour barrier too. That didn’t work out too well unfortunately. I ended up making a roof liner with thin laminate board and carpet.
And we chose not to include a vapour barrier this when we place the insulation board and rock wool up there. We’ve not used a vapour barrier on the walls either.
As a result we always keep the van fully ventilated even when dry stored.
How to insulate your van walls and van ceiling

With so many material choices we went for the simple approach.
If you’ve planned where all your cables and pipes are going to run and have fitted and tested all your electrics and service pipes, then you’re ready to begin insulation.
Attach those sticky sound deadening pads to the middle of each panel space if you decided to have them.
Cut the foam board so they loosely slot into the space between the wall ribs.
Sometimes getting the board behind the ribs is a challenge so you might need to cut several pieces. Stick them in place using tape or glue.
Try not to have separate board edges hard up against each other or any other hard edges. There is a chance they will annoyingly squeak as they rub together as you drive along.
Fill the gaps with rock wool, and use tape to hold them in place until the top or interior wall covering is in place.
We used 3mm hardboard with car carpet coverings as our top layer. Some people use wood or aluminium backed formica as their top cover and interior finish.
If you choose to fit a vapour barrier then the time to fit it is after filling and taping the insulation board and rock wool, but before you fit the interior wall.
When you fit the boards and rock wool make sure not to crimp any pipes or cables. Make sure those cables and pipes still run and terminate in the places you wanted them.
Useful planning tip | avoid having any joints or connections in any pipes or cables hidden within the insulation layer. They’ll be quite tricky to access if you need to fix anything in the future. Plan all you connections outside of the insulated area.
How to insulate a van floor
On some winter days when I step out of bed in my bare feet, I wish I’d insulated our camper van floor much better. It’s cold and I need to reach for my flip flops.
We installed10mm hardboard and Karndean floor tiles on top of the factory fitted 1” laminated wood floor that had a heavy duty linoleum top layer.
I thought this would be enough insulation for the floor. Seems not for those occasional mornings.
If I were to go back and insulate the floor again, I’d build a 1” raised floor on battens and fill the air gap with rock wool.
This raised floor would need to be well structured to prevent the top floor flexing or sagging as you walked on it. It’d also reduce the interior height and add a bit more weight to the build.
For now, I’ll keep my socks on.
Your camper van insulation and ventilation work together to help provide a clean, warm and dry home. Because you’ll only install the insulation once, our advice is to do it well.
Have plenty of ventilation and the structure of your camper van will give you many, many comfortable van life years.
Graham Bogie

Graham is a seasoned marine electrical engineer with two decades of experience designing customized electrical systems for plant machinery and converting campers and overland vehicles. His expertise has led him to author the reputable Campervan Electrics Handbook and become the chief designer of the RV Wiring Design Tool. As a knowledgeable figure in the field, his YouTube channel, blog, Facebook group, and newsletter, offering electrical advice and product reviews, reach more than a million users each year.

This is beyond helpful! Embarking on converting a 17 seater Ford Transit very soon..so excited!
In the winter I want to close all my fans and not let cold air in. But then i will die because i’d be in an airtight box with no ventilation.
How do I insulate and stay warm in the winter but still ventilate to live ?
Hi Sean – now we don’t want you dying – please open a window! Seriously though, you have limited choices. Ventilation is essential in helping to prevent damp, mould and rust. You need to strike the right balance for you between ventilation, insulation and a good heating system. Our van isn’t built for long term living in sub zero temperatures. We managed at -14°c on the Lagunas route in southwest Bolivia for 4 nights but it was a tad chillsome – not something we’d want to do for an entire season. We’d need a far bigger heating system if we wanted this long term – and we’d still open a window or vent.
I am thinking of buying a Fiamma Turbo Vent 40 for my van conversion. Just wondering how you feel about yours now you’ve used it? Some people say that the Fan-tastic vent is worth the extra money?
How important is a vapour barrier does anyone know? I’m building a conversion and really beginning to think its importance is largely overstated? With good ventilation whilst cooking and airing the van every morning I think problems can be avoided. Besides has anyone ever left a near empty bottle of water outside or in the window? The air space in the the bottle still condenses so any air space behind your vapour barrier will still condense and that will happen for the life of the van! Therefore leading me to think that a vapour barrier is almost useless and does not beat good ventilation. Thoughts?
Hi John
We agree – can’t beat good ventilation. We got rid of the factory fitted headline (which had a flimsy vapour barrier on the reverse) during the build. We’ve lived in Baloo for over a year now – no problems. :-)
I am in the process of looking for the right to convert and in the meantime am researching conversions constantly. I do have a question on ventilation. I’m planning on 2 roof vents with fans and am wondering if it is necessary to vent between the insulation and the roof? After all houses are vented between insulation and roof. I can’t find anything regarding this and in any video I watch, this issue is not addressed.
2 vents is great for ventilation especially when you have one pulling in air and the other blowing it out to keep the circulation moving. I’ve never heard of anyone ventilating between the skin of the vehicle and the insulation though. As long as the internal roof is breathable, the moisture will have somewhere to escape to. Ventilation, Ventilation. Ventilation.
Thanks for sharing excellent details for van insulation and ventilation. I just want to add, that if you want more RV roof protection simply apply a coating of RVRoof Magic.
Happy I found this site after all months & months of reading SO MANY conflicting reads on types of sound deadening and insulation. I finally have a little ease after reading Jacks comments which have me not so stressed out about tons of insulation b/c first off I’m not planning on living in the van. Just want to do some weekenders and hang out at a lot I bought on a creek. I would like some type of sound deadening and maybe a layer of insulation which I hear Thinsulate will provide. I’m just not sure if I need a barrier between my sound deadener and the thinsulate or between the thinsulate and the paneling I want to cover the walls with. Don’t understand barriers. I think I just spray some glue on the thinsulate and stick it to the metal and sound deadener and then panel or carpet the van. Hopefully w/the front two windows cracked and a sliding door T Vent window I’ll be able to vent it. But something tells me a roof vent in the back will be needed to suck out all the hot air in that 159′ Promaster hi top van. I’m just really afraid of a bad install & leaks b/c I don’t trust myself doing the job. Anyways… If anyone has a good track record w/using Thinsulate and knows if one layer of it and nothing else between in and the paneling works nicely? I’d appreciate it!
Blimey…I have spent age researching the internet on ideas to do everything necessary to get the van that I want. We all do it, we take advise from others who started off like just like ourselves to make the ‘right’ decisions. Everyone seems like an expert, until you listen to the next person. It is a very interesting exercise, and a little stressful at times…what to do… So….insulation… I have read sooo much on this, I almost feel like an expert now :-) I found this blog whilst researching ‘ventilating insulation’ in a camper van, as I have only come across one person discussing this and he was a commercial fitter in the US doing adventure vans. I have ordered some sheep wool for mine, as I really like the idea of this product and the insulation and soundproofing qualities seem good. I was looking at Thinsulite, but this is another product that you cannot readily get in the UK. Anyway, I appreciate the information on no insulation and more light in the van…I may get around to trying that next time, but for the moment if it’s bought, then it’s going in.
I love the site buy the way, I will be spending some time looking through it and getting some new articles in the future.
So glad to hear you stayed warm and cozy. It’s been a brutal winter here, -30’s & -40’s. Way too cold to enjoy the outdoors on my time off, so being able to hunker down and stay warm is a real blessing. The other WoW”s (Workers on Wheels) bailed months ago, but since my boss knew I had the only cold weather capable rig, he asked me to stay. He’s a great boss, and always found a job for me for many years, so I agreed. I’m no stranger to cold weather, but this one’s been a dilly. Had to learn a whole new skill set, but great job, great boss, great pay, just lousy weather. Three out of four isn’t too bad hehe.
You might want to consider sliding doors on your cabinets rather than swinging doors. Sliding doors stay shut while traveling, and don’t require extra interior space to open. I also put my drawers behind a sliding door, and it works great and they never fly open. I used to have problems not being able to fully open swinging doors, and the sliding doors totally solved that problem.
Great minds think alike! We’ve also gone for sliding doors and our shelving unit is behind it too! Even our bathroom door slides :-)
You’re right on ventilation, but not so much on insulation. The proper and needed amount of ventilation pretty much totally defeats any positive effects of insulation. Too many people have been conned into believing that insulation has some sort of magical properties that will keep you comfortable. It doesn’t. The cold hard truth is it keeps the heat in during the summer, and keeps the heat out during the winter…
Parking in the sun during the winter, and in the shade during the summer will do you far more good than any amount of insulation. Insulation won’t keep you warm all night in the winter, or cool all day in the summer, these things still require heating and cooling sources. You can easily obtain comfortable temperatures with proper heating and cooling, with or without insulation, and no matter how much insulation you have, you still need the heating and cooling.
If you start with a window van, with many opening windows in the back, you can avoid cutting holes for ventilation. In the winter, if it’s sunny, those windows can provide an amazing amount of FREE heat. In the summer, they can provide an amazing amout of FREE cooling, and combined with parking in the shade, and possibly a cheap 12v fan, they can keep you more comfortable than any amount of insulation.
I started out with a well insulated sprinter cargo van with 2 fantastic roof vents with fans. It was always either too hot or too cold, too dark, and too damp. When it didn’t work as expected, I went the opposite direction with a window van. I kept the original interior, just removing the seats. The ventilation is 1000% better, and I don’t miss the insulation at all. My window van is both cheaper and easier to heat and cool.
In comparison, my insulated cargo van MAYBE held the heat in about 15 minutes longer in the winter, but it robbed me of a ton of heat that the windows provide during the day. In the summer, since I had solar panels on my cargo van, I needed to park in the sun in an attempt to have power, and the van turned into an oven. The roof vents, and even opening all the doors didn’t help much. In my window van, I got rid of the solar panels, and park in the shade with my windows open, and it makes all the difference in the world.
My window van also solved my depression and anxiety problems, along with my day/night confusion problems whatever they’re called. I’m much happier and healthier with windows and a view. Even at night, being able to see where this or that noise came from, and seeing that it’s not a threat, allows me to instantly go back to sleep, instead of laying awake for hours worrying and wondering about it. Lots of windows have amazing advantages, that far outweigh any disadvantages. My insurance rate dropped by over $50 a month too, and driving is so much easier with windows all the way around and no blind spots. Using just outside mirrors on a dark and rainy night is both scary and dangerous.
Hi Jack – so pleased your set up works so well for you! We hope we’re as happy with our finished build as you are with yours. We’ve just finished installing the Webasto heater and gave it a test drive at New Year in northern England. We were nice and cosy so pretty pleased. We’re just finishing installing the cabinet fronts now so that should give a little less space to heat so hopefully not use so much fuel in cold climates. Our next major test will be in Patagonia so we certainly hope so! Definitely agree with the windows all round – can’t beat natural light first thing in the morning :-)