When you pack up after your camping trip, storing your water hose would probably be the last thing on your mind. But keep in mind that your water hose is the thing that carries all your drinking water for you. If you don’t store it in a dry, dirt-free place, it will become home to mold, viruses, and bacteria.
If we caught your attention, you might be wondering a few things now. What are the dos and don’ts of water hose storage? What are some RV water hose storage ideas that will keep your hose and your RV clean and free of germs?
We’ve done the work for you and answered these questions in the article below.
When you click on links to various merchants on this site and make a purchase, this can result in this site earning a commission. As Amazon Associates, we earn from qualifying purchases. For more info, please check our disclosure page.
Things To Do Before Storing Your RV Water Hose
What You Shouldn’t Do
Storing a water hose is not as simple as just coiling it up and putting it anywhere you like. It doesn’t work the same way as it does in your yard or kitchen garden. Here are some problems with this approach:
- It can cause your RV floor to have water all over it.
- It lets in dirt and dust inside your van.
- It makes it challenging to get the hose open when you need it.
- It gets the water hose all dirty (because it’s on the floor). So next time, you will have a lot of dirt on your hands when you open it up.
- Never store the water hose near the sewage hose. Your hose might get contaminated and can cause several diseases if you use water coming from it.
What You Should Do
If you keep the water hose clean, water-free, properly coiled, and in a safe place, you can use the hose without causing problems in your RV. Keep these things in mind:
- Clean the water hose end to end before storage.
- Make sure you get as much water as you can out of it before storing it so that it doesn’t leak water later on.
- Wind the hose properly and tie a rope around it so that it doesn’t open
- Secure the two open ends with plastic bags. Use a rubber band to close the mouth.
- Put the hose in a bucket and cover it.
7 RV Water Hose Storage Solutions
1. Use Hose Storage Bags
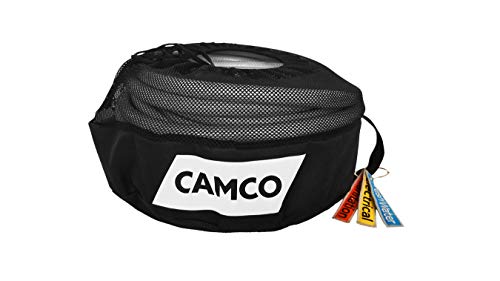
A hose storage bag like the one from Camco is a nice way to neatly store your water hose without creating a mess in your RV.
Most of these have got a waterproof bottom and sides on the interior and a mesh top that lets any water collected at the bottom dry out over time. You can even close them off at the top to make sure that the contents don’t spill out when you hit a bump on the road.
You can buy a few of these bags and use them to store all your electrical wiring, hoses, and sanitation pipes neatly in one place.
The Camco bag is 16 inches in diameter and about 10 inches high. Most RV water hoses are about ½ inch in diameter. Some quick math tells you that it should be good to hold about 70 feet of water hose if you wind it up nice and tight. If you have a bigger hose, you might have to buy a larger bag.
There is a drawcord at the top above the mesh that keeps everything packed snugly inside. It comes with color-coded tags that will help you quickly distinguish which bag contains what. The netting on the Camco bag was a bit weak, so that’s something you should look out for when buying a new hose bag.
2. Use a Hose Reel

A hose reel is a nice option to save some space on your RV. You can hang the ones like the Primefit HRM38100 on your RV wall with the help of screws, and it will save you nearly two sq. ft of space that a hose storage bag or bucket will take up.
A hose reel will save your water hose from kinks for sure, and the hose will remain neatly wrapped. This will make sure that the hose lasts longer for you. Make sure you drain out your hose properly because there is no protection for water falling from the hose onto your RV floor with a hose reel.
The alloy steel-based Primefit hose reel is pretty solid and will last you a fair bit of time. All you need to do is set it up and then roll the hose over the wheel. However, in case you don’t like the idea of putting screws in your RV wall, there are other hose wheels that you can set up without screws (and a DIY option that we will discuss later as well).
Overall, getting a hose reel is an expensive option when you look at the other things we are suggesting here. One might cost you around $30 and more.
3. Use a Hose Caddy
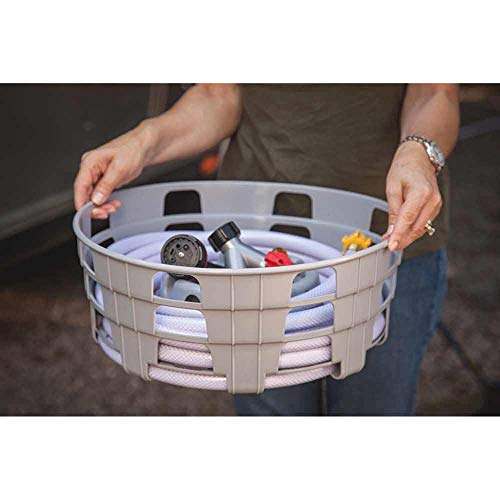
A hose caddy is essentially the same as a hose reel – kept on the ground. There are gaps along the bottom of the hose caddy where the water outlet can come out, and then you just wind your hose around the central wheel of the caddy.
It’s a neat little storage bin with spaces for the hose inlet and outlet built in. such plastic hose caddies are also good for storing your electricals since the plastic does not conduct electricity.
Stromberg Carlson makes a good set of hose caddies that you might want to buy. These are made of strong plastic and can carry up to 50 feet of the water hose (Stromberg claims 75 feet, but simple math says that’s not likely). They do take up about the same space as the storage bags above(16.75-inch diameter, 6 inches high), so if space-saving is your concern, you might consider the hose reel option.
4. Use a Storage Strap and Hook

Storage straps and hooks are perhaps one of the best ways to store your water hose. It’s essentially a strap that goes around your coiled hose with a handle on them. You can hang up the handle on a hook that comes as part of the product.
Having the strap with handle facility also lets you carry your water hose in your hands if you want to set up the hose somewhere outside the van, which you cannot do with a hose reel. Again, it keeps your hose free of kinks, away from the ground, and does not take up much space on the floor.
LuBanSir makes a great Strap and Hook combination. It’s got a nylon-based strap that can handle up to 50 pounds of weight, it doesn’t break easily, and you get a three-pack of strap and hook – with 17-inch, 22-inch, and 28-inch capacity. About the only negative of these products is that they have velcro straps which tend to get dirty over time.
5. Use Hose Box
Hose boxes are perfect for those who are neat freaks and want their hose completely protected at all times. The hose gets completely enclosed in the plastic box when coiled.
One problem with hose boxes is that they are typically not meant to carry a long hose. Another issue is that winding the hose back takes quite a bit of effort. If you don’t like the idea of winding both ends of the hose yourself, there are other products that let you crank the hose and wind it up.
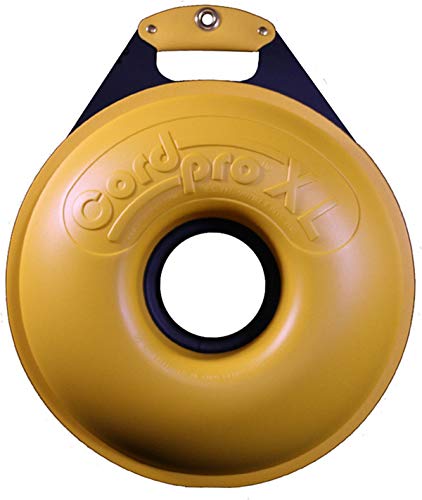
The CordPro C-XL is a good example of hose boxes of this type. The CordPro has a nice handle on the side that lets you carry it around and even hang it up to save space for you.
Its design lets you extend the hose from both sides, thus giving you a lot more hose length. Secondly, the hose is completely wound around the box, so there are no chances of kinks or tangles.
6. Use a 5-Gallon Bucket
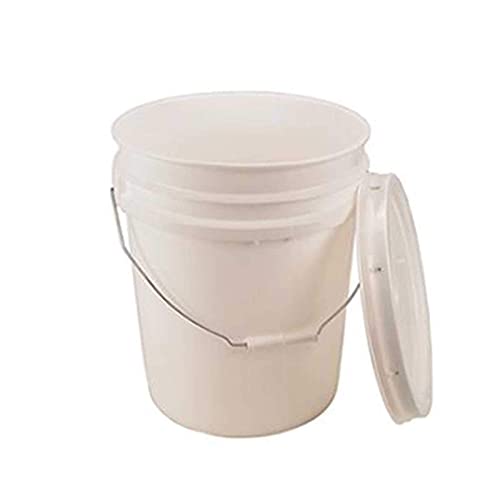
If you don’t want to buy a new storage bag or hose reel, a simple option to store your hose is to just dump it in a five-gallon bucket.
You may have one or two of these lying around in your garage from your last paint job. Just clean it up, dry it out thoroughly, and you are good to go. If you don’t, you can always just buy a new one like this one from Amazon.
Some things to keep in mind when using this method – the bucket will start to collect water at the bottom, so make sure you clean it out regularly and dry it completely. Do not let mold build up inside the bucket, especially since you are putting your water hose there.
5 gallon buckets are easy to transport as well – they are not heavy and take up very little space. They don’t let water spill onto your RV floor either.
7. The DIY Option
Keep in mind that all these methods are going to cost you upwards of $15, so if you don’t want to spend money, here are a few simple DIY options that will cost you nothing close to that amount:
7.1 DIY RV Water Hose Storage Bag
This is a really simple way to make a storage bag. First, gather together a reusable shopping bag, some scissors, and a sewing machine. Next, follow the steps below:
- Cut a hole in the middle of one side of the shopping bag. A hole about 8 inches in diameter should do the trick
- Next, sew around the hole to reinforce it.
- Sew the mouth of the bag shut. Make sure you do a double stitch at the mouth so that no air or moisture can get in.
- Now, take one end of your hose pipe and insert it into the hole in the bag.
- Wind the hose around until all of it goes inside the bag, and you’re done!
The whole thing won’t cost you more than a dollar, it’s easy to make, and you can even hang up the hose on a hook with the shopping bag handles.
7.2 Make An RV Water Hose Reel
If you loved the idea of a water hose but did not want to screw one into your RV walls, here’s a guide to making a DIY water hose reel:
- Start with two square 8-inch blocks of ½ inch thick plywood. These will form the two sides of the hose reel.
- Stick them together with double-sided tape so that you can drill holes into them at the exact same spot
- Now, mark out a large circle with 8-inch diameter and cut off the edges of the squares, leaving only the circular plywood blocks.
- Make a 2-inch diameter circle in the middle. Now make a square with a 2-inch side in the middle of this circle. Drill holes for two screws on each side of this square.
- Make four eight-inch slats that you can use to make the base of the hose reel between the two plywood boards that we stuck together using the double-sided tape earlier.
- Screw these eight-inch slats between the two circular plyboards in the middle. This wheel forms a basic hose reel.
- To add handles, make some cylindrical slats and then apply them to both corners of the circular plywood boards, 180-degrees apart from each other.
- Add a hook to one of the four eight-inch slats in the middle of the wheel. The hook will help to keep the hose in place when you are reeling it in.
- Smoothen out any rough edges, add a bit of varnish and paint it up. Now you have a nice hose reel ready that does not need to be screwed onto your RV
7.3 Hanging RV Hoses and Cables for Easy Storage
This is an easier DIY idea than the two above. You will need to get:
- You can install a long metal rail bracket at the back of your headboard in the RV.
- 3 or 4 hook-shaped brackets with a locking mechanism to hold them in place when you slide them onto the long metal bracket.
You can get all of these at any local hardware store or even your nearest Home Depot. If you get a four-foot rail, it will cost you around $30. The metal hooks may cost you about $10 apiece.
All you need to do is to install the long metal bracket at the back of your headboard with screws. Make sure that you are using small screws that don’t punch a hole in the headboard going all the way through. About ½ inch, long screws should be fine in most cases.
Secondly, try to get on as many screws as you can so that the bracket can support more weight. You don’t need to put in all screws, but try to get in at least one every 3 inches.
Now, just insert the hook-shaped brackets on the long metal bracket and use the mechanism that locks them in. Your DIY water hose storage is ready now.
You can use it exactly like you would use a hook and strap mechanism. You can wrap the looped water hose using large plastic or rubber bands to make it even neater.
In Conclusion
Properly storing your water hose is more important than you might think. After all, the hose carries all your drinking water, and if you get it dirty, you might end up drinking contaminated water. Secondly, not draining the pipe properly or closing the ends will make your RV dirty.
We hope you liked the seven RV water hose storage ideas that we shared above. Keeping your water hose in safe and dry storage will probably not cost you more than $20-$25, so it’s a small investment that gives you rich returns.
Angela Devaney

Angela Devaney, a former IT project management professional, embarked on an adventurous journey of full-time travel, which included touring West Africa in a converted overland truck and converting an ex-military 4×4 Sprinter van into a camper for a five-year South American expedition. She now utilizes her hands-on experience to create practical RV living and van life advice as a full-time digital media producer, reaching over a million users annually through her YouTube channel, blog, and newsletter. Angela also lends her expertise as the editor-in-chief of the Campervan Electrics Handbook.