Dive into our comprehensive RV battery disconnect switch guide, covering selection, installation, and usage for effective power management.
Today, we’re diving into a crucial topic for anyone who owns or is considering owning an RV: the RV battery disconnect switch.
Why is this small yet powerful device so important?
Well, it’s all about isolating your RV battery from the electrical system for various reasons, such as:
- preserving the battery’s charge,
- ensuring your safety,
- preventing parasitic loads, and
- prolonging the lifespan of your battery.
Understanding how to use a battery disconnect switch and why it is essential for your RV adventures is a must-know for every RV owner.
Not only will it save you from potential hazards, but it will also ensure that your RV’s electrical system runs smoothly and efficiently.
That’s why we’ve created this comprehensive blog post dedicated to sharing everything you need to know about RV battery disconnect switches.
This post covers everything from the different types of disconnect switches available to step-by-step installation guides and when to switch them on and off.
When you click on links to various merchants on this site and make a purchase, this can result in this site earning a commission. As Amazon Associates, we earn from qualifying purchases. For more info, please check our disclosure page.
What Is an RV Battery Disconnect Switch?
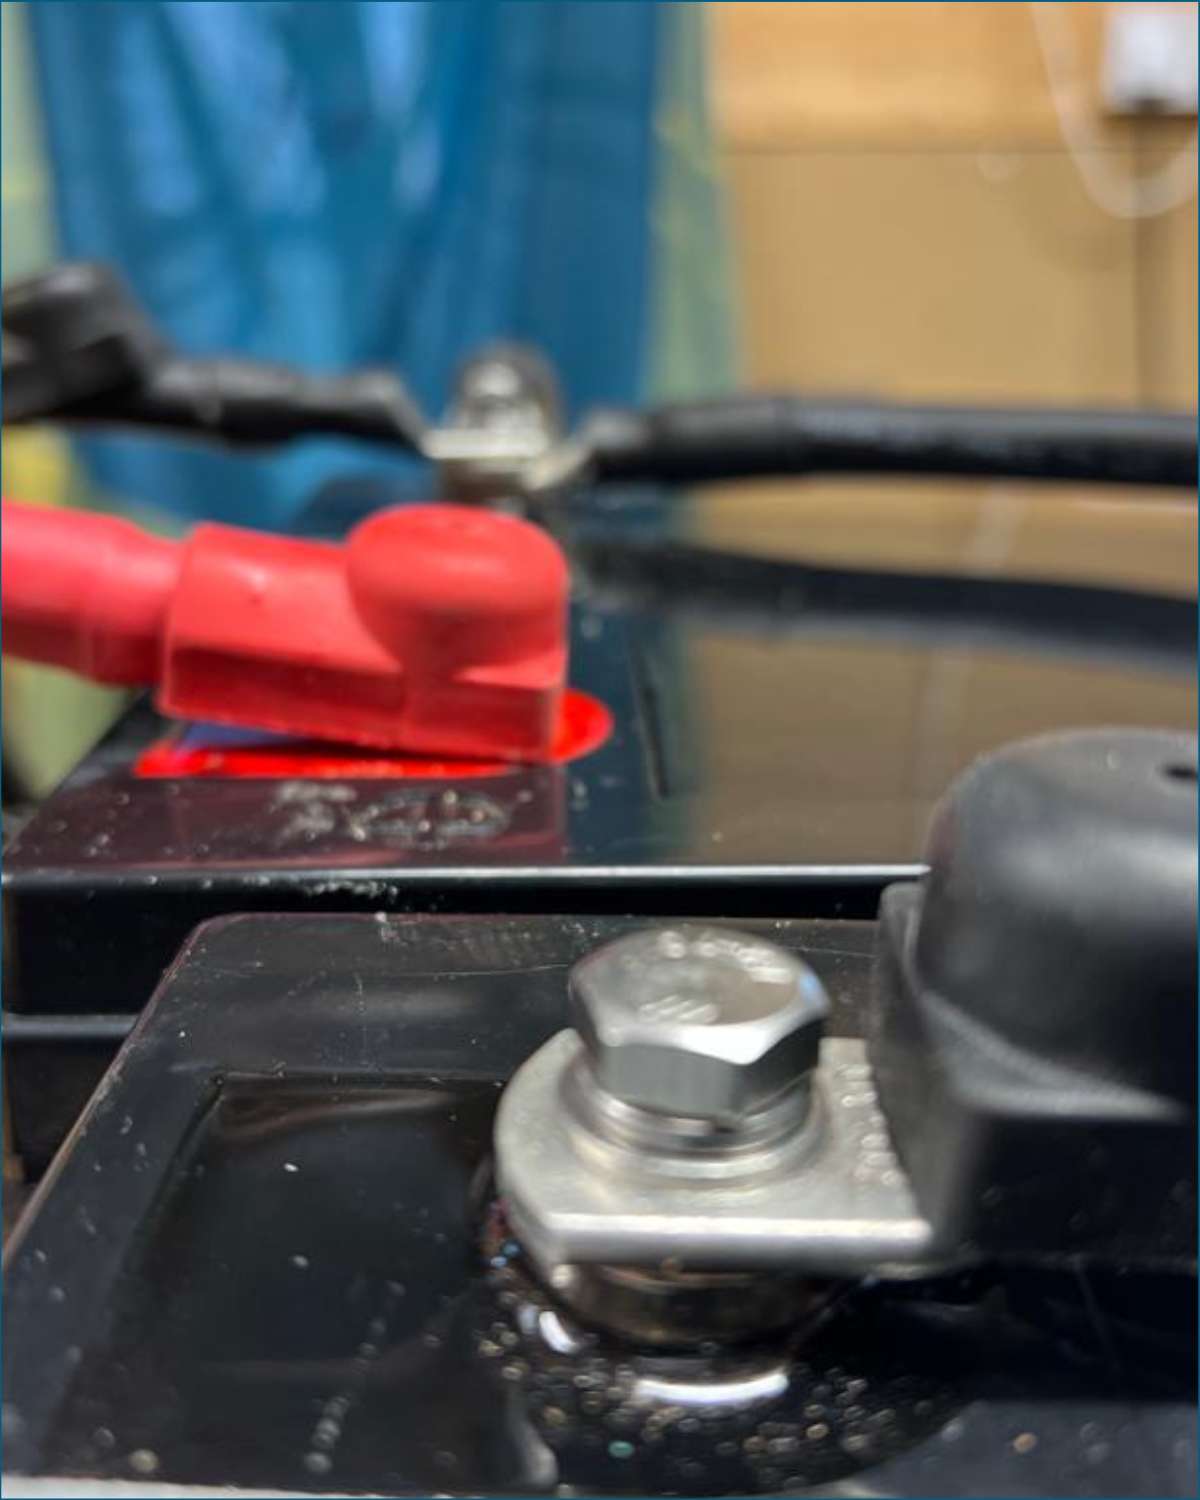
An RV battery disconnect switch is a device that is installed between the positive or negative terminal of your vehicle’s battery and its cable.
When switched off, it stops all power from flowing from the battery into your RV.
This helps protect you against electrical fires and conserves energy when you’re not using your vehicle.
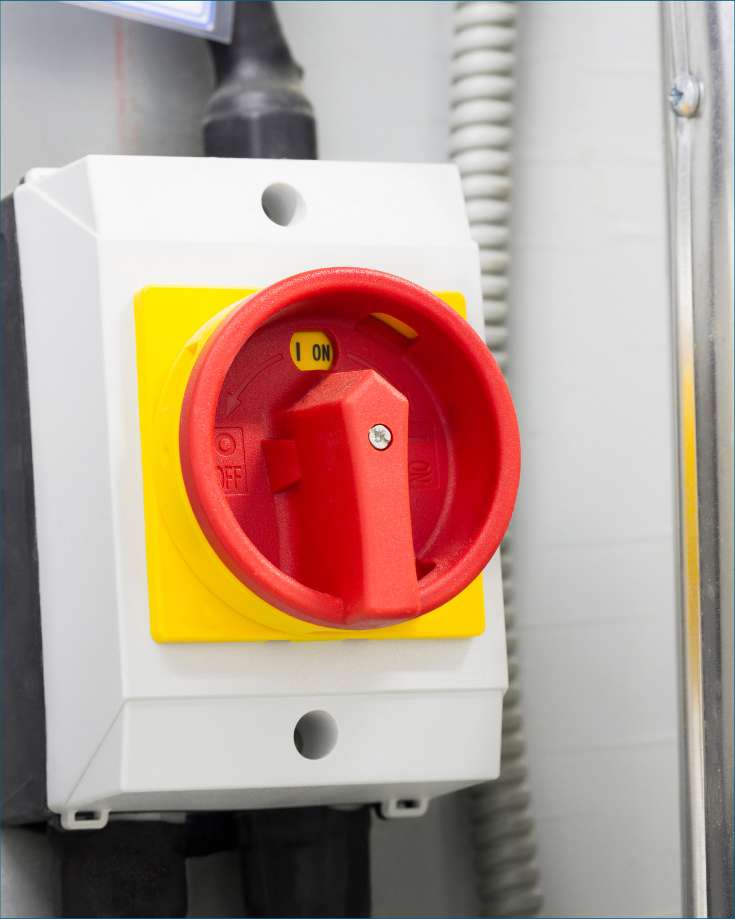
There are two main types of battery disconnect switches: manual and automatic.
- Manual switches require you to turn them on and off physically whenever you want to cut or restore power.
- Automatic switches will do so automatically based on certain conditions, such as low voltage or temperature.
Ideally, you’d fit both types in your camper.
You’d then use:
- the manual switch when you want to isolate the battery from all load and supply sources, and
- the automatic switch kicks in if the battery is draining and getting close to being flattened.
The rest of this article focuses solely on the manual disconnect switch.
How Does an RV Battery Disconnect Switch Work?
The disconnect switch usually has a rotary or lever-style mechanism.
It breaks the electrical connection between the battery and the RV’s system.
When the switch is on, the battery connects to the system, allowing power to flow.
When off, the connection is cut, isolating the battery.
To use the switch, turn it to “off” to disconnect the battery.
Turn it to “on” to reconnect.
This simple process helps manage battery usage and extends its life.
Benefits of Installing a Battery Disconnect Switch
Installing an RV battery disconnect switch in your RV has several benefits:
It prevents electrical fires caused by short circuits or other problems with the wiring in your vehicle by allowing you to switch off the power supply in the event of a catastrophic system failure.
It can help conserve energy when not in use since no power will be drawn from the battery while switched off.
It makes it easier for technicians to work on electrical systems in your vehicle since they won’t have to worry about accidentally connecting live wires while working on them.
When Should You Disconnect Your RV? And When You Shouldn’t
Knowing when to disconnect your RV’s battery using the battery disconnect switch is essential for prolonging battery life and ensuring safe operation.
Here are some scenarios when you should and shouldn’t disconnect your RV battery:
When You Should Disconnect Your RV Battery
- Long-term storage. If you’re not using your RV for an extended period, it’s a good idea to disconnect the battery to prevent parasitic drains and preserve the battery charge.
- Maintenance or repairs. Disconnect the battery before performing any maintenance work or repairs on your RV’s electrical system to avoid electrical hazards and prevent short circuits.
- Replacing the battery. Always disconnect the battery before removing it from your RV and installing a new one to ensure safety and protect your RV’s electrical components.

When You Don’t Need To Disconnect Your RV Battery
- While driving. Many campers can charge their RV batteries while driving from the engine’s alternator. If the battery is disconnected, that can’t happen. It would also prevent your DC appliances, like your 12v refrigerator, from operating.
- Connected to shore power. When your RV is connected to shore power, it’s generally safe to leave the battery connected, as the converter/charger will maintain the battery charge and prevent overcharging.
- During charging. Avoid disconnecting the battery while it’s being charged. It will interrupt the charging process.
Understanding when to use the battery disconnect switch can help you maintain your RV’s battery health, ensure safety during maintenance tasks, and optimize your power management while on the road.
How to Find Your RV’s Battery Disconnect Switch
Finding your RV’s battery disconnect switch can be tricky, as different RV manufacturers may place the switch in various locations.
Here are some tips to help you locate the battery disconnect switch in your RV:
- Check the owner’s manual. Your RV’s owner’s manual should provide information about the location of the battery disconnect switch and any specific instructions for its use.
- Look near the battery compartment. Many RVs have the battery disconnect switch installed close to the battery compartment or on the battery directly. Check around these areas for any visible switches or labeled compartments.
- Search near the entry door. Some RV manufacturers install the battery disconnect switch near the RV’s entrance door or the main control panel. Look for a switch labeled “Battery Disconnect” or something similar.
- Inspect the electrical compartment. In some cases, the battery disconnect switch may be located in the RV’s electrical compartment, where other electrical components, such as fuses, breakers, and converters, are housed.
- Consult your RV dealer or manufacturer. If you need help locating the RV battery disconnect switch, contact your RV dealer or the manufacturer for guidance. They should be able to provide you with the necessary information.
Once you’ve found your RV’s battery disconnect switch, familiarize yourself with its operation to ensure proper battery management and prolong its lifespan.
If your RV has no battery disconnect switch, consider retrofitting one for convenience and improved battery maintenance.

Can I Retrofit a Battery Disconnect Switch in my RV?
Yes, you can retrofit a battery disconnect switch in your RV.
Installing a battery disconnect switch is a relatively simple and cost-effective upgrade that can be done with some essential tools and electrical knowledge.
Best Disconnect Battery Switches for RVs
Blue Sea Battery Switch

- 350A
- Upto 48V
Amper Remote Battery Switch

- 1250A
- 12V
Top Post Knife Blade Master Switch
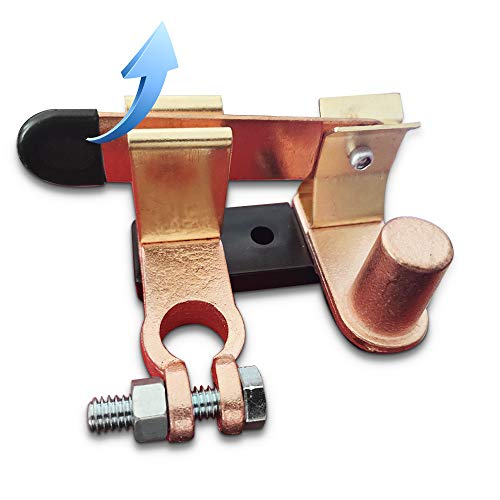
- 250A
- 12V
What To Look For When Buying A Disconnect Battery Switch
When shopping for a battery disconnect switch for your RV, several factors must be considered to select the best option for your needs.
Here’s a list of key features and aspects to look for when buying a disconnect battery switch:
- Compatibility: Ensure the switch is compatible with your RV’s voltage (12V, 24V, or higher).
- Current Rating: The switch should have an appropriate current rating (amps) to handle more than the maximum electrical load of your RV’s battery bank. Look for switches with a continuous and peak current rating that matches or exceeds your requirements.
- Switch Type: Battery disconnect switches come in different designs, such as rotary, lever-style, or push-button. Choose a switch type that is easy to operate and suits your preferences. We prefer rotary styles because the physical position indicates whether it’s on or off. That gives more confidence the battery is isolated.
- Durability and Build Quality: Opt for a switch made from high-quality materials that withstand harsh conditions, vibrations, and corrosion. A durable switch will provide reliable performance and a longer lifespan.
- Ease of Installation: Look for a switch that can be easily installed in your RV with minimal modifications. It should come with clear instructions and any necessary hardware for mounting.
- Mounting Options: Consider the available space in your RV and how the switch will be mounted. Some switches can be surface-mounted, while others require a panel cutout or specific mounting brackets.
- Visibility: A switch with clear labeling or color coding can help you quickly identify its function and ensure proper use.

Should I Install the RV Battery Disconnect Switch on the Negative or Positive Battery Cable?
Installing the battery disconnect switch on the negative battery cable is generally recommended.
This is because disconnecting the negative cable first helps prevent accidental short circuits that could occur if the positive cable comes into contact with any grounded metal surfaces.
By breaking the connection between the battery’s negative terminal and the vehicle’s ground, you effectively isolate the battery and ensure a safer working environment when performing maintenance or troubleshooting tasks.
However, always consult your RV or battery manufacturer’s guidelines or consult a professional for specific recommendations related to your setup.

How to Install an RV Battery Disconnect Switch
Installing a physical RV battery disconnect switch isn't too tricky but should still be done carefully since improper installation can lead to severe issues such as:
- short circuits,
- electrical shocks, or
- fire hazards.
Materials
- RV Battery Disconnect Switch
- Correctly sized wire
Tools
- Multimeter
- Spanner
- Screwdriver
Instructions
- Choose the right disconnect switch. Pick a suitable RV battery disconnect switch, considering factors such as the type of switch (rotary or lever-style), current rating, and mounting options.
- Find a convenient and easily accessible spot near the battery to install the switch. Securely mount the switch somewhere inside your vehicle without being exposed to moisture or dirt. Ensure there's enough space for the switch and the necessary wiring.
- Turn the switch to the off position so the battery is disconnected when you install the wires.
- Disconnect the negative battery terminal.
- Disconnect the positive battery terminal.
- Make sure your cables are larger than needed for the battery bank size.
- If connecting on the positive side:
- Connect the positive circuit supply busbar to the switch's output terminal.
- Connect the switch's input terminal to the positive battery terminal.
- Ideally, fit a fuse between the switch output and the circuit supply/busbar.
- If connecting on the negative side:
- Connect the switch input terminal to the negative battery terminal.
- Connect the switch output terminal to the vehicle earth point.
- Ensure all connections are secure and there are no cross connections or short circuits between the battery's positive and negative terminals.
- Use a multimeter to confirm the continuity and separation of the positive and negative circuits before inserting the battery fuse and turning the disconnect switch to the on position.
- Test the newly installed battery disconnect switch to ensure it works correctly. Turn the switch on and off to confirm the battery is properly connected and disconnected from the RV's electrical system.
Notes
Always consult your RV or battery manufacturer's guidelines or seek professional assistance if you need clarification on the installation process.
RV Battery Disconnect Switch Wiring Diagram
Wiring the Switch on the Negative Wire
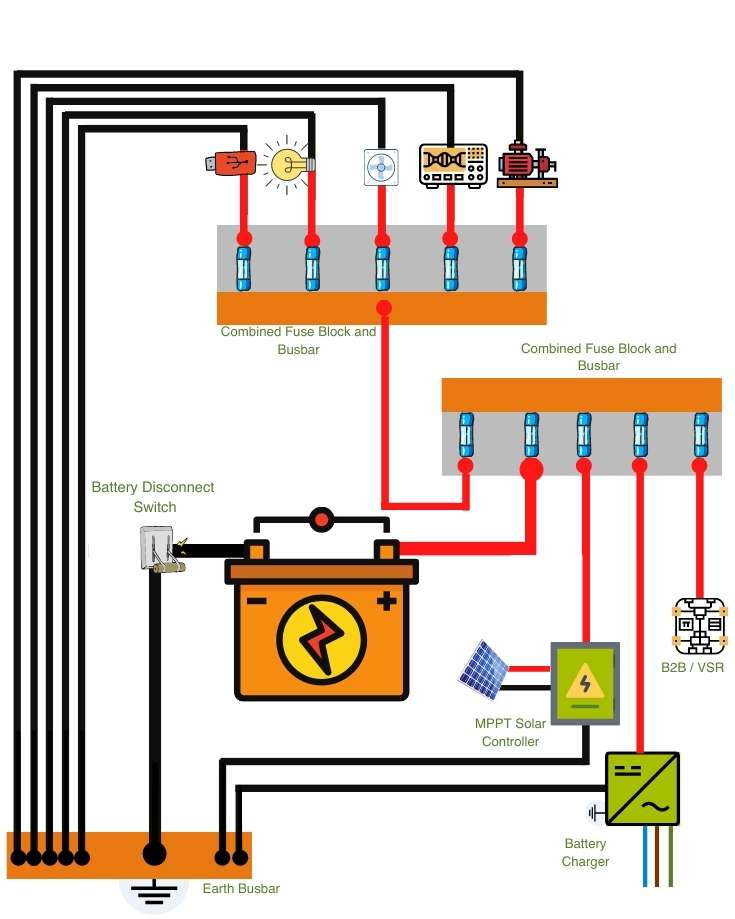
Wiring the Switch on the Positive Wire

In Conclusion
An RV battery disconnect switch is essential for any RVer looking for added peace of mind while traveling with family or friends!
It provides immediate protection against potential electrical fires if a fault occurs.
Plus, it helps prevent a dead battery by cutting off power completely until needed again later down the line!
Graham Bogie

Graham is a seasoned marine electrical engineer with two decades of experience designing customized electrical systems for plant machinery and converting campers and overland vehicles. His expertise has led him to author the reputable Campervan Electrics Handbook and become the chief designer of the RV Wiring Design Tool. As a knowledgeable figure in the field, his YouTube channel, blog, Facebook group, and newsletter, offering electrical advice and product reviews, reach more than a million users each year.