Whether your campervan is a 2wd or a 4wd, a well equipped 4×4 recovery kit is essential if you ever consider taking your van off a black top road.
It doesn’t take much to get stuck in a muddy field, soft sand track or even on a grassy campsite field.
But what equipment do you need? And just as importantly, how do you use it?
Here’s a run down of all the off road recovery gear you need for a safe van life, including tips on avoiding getting stuck and how to get unstuck.
When you click on links to various merchants on this site and make a purchase, this can result in this site earning a commission. As Amazon Associates, we earn from qualifying purchases. For more info, please check our disclosure page.
Essential 4wd Recovery Gear & How to Use it
Alongside your emergency roadside kit, a 4×4 recovery kit isn’t enough to get you out of a sticky situation.
Unless you know what to do with it and in what situations, it’s next to useless.
This section goes into more detail about essential 4wd recovery gear to carry with you.
We look at each bit of equipment, what it’s used for and how to use it.
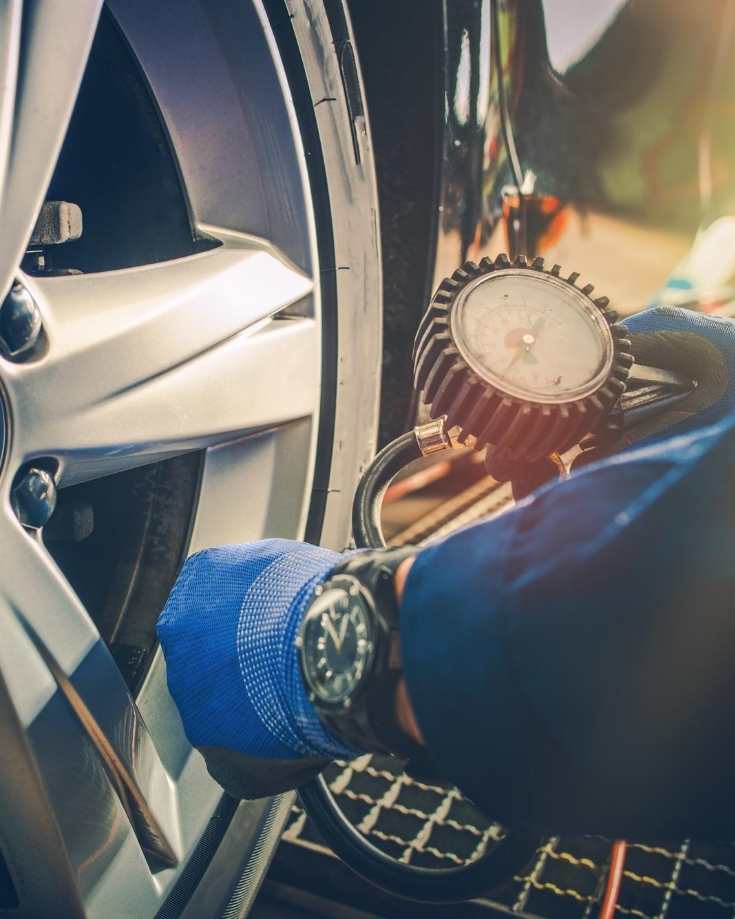
Portable air compressor
Tyre pressure has an enormous effect on vehicle traction.
On loose tracks, soft sand and gloopy mud, releasing air to reduce tyre pressure helps widen your footprint and improve grip.
Once clear of the soft slippery surface you should air up again because under-inflated tyres are dangerous at speed.
On some long road trip routes, like the northern part of Ruta 40 in Argentina, stretches of soft sand tracks alternate with loose gravel ripio for miles.
Inflating and deflating tyres is a regular occurrence on these kinds of routes.
If you expect to drive on anything other than tarmac roads, include a good quality 12v piston air compressor and a long air line to reach the rear tyres.
If you have air brakes on your camper, you can modify this to use as your air compressor.
Some overland campervan builds include permanently fit air compressors with a pressurised air tank for this type of work.
A portable compressor is just as good though.
In fact in scenarios where someone else is in trouble, it’s better they borrow your compressor than you drive into potential trouble to help.
Make sure your air compressor has an integrated tyre pressure gauge too or invest in a separate one.
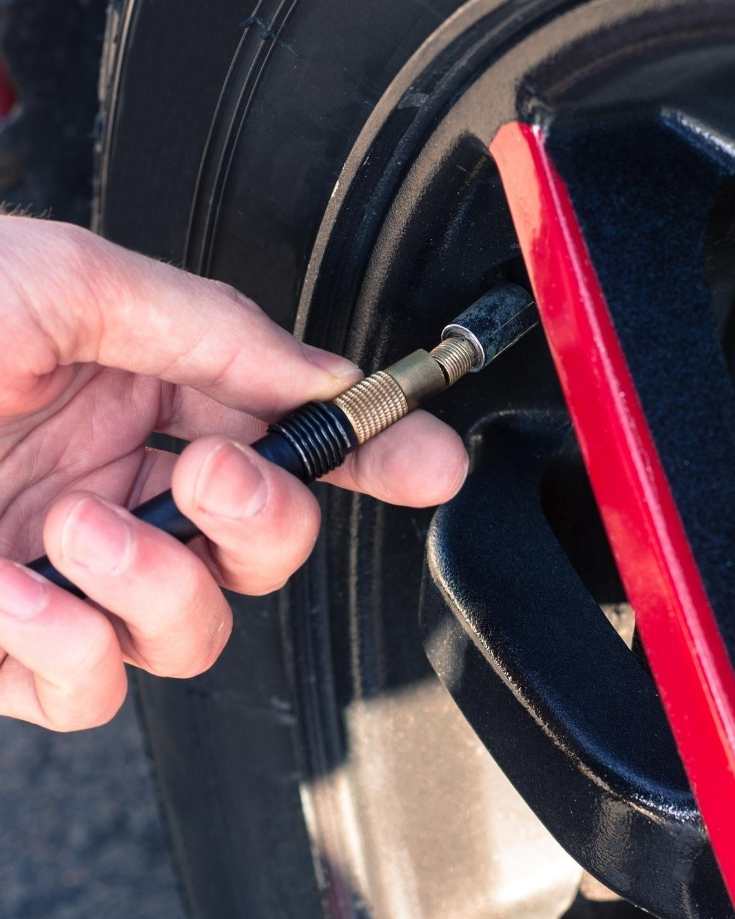
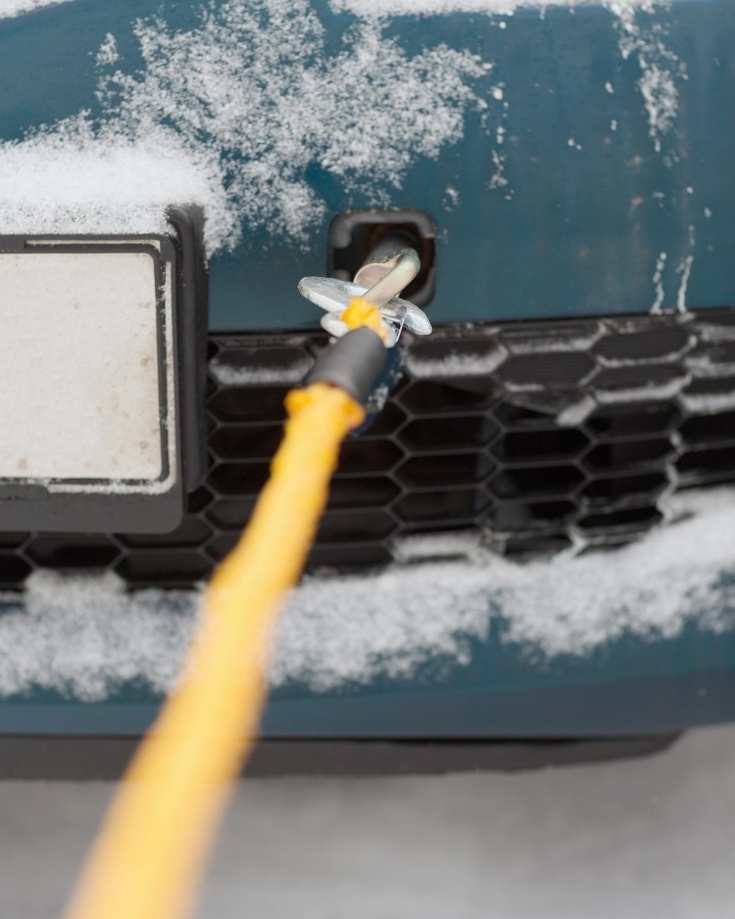
Tyre deflators
If you expect to be inflating and deflating tyres on your travels, you could use a set of tyre deflators.

These brass caps, screw onto your tyre valves and let the pressure out to a set level.
They’re very helpful and a lot easier than using a pin, screw driver and hunching down to let the air out.
You don’t need to keep checking the pressure with a gauge either.
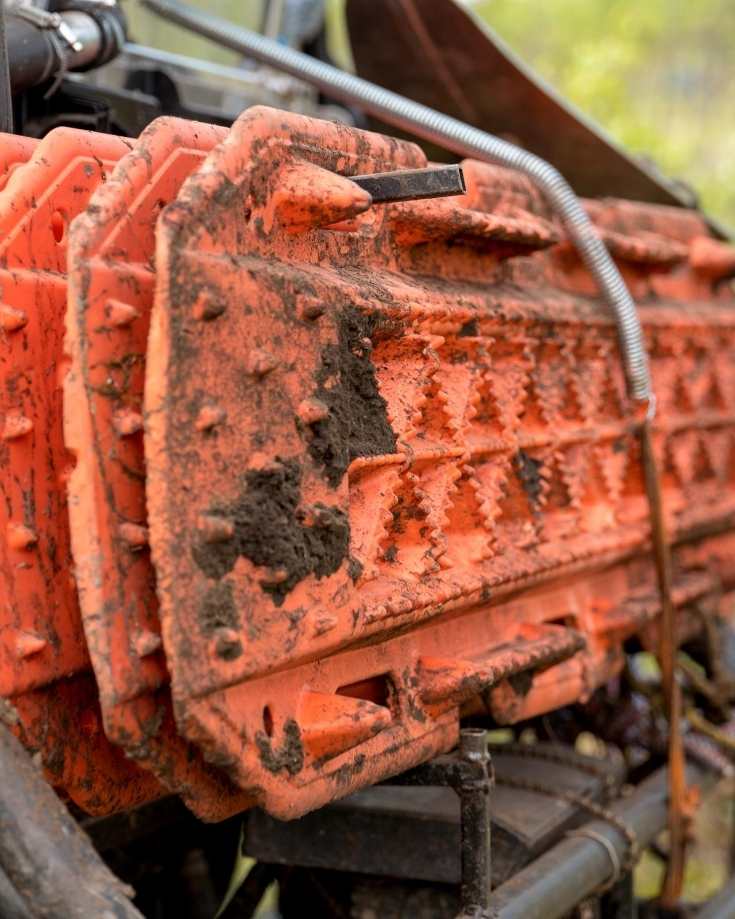
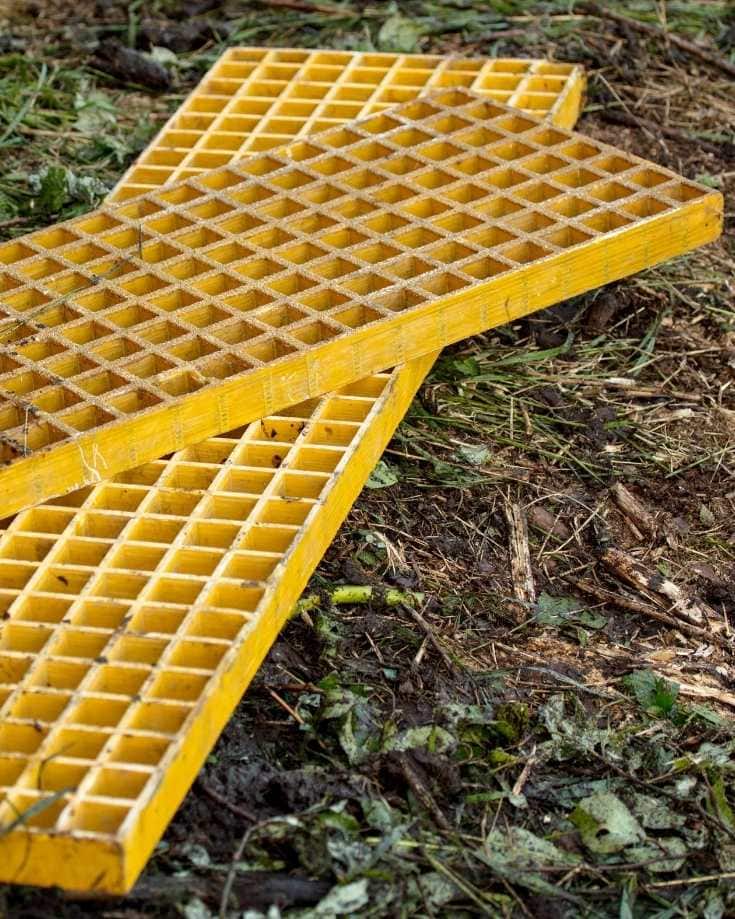
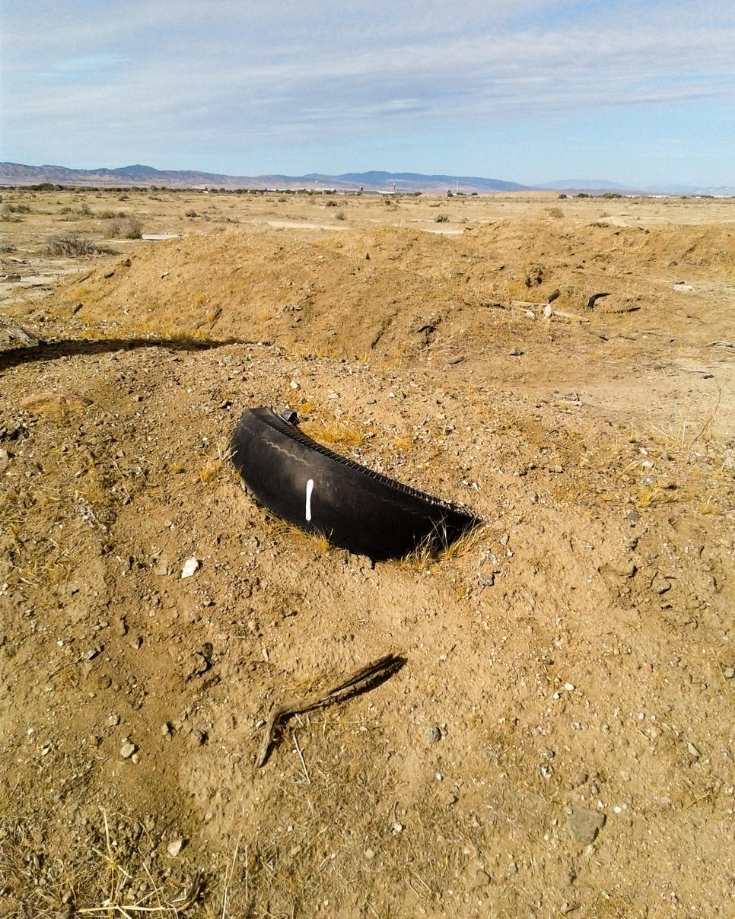
Plastic traction recovery tracks
Light weight, solid plastic traction tracks are placed under a slipping wheel to provide a short run of treaded road.
They provide an initial run so you can get some momentum and drive out of a situation.
MAXTRAX are a popular brand and designed for vehicle loads of upto 3500 kgs.
If your van is heavier, X-Bull’s are designed for up to 10000 kgs.

They’re a large bit of recovery kit at well over a metre long so they’re usually mounted on the outside of the vehicle.
We have ours attached to the ladder on our back door.
There are special mounts available to help secure them to your camper properly.
Shovel
A good quality metal bladed shovel with a strong handle is ideal for clearing away earth obstructions or filling in holes to assist with recovery.
Some cheap folding military style shovels save on space but often not upto the job of heavy digging.
We mount ours inside the back doors of our campervan with our outdoor gear.
Tow rope
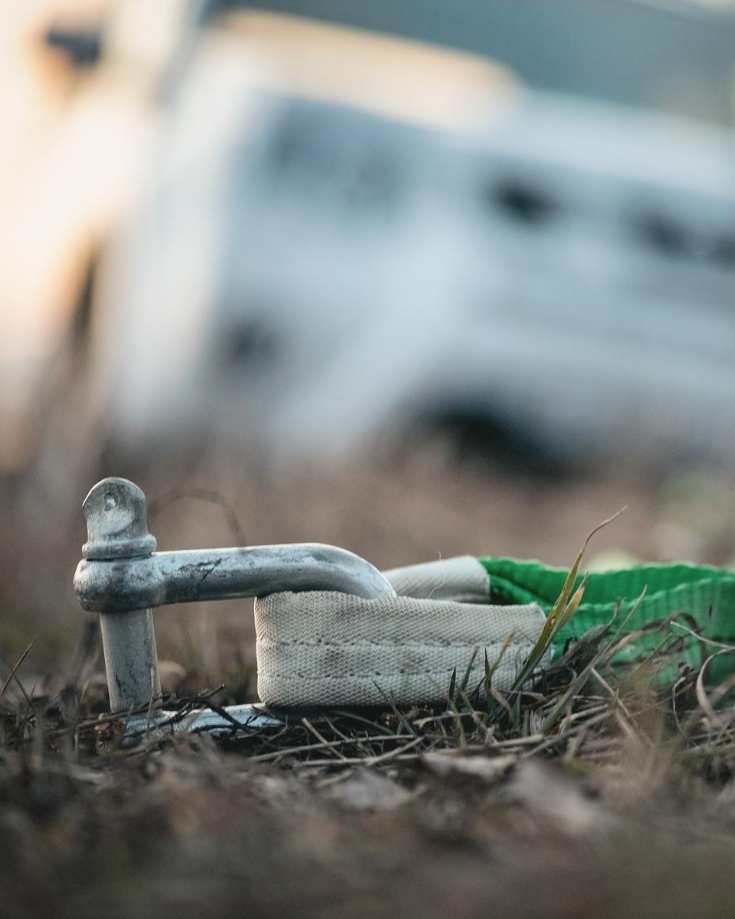
A very useful strop to keep handy for those moments when you just need a little tug from another vehicle to get going.
Try to tow from the rear of your vehicle to protect your engine and windscreen if the strop breaks free from the other vehicle’s tow point.
Some strops or snatch straps, naturally stretch by 20% to give a kinetic energy lurch to help smooth the pull. It also reduces the chance of the rope breaking.
You should use a tow rope with a soft loop woven in at each end.

Use them with a D shackle to prevent damage to the strop while towing. You’ll have next to no chance of undoing a knot that’s had 8 tonnes of strain on it.
Tow ropes with cheaper metal hooks fitted can be dangerous if the hook slips off the tow point.
It’s not unknown for them to fly through the air and hit nearby spectators, windscreens and radiators.
Draping a winch blanket or dampener across the line will reduce the effect.
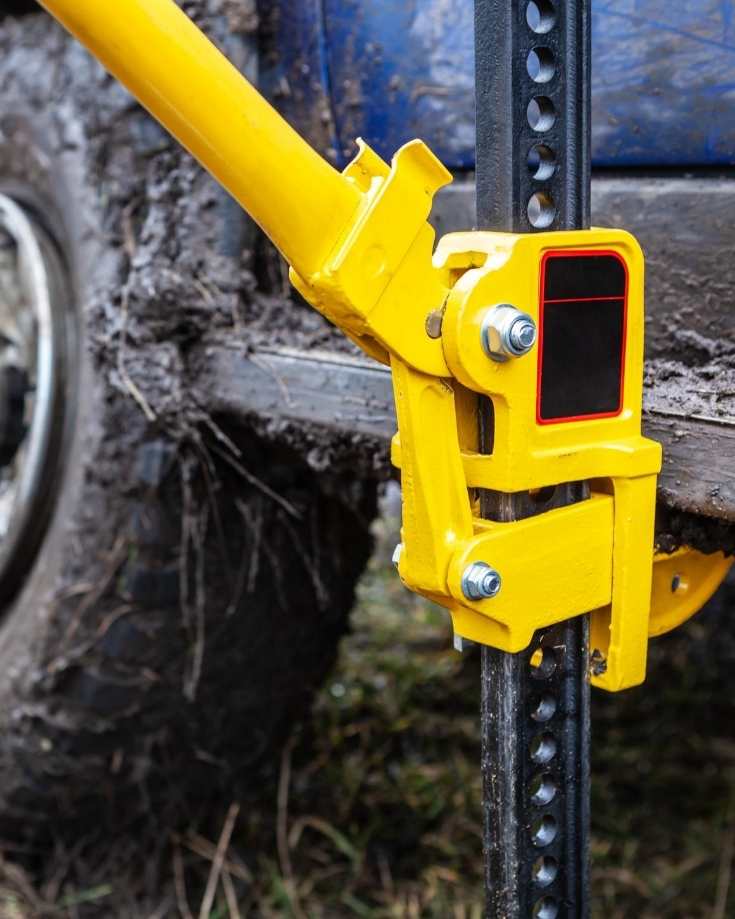
D Shackles

Use heavy duty D shackles to attach to the tow point on each vehicle.
Unscrew the pin, insert the tow rope loop and reattach the screw pin through the vehicle tow points.
D shackles should be rated for a load at least twice your campervan’s weight.
Hi-Lift or Farmers Jack
Hi-Lift jacks are versatile heavy lifting or winching tools. Because of their strong build, they are heavy and need to be properly secured when traveling.
They are simple to use but have no gearing in the lift mechanism so can be hard work.
Because they have a narrow foot plate, they’re prone to toppling side ways when in use scraping your side panels.
Keep them well maintained, greased and out of dust or mud, so the lifting mechanism doesn’t become seized.
Jacking pad
Trying to lift your wheel with the jack on soft ground is not a great past time.
The vehicle’s weight will just push the jack into the ground as you pump the hydraulic arm.
A jacking pad will spread the load area and should give you enough of a firm footprint to lift the wheel.
In especially soft ground, it’s quite possible the jack and jacking pad will continue to sink but it may give you enough time to quickly put traction material under the wheel.
Take care though!
Jacks used on soft ground can make the vehicle unstable. Stay in a safe position away from any lean of the vehicle.
You never know if a wheel is going to slip, and in which direction, forcing the vehicle or the jack to tip over.
Snow Chains
Depending on where and when you plan to travel, you may need a set of snow chains in your recovery kit.

Get them onto your driving wheels before conditions demand them.
1 pair is fine in a 2wd. If you have a 4×4 and only 1 pair, fit them to your front wheels to help with steering.
Ideally you should fit 2 pairs of chains on all 4 wheels.
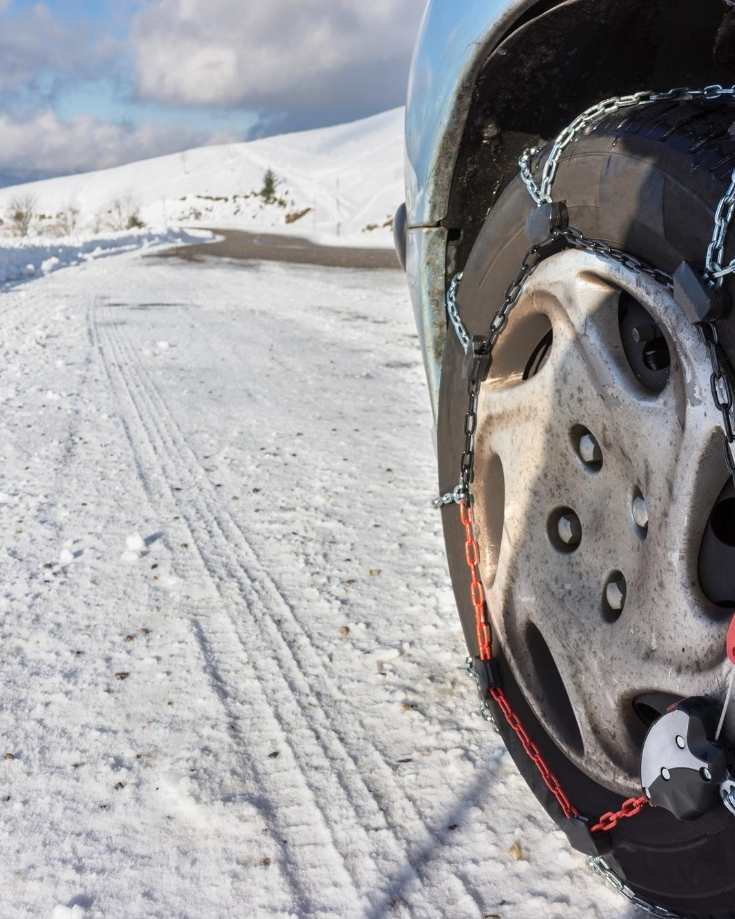
With chains on, avoid driving faster than around 20-30 mph.
Driving on a dry road with chains is like driving on ice and you’ll probably slip and slid all over the place. Not sensible so remove them once you no longer need them.
4×4 Recovery Kits | Our top picks for van life
There are kits on the market for all levels of off-road and adventure driving.
For van life though, it’s less likely you’ll need recover gear for extreme driving challenges.
Here’s a quick overview of our top 4×4 recovery kits.
WARN Recovery Kit

Top of its class, WARN are well known manufacturer of high quality and reliable recovery gear.
The WARN recovery kit includes 2 D-shackles, a snatch block, tree trunk protector recovery strap and winching gloves.
You don’t need a winch to find this kit useful for towing.
ARB Recovery Kit

Along with WARN, ARB products are king of recovery kit.
It’s well engineered and built to last. And it needs to be because if and when you need to use it, you don’t want it to fail. Then you will be stuck!
Vehicle Recovery Techniques | Tips & Tricks
If you live in a camper van or RV full-time, your onboard 4×4 recovery kit is supposed to be for emergency use only.
No matter whether you drive a 2wd or a 4wd, on long road trips, getting stuck isn’t fun. Well not unless you’re a serious off-roader anyway.
We’ve lived in our 4×4 Sprinter van conversion full-time since 2018 and while we carry a well equipped recovery kit, we put a lot of effort into never needing to use it.
But mistakes happen. Terrain can get soft, sandy, wet or muddy. And vehicles can get stuck.
Before hauling out your fancy pants 4×4 recovery kit though, there’s a few vehicle recovery techniques to try first.
Here’s our tips and tricks on vehicle recovery techniques to help avoid making matters worse.
Avoid Getting Stuck
Prevention is better than cure.
We travel in our home full time, so we spend time avoiding (or planning to avoid) difficult scenarios.
We have a 4×4 and have a long history of driving in off road conditions in Land Rovers and Land Cruisers so know what we’re doing.
Yet our van is now our home, so our outlook to risk has changed (and maybe our age a bit too).
We don’t need or want the drama of avoidable situations when we drive. Life on the road naturally brings that around every corner.
Our driving tips to avoid getting stuck:
- Where possible, avoid driving in bad weather
- Avoid driving at night (it’s our golden rule)
- Know your vehicle’s capability
- Never park on tidal beaches
- Read the road ahead, looking for potentially challenging driving conditions (to avoid)
- If in doubt, walk the route first.
Be prepared

We don’t mean having a fully equipped 4×4 recovery kit.
Instead, understand what’s ahead and make sure you’re prepared for the driving the conditions.
- Choose the correct gear
- Engage your 4×4 and diff locks when necessary
- Correct tyre pressure
- Wear snow chains when needed
These aren’t recovery techniques as such. Forward planning is the best way to avoid getting stuck in the first place.
Depending on track conditions, you could be in and out of the van airing up and down our tyres every few kilometres.
Making yourself aware of the road in front and taking action to avoid a problem is way better than digging yourself out of a hole. Literally.
No Winch Vehicle Recovery Techniques
Not all, but most van lifers won’t have a winch fitted to their vans.
And to be honest, if you need a winch for self recovery, you’re probably in a pretty bad predicament.
But some incidents are quite common and knowing how to get out of trouble without making the situation worse is an important skill to have.
Below we cover the 2 most common situations – a spinning wheel and grounding your vehicle – and the vehicle recovery techniques you can deploy to avoid getting out the 4×4 recovery kit.
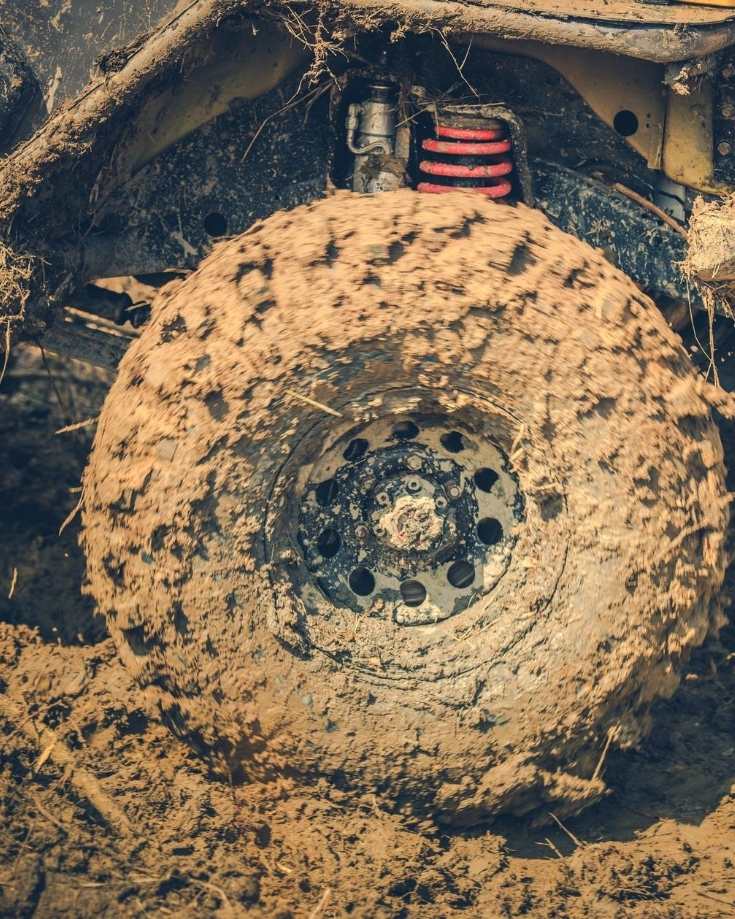
Spinning wheels
We’ve visited all 7 continents and got a vehicle stuck on all but 1 of them.
We couldn’t drive on Antarctica but if we could, we’re pretty confident we’d have got struck there too!
Despite all our efforts to avoid getting stuck, it still happens from time to time.
It’s surprisingly easy to hit a soft sand patch, muddy track or deep shingle and end up with at least 1 wheel free wheeling.
Putting your foot to the floor isn’t the way to go! So what’s the right thing to do when this happens?
- Keep calm
- Start to drive slowly
- Get the right tyre pressure
- Give it a push
- Get some traction
- Start in gear
- Racing start
- Get a tow
We’ll take a look at each of these in a little more detail.
Keep calm

Whatever you do, don’t panic.
Firstly, there’s no need and secondly, it won’t do you any good. If anything, it could hamper your efforts of self recovery.
Over reacting can turn a minor incident into a complete self recovery mission. So keep calm and consider your next steps.
If there is immediate danger, get out and assess the situation to consider your next move.
Start to drive slowly
A slipping wheel is more likely to catch some traction when it turns slowly than driven at full throttle.
For front wheel drive or 4×4, try moving your steering wheel from side to side. You might be lucky to catch a firmer surface.
Try to reverse. Often, it’s easier to back out the way you came than it is to attempt to continue forward.
When you start moving, don’t be tempted to apply full power. Maintain a low constant speed until you’re free.
Keep the wheels straight too because this help reduce resistance.
If you can, switch off traction control.
This sounds counter intuitive but by switching it off, it stops the vehicle automatically applying the brakes to the slipping wheel.
Imagine you’re in soft sand. You may have some forward momentum but the wheel is still spinning. If the traction control applies the brake, that forward momentum could be lost.
Shift to 3rd gear in a manual box or low gear in an automatic. It’ll help keep the wheel speed down and the engine less sensitive to rapid acceleration. With careful clutch control you can avoid stalling.
If you do have a little forward and reverse movement before getting stuck again, try driving the vehicle back and forth.
Sometimes you can get longer and longer runs to the point you have enough momentum to over come the soft spot.
If you’re well and truly stuck, stop and get out to assess the situation. Continuing to spin the wheels will only help you dig in deeper.
Make a cup of tea. It’ll give you time to consider your next steps and think through how to extract yourself.
Get the right tyre pressure
Letting some air out of the tyres is one of the most advantageous, quickest and easiest techniques to get your stuck vehicle moving again.
Reduced pressure increases the footprint of the tyre so increases the traction surface area.
Reduce tyre pressure to about 50% and try driving out. You might need to reduce your pressure further to get a big enough footprint.
But take care as driving on tyres with ultra low pressure runs the risk of stripping the tyre from the rim.
Never drop below 30% of the normal road running tyre pressure.
About 50% is the normal technique for sand and mud tracks.
Getting the right pressure over sand is a little bit of trial and error.
When you get it right it feels like the vehicle is floating over the sand. Get it wrong and you’ll feel the heaviness of the van as it tries to plough through, stressing the clutch and engine.
Once you reach firmer ground, tarmac or gravel, re-inflate the tyres to reduce the risk of splitting a soft tyre or damaging the wheel rim on sharp rocks.
On long remote tracks and trails, you may need to adjust tyre pressure often so a portable air compressor, tyre deflators and pressure gauge are essential.
Give it a push
If reduced tyre pressure hasn’t got you unstuck, it’s time to put your back into it.
Using low power and slow speed, get help from any adults around.
It’s best to have them push on the bumper or corner of the panels to avoid damaging the middle panel.
Keep children inside the vehicle or well away from it out of harms way.
Get some traction
If your wheel in spinning in slippery mud, sand or snow, adding some traction may be enough to get you out.
Shovel some grit or old fallen branches under the leading edge of the stuck wheel.
Plastic traction recovery tracks are ideal in these situations. But if you don’t have them, try using your plastic footwell mats. They’re not so good but any extra traction will help.
In soft ground, you might need to lift the wheel with your jack to fill the ground underneath.
Place a jacking pad under the jack to prevent it sinking into the ground.
Start the engine with it in gear
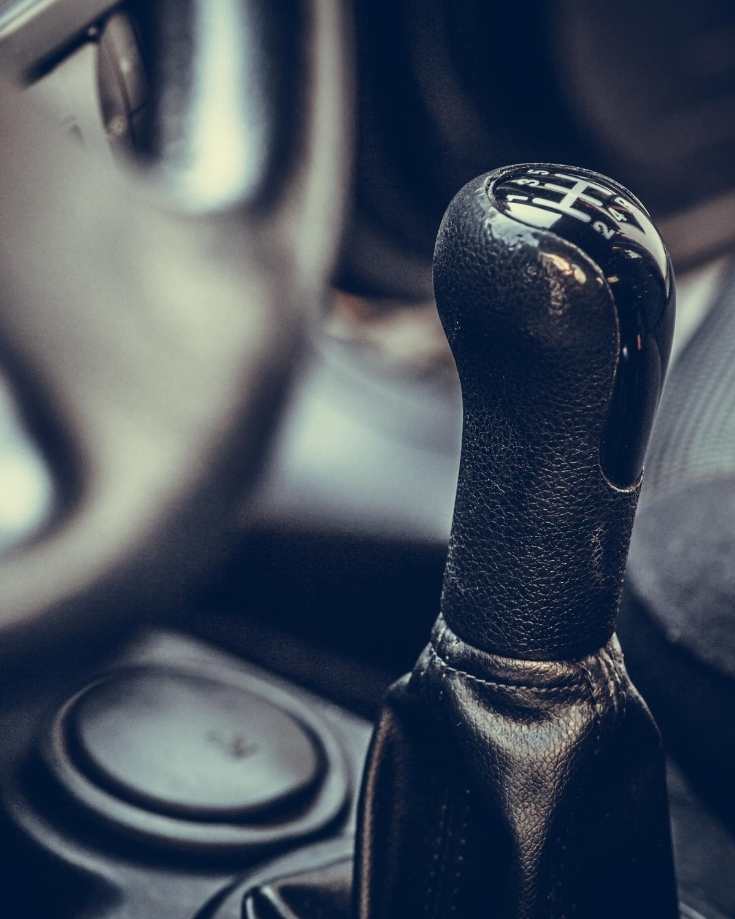
Another option is to switch off the engine, leaving the vehicle in gear, feet off the clutch and restart it.
This will result in the vehicle lurching forward so make sure it’s safe to do so.
The lurch could be enough to get you unstuck.
Avoid using this technique more than once or twice as there is risk of damaging the motor or getting a flat starter battery.
This technique is not normally possible on an automatic engine as they have a safeguard that the ignition will only work when the gear is in park or neutral.
Racing start
Another option is try a racing start. This is a one off technique for a manual gear box vehicle.
- Put the vehicle in gear with your foot on the clutch.
- Increase engine revs to about 4000 rpm.
- Remove your foot from the clutch quickly.
This may result in a sudden lurch to get you going forward. If it does, drive forward immediately dropping the engine revs low enough to keep the forward momentum and the engine almost at a stall.
Worst case, you might stall or even dig in deeper.
Do not keep the gas full on with bogged wheels as you could quickly burn the clutch out.
Get a tow
If after all these techniques have failed, it’s time to get your tow rope out and find someone with a vehicle to give you a helping hand.
All passengers should decamp the vehicle and move away to a safe distance away.
Attach a towing strop to both vehicle’s tow points using a D shackle. Bumpers and rear steps are not usually strong enough to use as a towing point.
Avoid tying knots in the tow strop. Once the combined weight and force of the two vehicle is applied they’d become almost impossible to undo.
The towing vehicle should not get themselves into a precarious position and risk also getting stuck.
Broken tow ropes can happen. Never step over a taught tow rope and always use a winch dampener to neutralise the effect of a snapped rope.
If possible, attach the tow rope to the rear of both vehicles. If the rope does break, the ricochet is less likely to damage the engine, radiator or windshield.
The tow vehicle should slowly take up the rope tension and smoothly power on to pull the stuck vehicle.
It’s helpful if the stricken vehicle is also powered with wheels turning. Keep the tension on the tow rope until you reach solid ground.
Slow to a halt, keeping the rope slightly taught and avoid driving over the tow rope.
Less experienced tow drivers maybe tempted to reverse up and apply full power to get going.
The trouble with this approach is as the slack is taken up, this explosion of energy will shock the rope and tow points of both vehicles.
This release of energy will probably be more than the load rating of the strop or tow points and something could break.
Grounded vehicle
If you drive across this hump or ditch head on at 90° you might find yourself grounded.
Longer wheel base campervans, even with high ground clearance, can get the mid chassis section stuck on mounds.
You can’t get traction without enough weight on the driving axles. No amount of wheel spinning is going to help.
A backward tow is usually the easiest solution though there is a risk of scraping & damaging the underside of the vehicle.
If you are on your own, a beached van is much more difficult to unstick.
You have to decide how to get the vehicle to a position where one of the driving axles has enough traction to free the entire vehicle and clear the chassis over the mound.
If it is loose material like snow, sand or mud, then with a shovel and some hard work removing the mound material under the chassis will work.
Keep removing material until a set of driving wheels are in contact with the ground, carrying the full weight of the vehicle.
If removing the material isn’t an option, try build up under the driving axle.
In a 4×4, decide which is the easier axle set to use.
Lift each wheel in turn with your jack and jacking pad.
If your traction recovery tracks are the right depth to lift the vehicle clear of the grounding, use them beneath the wheel.
Otherwise, gather small rocks, fallen tree trunks or anything to pack out the ground to lift the vehicle clear.
You’ll probably need to do this to both wheels on the drive axle before you can drop the jack and drive it out.
Yep – it’s a lot of hard work.
Once you’ve done it once, you’ll try harder next time to avoid the situation in the first place!
Do you Need a Winch on a Campervan?
Many 4×4 van builders put winch bumpers and electric winches on their vans. They make the van look really cool, giving it an “I can go anywhere” look.
There is some merit to having a winch fitted on the rear because it enable you to pull yourself out the way you came.
If our winch on our Unimog had been on the rear instead of the front, we’d have managed to avoid a bad situation getting a lot worse!
The problem is rear mounted winches don’t look so cool do they?
And most people want a winch because it looks cool, not because they know how to use it or ever expect to.
Winch bumpers are incredibly heavy and so are electric winches. Both must be fitted properly so make sure to follow the manufacturer’s instructions.
Avoid steel wires because if it snaps under load, (just as a tow rope might), they can whip lash and easily remove limbs in its path.
Instead fit dyneema or synthetic rope because while they can still snap they generally don’t whip lash and are considered safer.
The winch bumper and rope should both be rated for the weight of your vehicle or above.
The winch rating shouldn’t exceed the bumper rating.
We had a winch rated for 3500 kg fitted to a 7500 kg Unimog. It was never designed to lift the entire vehicle.
In the rare scenario where you need a winch, you’re unlikely to need to lift the entire weight of the vehicle so consider this when choosing models.
Using a snatch block allows you to double up the winch rope, reducing the winch load.
This worked well for us when we needed to pull Mowgli the Unimog from 2 wheels back onto 4.
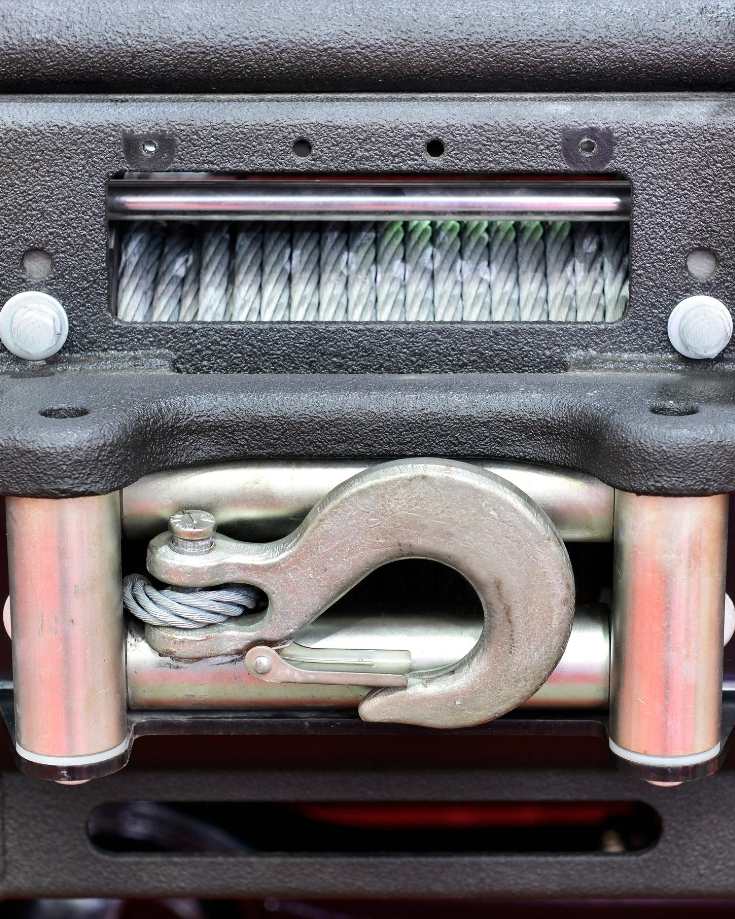
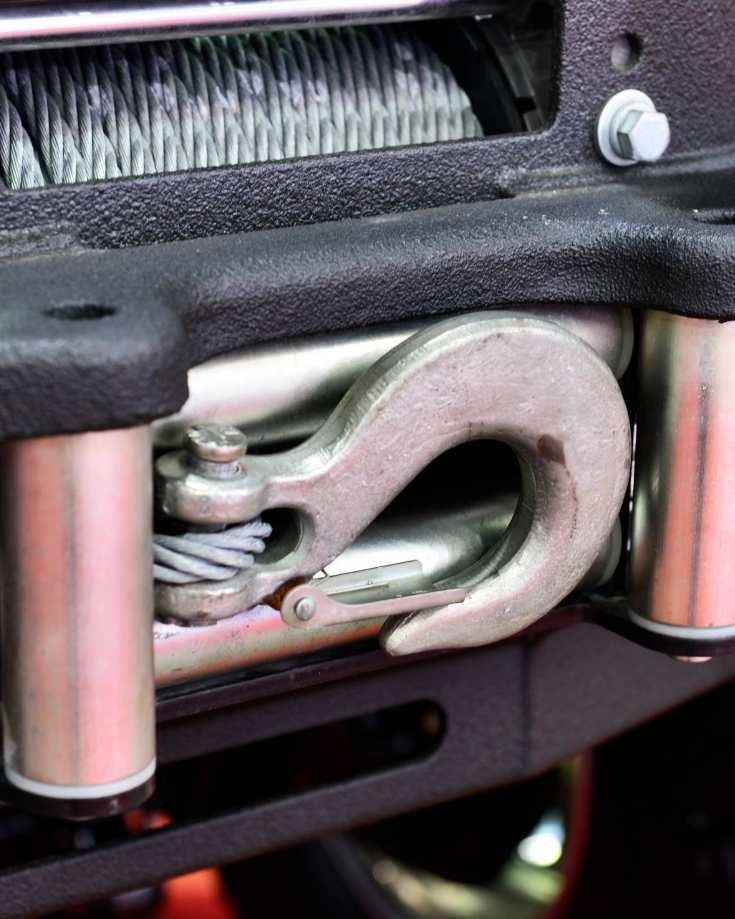
If your winch rope is fitted with a metal hook, consider replacing it for a soft eye and D-Shackle because it’s safer.
Your starter battery provides power to an electric winch so when using it, always have your engine running so you don’t flatten your battery.
When using a winch, keep all passengers and bystanders not involved in the recovery efforts well out of harms way.
For your personal safety, wear gloves, eye protectors and safety boots too.
In over 20 years of off road driving, we’ve only used a winch to recover in anger a handful of times. And most of those occasions could have been avoided.
The use of a winch needs an anchor point though. They’re ideal for helping to recover another vehicle without putting your own in harms way.
If you need to use your winch to recover yourself, you’ll need to a tree of hefty boulder to winch off.
A tree trunk protector with the recovery strap will help avoid damage to the tree and rope.
There’s not many trees around in the desert though, a typical terrain where you could find yourself stuck and in need of the winch.
Make sure you know how to use a ground anchor. If you don’t have a ground anchor, learn how to bury your spare tyre to use as a ground anchor instead.
Using a winch without experience or training is a dangerous pastime so please get some tuition and practice in before you find yourself in a situation where you may need it.
Unless you’re a serious off-roader, and given the need for training and how infrequently you’re likely to need a winch, we don’t think you need this on either a 2wd or 4×4 campervan.
Hi-Lift Jacks | A Low Cost Alternative to a Winch
Using a hi-lift jack allows you to lift the vehicle much higher than a standard vehicle jack, so ideal for recovery situations.
But you need robust lifting points on your vehicle to use it.
4×4 gear shops will happily sell winch bumpers, reinforced sills and heavy rear steps for this purpose.
Unless you want to go all off road commando with your home on the back, we don’t think it’s a good use of your cash to retro fit them.
They just won’t get used often enough to warrant the spend.
Save your money, keep your vehicle weight down and don’t bother with them.
A hi-lift jack is still useful though because you can use it as a manual winch.
Secure the base plate end to a tree or other anchor point using a D shackle and the towing strop.
It will, with hard work, move you about a metre, before you need to reset the towing strop length.
We spoke to one overlander a few years ago who used his hi-lift jack to recover his vehicle out of over 100 metres of soft sand.
In a remote location with no passing help, it took him 36 hours to get free.
This is taking a road trip to an extreme level.
Hi-lift jacks can also be dangerous when under load. If the direction mechanism slips, the jack will drop quickly and the handle will move up and down uncontrollably.
If your body is in the way, it will break bones.
The foot plate is quite small too and if your are lifting the vehicle at angles it could fall to one side.
But if you feel the need for added peace of mind, hi-lift jacks are low cost and considerably less weight compared to a winch.
They’re quite long though and heavy enough not to want to feel one hit the back of your head, so make sure you secure it well so it cannot be dislodged while driving.
Try to avoid fitting it to the outside of your vehicle.
It might look cool but it also look tempting to would-be thieves and the mechanism could get jammed up with dust and dirt.
We keep ours on the inside of the back door and we’re yet to use it in our 4×4 Sprinter van.
Practice Self Recovery
So with the right 4×4 recovery kit and know-how, you can get out of most situations you get yourself into.
The key though is to practice before you need to rely on these skills.
Reading this blog post alone probably won’t be enough when you have to do it for real.
So practice. Learn how to use everything in your recovery kit, how to maintain it and most of all, how to avoid needing to use it.
Angela Devaney

Angela Devaney, a former IT project management professional, embarked on an adventurous journey of full-time travel, which included touring West Africa in a converted overland truck and converting an ex-military 4×4 Sprinter van into a camper for a five-year South American expedition. She now utilizes her hands-on experience to create practical RV living and van life advice as a full-time digital media producer, reaching over a million users annually through her YouTube channel, blog, and newsletter. Angela also lends her expertise as the editor-in-chief of the Campervan Electrics Handbook.