Converting a campervan into the perfect home on wheels takes time, money and a great design.
Campervan travel and overlanding is becoming increasingly popular, whether for short term road trips or long term adventures.
More and more people are turning to living in a van full time.
Off grid living is an ideal way to escape the stresses of a conventional life, reducing your van life costs and enjoying the great outdoors.
To make a campervan better equipped for time off grid, you need a power source to keep the fridge chilling, charge your camera batteries and run your water pump.
Our guide on the basics of campervan electrics provides a great overview of everything you need to know. If you’re just learning about electrics for your campervan, it’s the place to start.
If you’re serious about boondocking and wild camping in your campervan or RV, you need a campervan solar system set up.
Camper van solar panels built into your campervan electrical design will provide free energy and keep you out of town for longer.
In this post, we’ll go through everything you need to know about camper van solar panels.
We’ll start simple and work through to detailed campervan solar wiring diagrams.
You’ll come out the other side knowing exactly how to calculate your energy consumption, work out what you need, what to buy and how to install your camper van solar panels.
It’s a pretty definitive post so settle in for a long read or use the links in the content to jump forward to the sections you want.
This post is part of our series on campervan electrical components.
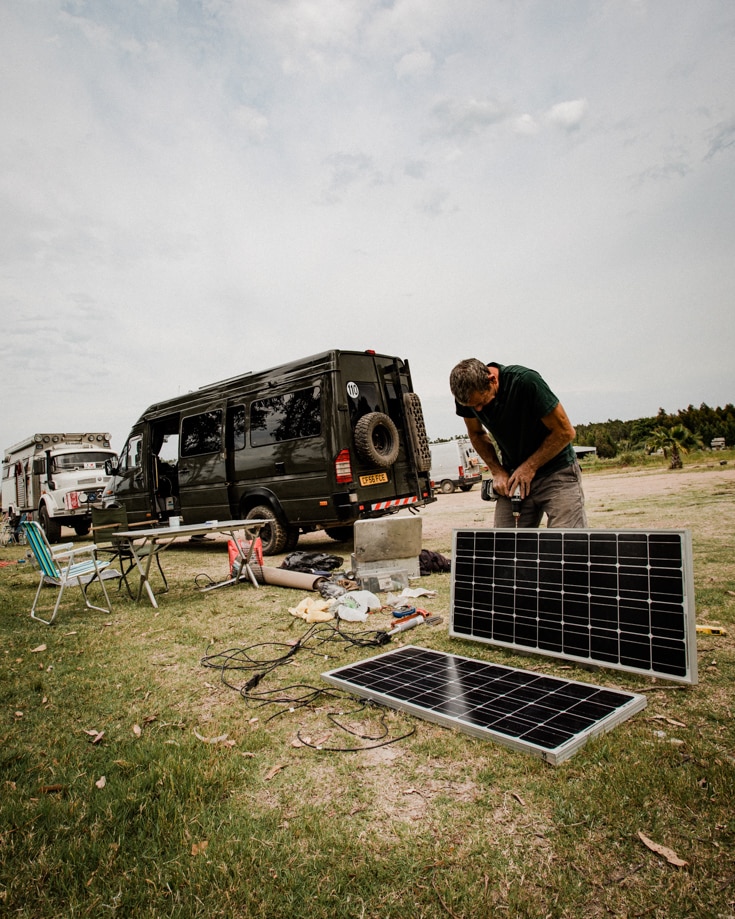
Why we need camper van solar panels
Harnessing the power of the sun lets you avoid the need for noisy, fuel hungry generators or paying electric hook up fees on campsites.
But where do you start?
There’s so many different types of solar panels on the market, how do you know which you should buy?
Some setups are more efficient than others, some are more expensive.
How many solar panels do you need? How do you fit and install them? What tools and accessories do you need? The list of questions goes on!

How do camper van solar panels work?
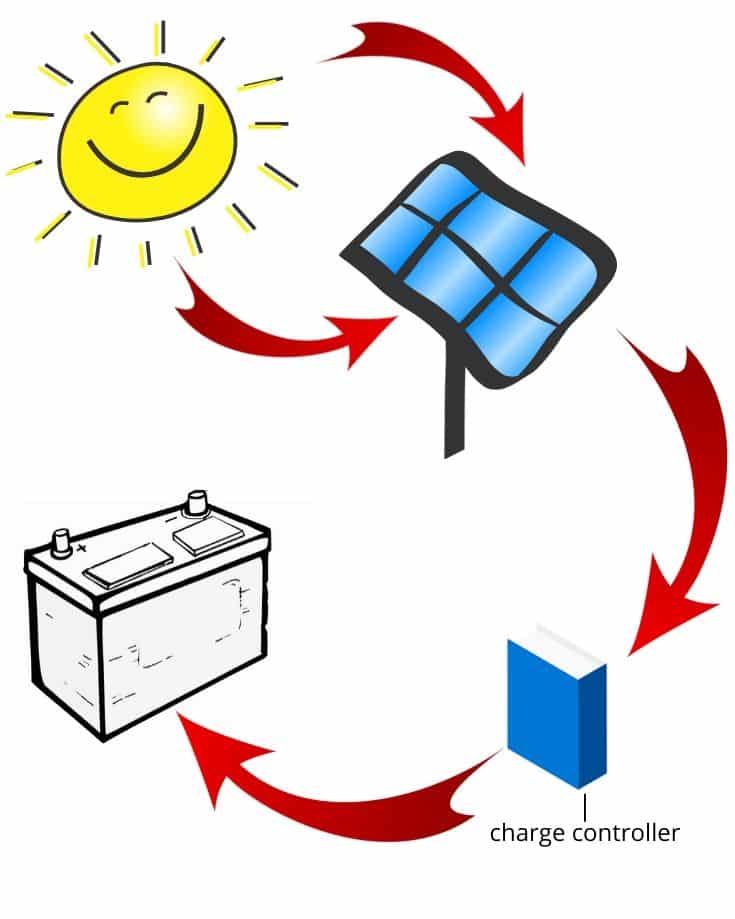
Solar panels turn sunlight into electricity.
Each panel is made up of a bunch of photovoltaic cells. Each cell converts sunlight into electricity.
The electricity is collected and stored in your batteries.
However, the battery bank will only take the energy if the voltage is within a set range.
Sunlight is variable. The sun’s position in the sky, cloud cover, shade from buildings and trees all affect the consistency of the sunlight.
Even how the sunlight falls onto a single solar panel is inconsistent. Some cells may be in direct sunlight while others could be in shade.
So solar panels produce electricity with inconsistent voltage.
The electricity produced by the solar panels needs to be regulated, converting variable voltage into something the battery will accept.
A charge controller does the job of regulating the solar energy.
Choosing the right camper van solar panels
You can charge your batteries from a hook up, wind power, generators and even your engine as well as solar panels.
Most campervan electrical systems use a combination of 2 or 3 of these methods so don’t rely on one method for 100% of their electricity.
For us, the vast majority of our power is generated from our solar panels. The engine charges the battery as we drive too but we don’t want to rely too much on this as we quite like to hang out for days on end without travelling.
So to keep things simple and to illustrate the point more clearly, we’re going to ignore any other source of electric supply in this post.
In order to choose the right camper van solar panels for your van, calculate your expected power usage then match this with the panels.
There’s no point in installing solar panels if they don’t meet your needs.
Add too many panels and you’ll spend more money than necessary and use more space on your roof.
Too few panels, and you won’t generate enough energy to power your appliances, making living in a van less comfortable than you planned.

Calculating your campervan power usage
We’ve covered how to calculate how much electricity you’ll use in your campervan in another post but to recap:
- Make a list of every electrical appliance & device you’ll carry in the van
- Note how many amps each appliance uses
- Estimate the number of hours per day you’ll use the device
- Calculate the number of amps needed per day for each device by multiplying amps by hours in use
- Add together all the amps needed per day. This gives you the total amp hours per day you expect to use
- Add a bit – say 20% – for contingency.
Your aim is to calculate your electricity consumption on a high usage day – maybe a cold, wet day where you need your heater running for a few hours.
This will give the maximum power in amps you can expect to use on any given day.
We calculate the power in amps because it helps to work out how much battery capacity you need. Batteries are sized in amps too so this makes sense.
Solar panels are sized in watts though.
Matching power usage to solar panels
Because solar panels are measured in watts, you’ll need to calculate how many watts you need.
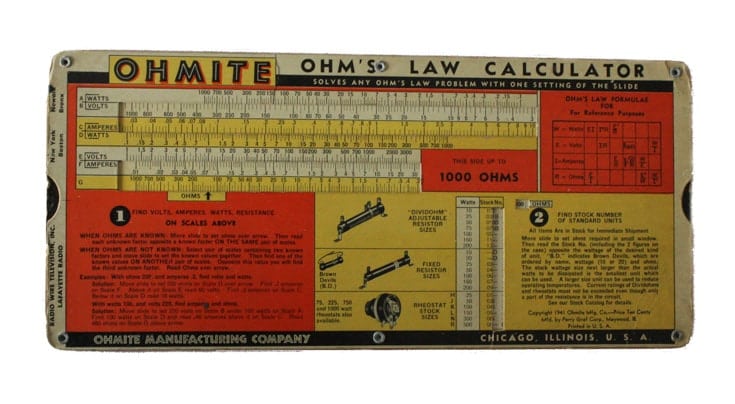
Ohm’s Law allows us to do this:
amps x volts = watts
Let’s say you’ll use 70 amps per day.
You plan to use a 12v battery.
Therefore you need 70 amps x 12 volts = 840 watts of power output by your solar panels each day.
Solar panels are rated by watts per hour. For example a 100 watt panel means it will provide 100 watts of power per hour during standard test conditions.
Now this is where your calculation becomes a little bit of guess work.
The standard test conditions include the illumination on a solar panel when pointed directly at the sun for a full hour.
In reality, your location and time of year will play a big part in how many hours per day you can expect to get that amount of illumination hitting your panels.
In the UK for example, you can expect 6 or 7 hours in the height of summer and less than 1 hour in the middle of winter.
For the benefit of illustrating the point, if you need 840 watts per day and assume an average of 5 of hours per day of the best sunlight, you’ll need 840 ÷ 5 = 168w of solar panels.
Of course, the number will vary on a day to day basis, where your van is parked, how much shade hits the panels and so on so use your calculated figure as a starting guide.
In our experience, this figure is an absolute minimum.
We top up our batteries when we drive too but even then, we’d happily take all the solar panels we can fit on our campervan roof.
We suggest at least doubling the number the calculation gives you unless you plan to spend most of your van life in the full sun of summer.
Types of camper van solar panels
Not all solar panels are made equal.
In this section we discuss the types of camper van solar panels available and where to place them on your campervan.
There’s basically 3 types of solar panels:
- Monocrystalline
- Polycrystalline and
- Thin film aka amorphous.
Because solar panels are rated based on standard test conditions, they are effectively benchmarked against each other.
So one 100 watt solar panel is the same as another 100 watt solar panel, given the same conditions.
So how does the technology make any difference?
Monocrystalline is the most efficient, followed by polycrystalline and least efficient of all, are the amorphous panels.
This means a 100 watt monocrystalline panel is smaller than a 100 watt polycrystalline which in turn is smaller than an amorphous alternative.
Need help & advice with your electrical setup?
Join Our Facebook Support Group
Given the space on a campervan roof is already pretty small, fitting the most efficient panels will provide the maximum energy for the same footprint.
The more efficient the panels, the more expensive they are.
Despite being the most expensive, we recommend you fit monocrystalline panels from a well known manufacturer.
We know from experience, replacing panels on long term campervan travels isn’t always easy.
Just try sourcing a monocrystalline panel in southern Patagonia!
Install the best you can during your build rather than try to retro fit better quality on the road.
Rigid panels
Solar panels come either as rigid or flexible solar panels.
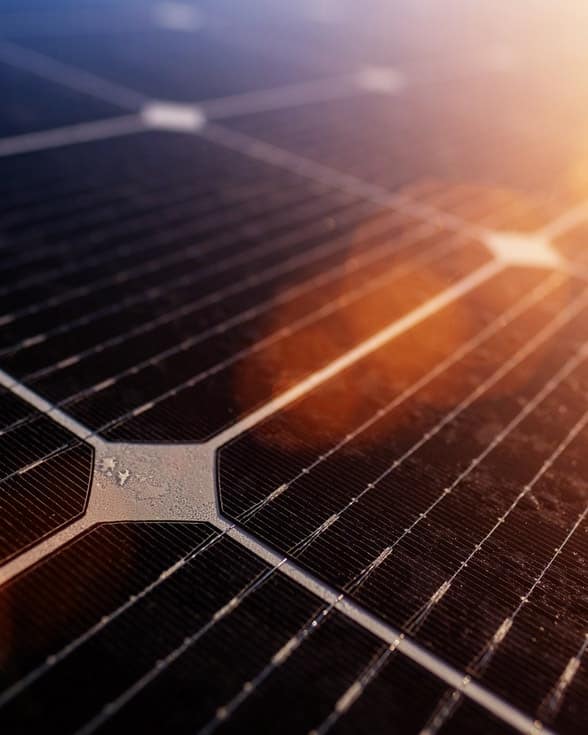
Rigid solar panels are typically set within an aluminium frame under robust, tempered glass. Because they’re designed for outdoor use, they’ll stand up to hail, snow and rain.
The aluminium frame provides a gap between the campervan roof and the underside of the business end of the solar cells.
Because solar panels work more efficiently when cool, this air gap helps improve performance in hot climates.
Remember the frame will probably add a little over an inch to your vehicle’s overall height.
If your campervan ventilation includes a roof vent, the vent will be higher than the solar panels though so it makes no odds.
Solar Panels
Solar panels harvest sunlight, converting it to electricity.
There are different types of solar panels but we recommend using monocrystalline as they’re the most efficient.
Flexible panels
Flexible panels are generally a lower quality product. They’re lighter and scratch more easily.
Because they bend, it’s possible to fit them to curved surfaces to a point.
A solar panel is most efficient when the surface receives consistent sun so that bending, reduces efficiency further.
Cosmetically, they’re great because they’re low profile but the lack of an air gap isn’t helpful in hot weather.
On the upside, flexible panels can be glued to the roof so avoiding the need to drill holes for brackets in your campervan roof.
Where to fix your camper van solar panels
Solar panels for campervans and RVs can be fitted in a permanent spot, usually on the roof.
Portable options are available too for extra power if you need it.
Fixed solar panels
Fit fixed solar panels to the camper roof with brackets robust enough to hold each panel.
You can drill holes into the van roof or better, use a panel bonding sealant to secure them. This avoids any potential for water ingress, a van dweller’s nemesis.
If you don’t want to use panel bonding to secure the panels, seriously consider adding a roof rack and fixing them to that.
Our advice is to avoid drilling unnecessary holes at all costs but we also suggest avoiding roof racks if possible. You can see more on this in our post on modifying your overland vehicle.
If we had no choice, we’d opt for a roof rack over drilling holes though.
We’ve had our rigid panels bonded to our roof for a couple of years already and had no issues.
You can buy tilt mounts for your solar panels too. These allow you to adjust the angle of the panel on the roof so you can point it more directly towards the sun.
Make sure you can reach the roof to make the adjustments. We’d struggle in our high roof Sprinter van conversion.
And remember to lower them before you start driving!
Portable solar panels
If you’d prefer to avoid roof panels altogether or need extra power from time to time and have no more space of the roof, portable solar panels provide a solution.
These modules fold away like a briefcase or suitcase so providing a level of protection while in transport.
You can set it up so it’s integrated into your overall solar set up or use them to power a portable solar generator.
Because they’re portable, they can be prone to theft if you leave them unattended.
But on camp, you can leave them in direct sun while you shelter the van in shade, ideal in hot conditions.
Alone, portable solar panels aren’t really a viable option for living in a van full time but they can certainly bolster your solar energy harvesting capability.
How to Wire Camper Van Solar Panels
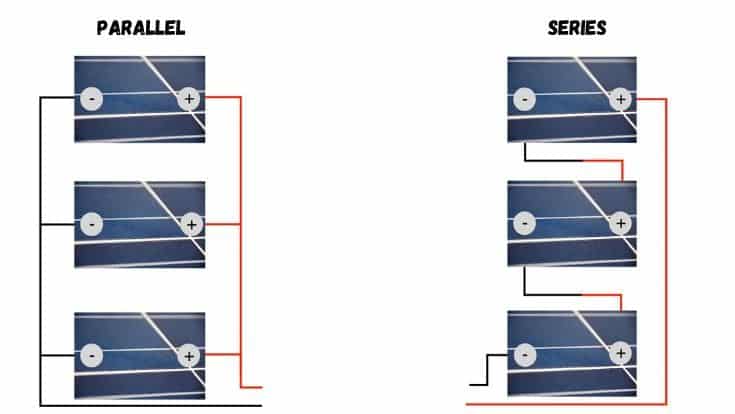
There’s 2 ways to wire camper solar panels with charge controllers: in series or in parallel.
Solar panels wired in series
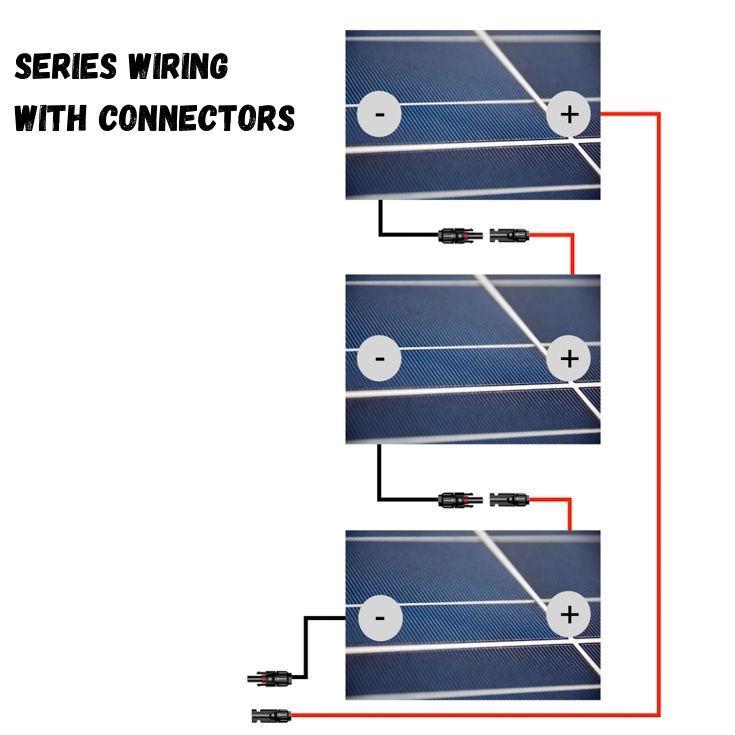
If a solar array is wired in series, the whole campervan solar system will stop working if any panel has a fault.
When wiring solar panels in series, the voltage is cumulative but the amp stay the same.
If you have 2 solar panels wired in series, each rated at 12 volts and 5 amps, the entire solar array would be 24 volts and 5 amps.
However, the current (amps) of the entire system will never be greater than that of the lowest rated panel.
So imagine you have 2 x 100w panels rated at 5 amps. If you add a 150w panel rated at 12.5 amps, that panel will only provide 5 amps too, so reducing the maximum output to about 60 watts for that panel.
Additionally, solar panels wired in series all depend on each other. If one panel is shaded, this will bring down the output of the entire system. Drastically.
Not ideal when you can’t always control where you park.
Pros
- Smaller amps allows you to install smaller wires so saving a little money
- You don’t need so many connectors, saving a little more cash
Cons
- If one panel has a fault, you lose all your solar capability
- Not ideal for adding different size panels
- Shade negatively affects the entire system
Good for: budget installation where efficiency isn’t critical
Solar panels wired in parallel
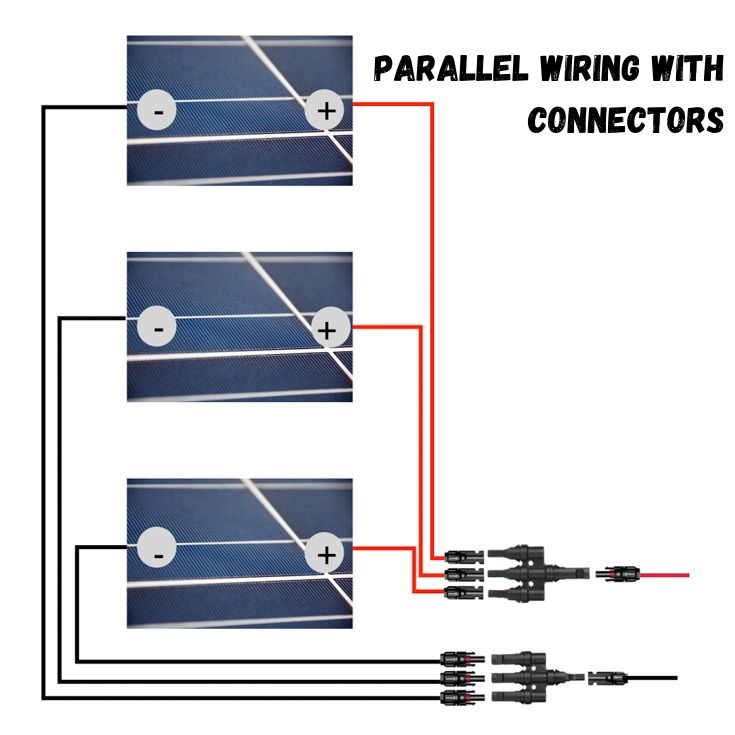
For parallel circuits, if one panel experiences a fault, the others will continue to supply power.
When wiring solar panels in parallel, the amps are cumulative but the volts stay the same.
If you have 2 solar panels wired in parallel, each rated at 12 volts and 5 amps, the entire solar array would be 12 volts and 10 amps.
Because the current is greater, you’ll need thicker, slightly more expensive wires.
As you can see from the diagram below, you’ll need more connectors too.
Pros
- Handles shading much better than series wiring
- Can mix and match panels to good effect
- If one panel has a fault, power supply continues
Cons
- Slightly more expensive to install because of thicker wires and more connectors
Good for: campervan electric setup where efficiency is critical
For a full breakdown of the detail, comparisons and even an interactive calculator for mixed panels, check out our complete guide to wiring your solar panels in series or parallel.
Charge Controllers for Campervans and RVs
A solar charge controller does 3 important jobs in your solar electrical set up:
- Regulates the current into the batteries to a safe level
- Allows the solar panels to charge the batteries
- Monitors the battery level
Types of charge controllers
There’s basically 2 types of charge controllers for your campervan:
- Standard or PWM controller
- MPPT
A simple explanation of the difference between the 2 types of charge controller can be boiled down to these 2 points:
- MPPT controllers cost considerably more than a PWM version
- MPPT controllers charge the batteries with more efficiency than PWM controllers
For the most bang for your solar panel invested buck, install an MPPT solar charge controller.
If you’re on a budget and you’re not so dependant on a power supply, a standard controller may suit you best.
We recommend an MPPT controller for anyone living or travelling in a campervan full-time.
How do solar charge controllers work?
Put simply, a standard charge controller regulates current from the solar panels so the battery bank can be charged. But it’s inefficient and wastes a lot of energy.
An MPPT controller maximises the efficiency of the solar panel to allow the most current into the battery despite the battery’s actual voltage.
That’s all you need to know so jump forward to the next section on sizing the charge controller to avoid this geeky bit.
Your leisure batteries are 12v.
But solar panels are designed to output something like 16 – 18 volts, to take account of poor energy producing weather conditions.
Each panel will have a rating. For example, the Renogy 100 Watt 12 Volt Monocrystalline Solar Panel operates at 5.6 amps at 17.6 volts.
So the panel is outputting 5.6 amps and the battery is sitting at 12v and charging.
5.6 amps x 12 volts = 67.2 watts.
Some way short of the 100 watts you bought!
The loss gets even worse if your batteries are low. Let’s say they’re at 11.4v and charging.
5.6 amps x 11.4 volts = 63.8 watts.
That’s a whopping 37% loss and not what you hoped for when you bought the 100w panel.
Enter the MPPT solar controller.
This clever little device takes the volts and converts it down to just what the battery needs, ramping up the amps.
So in our example, it converts the volts down from 17.6v to 12v and ramps up the amps to about 8 amps and hey presto!
8 amps x 12 volts = 96 watts from your 100 watt panel.
In reality, MPPT controllers are between 94% and 98% efficient so you’ll actually get something between 94 and 98 watts of power from a 100w panel.
The MPPT controller monitors the battery continuously so it’s always charging the battery with the maximum amps possible.
What size charge controller do you need?
Whether you’re buying a PWM or a MPPT controller, you want it to deliver the maximum current (amps) to the batteries that you can get from your solar panel array.
So it’s important to install the right size charge controller.
It’s worth buying a controller big enough to handle an extra solar panel should you wish to increase capacity later.
Charge controllers are sized by both the maximum input voltage they can handle from the solar panels and the maximum output amps they can produce to charge your battery.
What amps do you need?
When looking at the amps, aim to buy a solar charge controller around 8 amps for every 100w of panels. Then round it up to the nearest common size available.
Charge controllers usually come in multiples of 10, 20 and 30 amps.
So if you have 2 x 100w solar panels, buy at least a 20 amp controller. It’ll leave you with a bit of contingency too.
Better still, buy a charger big enough to accommodate as many solar panels as you can fit on your roof.
You don’t need to fit them all in one go but it will give you wriggle room to scale up in the future without buying a new controller.
What voltage do you need?
When looking at the volts of the charge controller, you need to make sure it can handle the voltage output by the panels.
For PWM charge controllers, the decision is simple. Choose one with a voltage greater than your array outputs, typically 12v or 24v.
Remember, the voltage is different if you wire in series or parallel.
For MPPT charge controllers, you need to look at the label on the back of the solar panel for the technical spec. Make a note of the open-circuit voltage.
The open-circuit voltage will be much higher than the voltage of the panels. As temperature drops, solar panels become more efficient and the voltage increases.
The open-circuit voltage indicates the maximum each panel can produce and the controller needs to be able to cope with that.
So if you have 2 panels wired in series, each with 22.5 open-circuit voltage, you need a controller to handle at least 45 volts.
If the same panels are wired in parallel, you need a controller to handle at least 22.5 volts.
Best Solar Charge Controllers
Charge controllers come with a variety of features including LCD displays, solar and wind modes and even the ability to monitor your batteries remotely.
When buying an MPPT controller, aside from choosing the features you want, check the efficiency rating. Most are between 94-98% efficient – the higher the better.
Some of the better known brands include Renogy, EPever, Midnite and Victron Energy.
Check out our complete guide on how to select the right solar charge controller for your setup.
Best Batteries for Campervan Solar System
We’ll avoid going into the semantics of batteries here. The subject warrants a dedicated post.
So you can read our complete guide in our campervan batteries post.
To cut a long story short, if you can afford it, lithium ion batteries are the most efficient.
They have a crazy high price tag though so until the technology becomes more popular and prices fall, Gel and AGM batteries are good value.
Use our battery sizing calculators to get the right size and type for your needs:
Campervan solar system battery cut off switch
There’s no on/off switch on solar panels so they constantly produce electric in sunlight.
There are times when you might want to stop the electricity flowing through to your batteries though. For example:
- You’re putting your van in storage
- You have a fault in your electric system and need to switch off the solar power to aid fault finding
- You’re working on your electrical system and would prefer to avoid electrocution.
To this end, fit an isolator or battery cut off switch to serve as the on/off switch.
Fuse
A fuse will protect the charge controller from any power surges or battery faults coming from the rest of the campervan’s electrical system.
The charge controller has its own fuses fitted though. The benefit of adding an additional fuse is if you need to change it.
It’s easier to change the external fuse than opening up the charge controller.
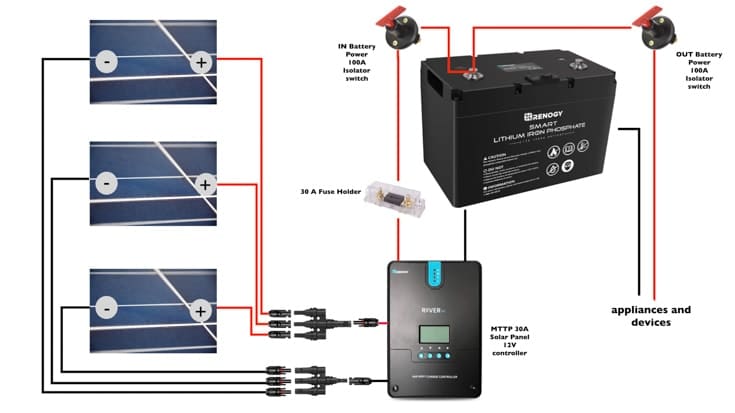
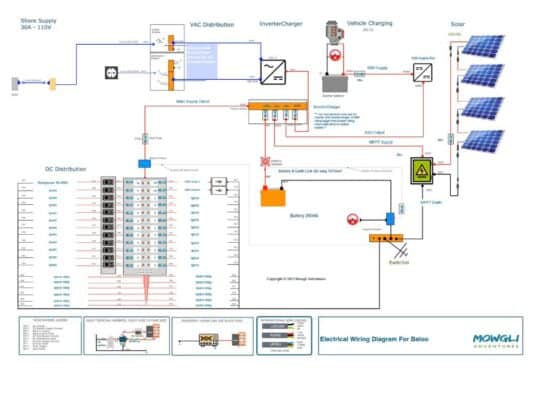
Solar system wiring diagram
Now you’ve decided on your battery, charge controller, solar panels and if you’ll wire them in series or parallel.
It’s time to draw out your solar wiring diagram and start installing your camper van solar panels.
Take your drawing up to the roof to install your camper van solar panels so you don’t get it wrong.
Automatically Create Your Bespoke RV Wiring Diagram
Includes 110v & 240v, solar, B2B, batteries, inverters, 12v, 24v & 48v systems, wire gauges in AWG & mm² & much more!
Graham Bogie

Graham is a seasoned marine electrical engineer with two decades of experience designing customized electrical systems for plant machinery and converting campers and overland vehicles. His expertise has led him to author the reputable Campervan Electrics Handbook and become the chief designer of the RV Wiring Design Tool. As a knowledgeable figure in the field, his YouTube channel, blog, Facebook group, and newsletter, offering electrical advice and product reviews, reach more than a million users each year.


How can I get a printed version of this article?
Great blog on Solar panels,great information on the requirements to fit on Motor home thank you so much. I just need to get a suppliers of the panels and materials and then this could be my winter project ready for spring 2023
But what about getting them wet? How do you protect them from getting wet if it rains or something and would a clear cover block it from getting sun?
Hi Jae
Most solar panels are waterproof and designed for the elements. No need to cover them.